Olympus VN-180 VN-180 Instructions (English) - Page 5
Installing the Batteries, Clock Adjustment
 |
View all Olympus VN-180 manuals
Add to My Manuals
Save this manual to your list of manuals |
Page 5 highlights
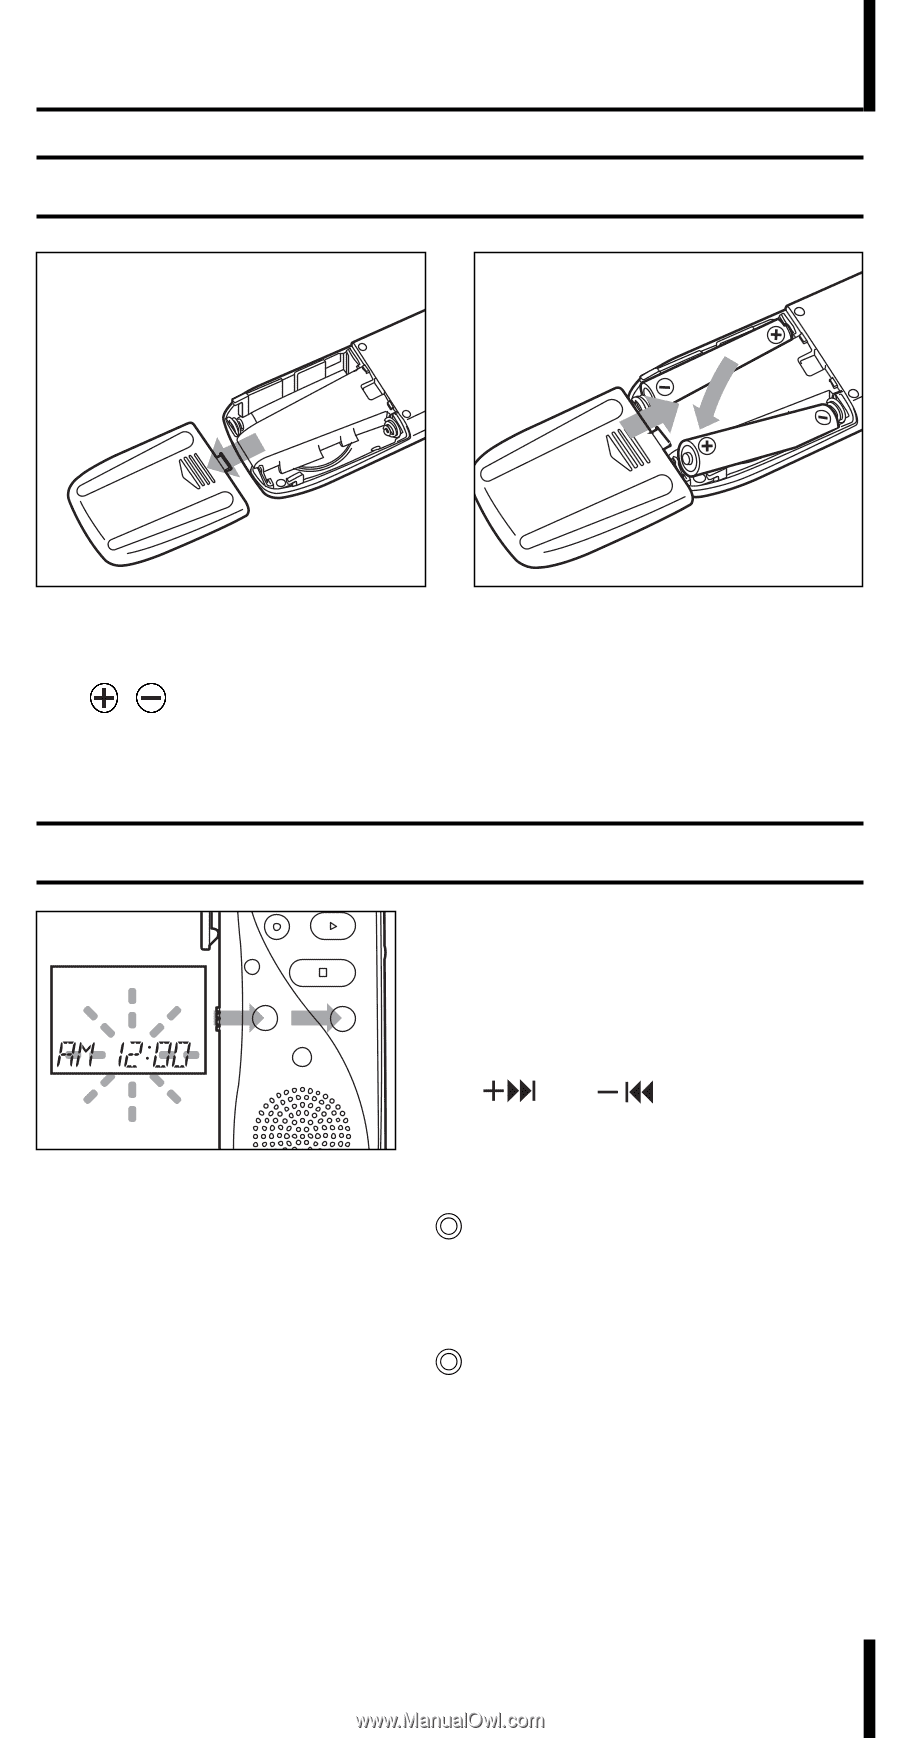
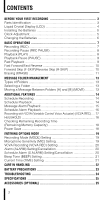
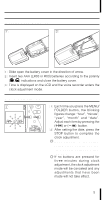
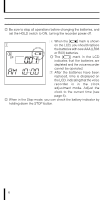
Installing the Batteries 1 2 1 Slide open the battery cover in the direction of arrow. 2 Insert two AAA (LR03 or R03) batteries according to the polarity ( , ) indications and close the battery cover. 3 Time is displayed on the LCD and the voice recorder enters the clock adjustment mode. Clock Adjustment 1 1 Each time you press the MENU/ FOLDER button, the blinking figures change: "hour", "minute", "year", "month" and "date". Adjust each item by pressing the ( ) or ( ) button. 2 After setting the date, press the STOP button to complete the clock adjustment. If you press the STOP button during clock adjustment, the clock adjustment mode will be canceled. If no buttons are pressed for three minutes during clock adjustment, the clock adjustment mode will be canceled and any adjustments that have been made will not take effect. 5
-
 1
1 -
 2
2 -
 3
3 -
 4
4 -
 5
5 -
 6
6 -
 7
7 -
 8
8 -
 9
9 -
 10
10 -
 11
11 -
12
-
13
-
14
-
15
-
16
-
17
-
18
-
19
-
20
-
21
-
22
-
23
-
24
-
25
-
26
 |
 |