Olympus VN 5200 PC VN-5200PC Instructions (English) - Page 7
Menu mode - how to use
 |
UPC - 050332164789
View all Olympus VN 5200 PC manuals
Add to My Manuals
Save this manual to your list of manuals |
Page 7 highlights
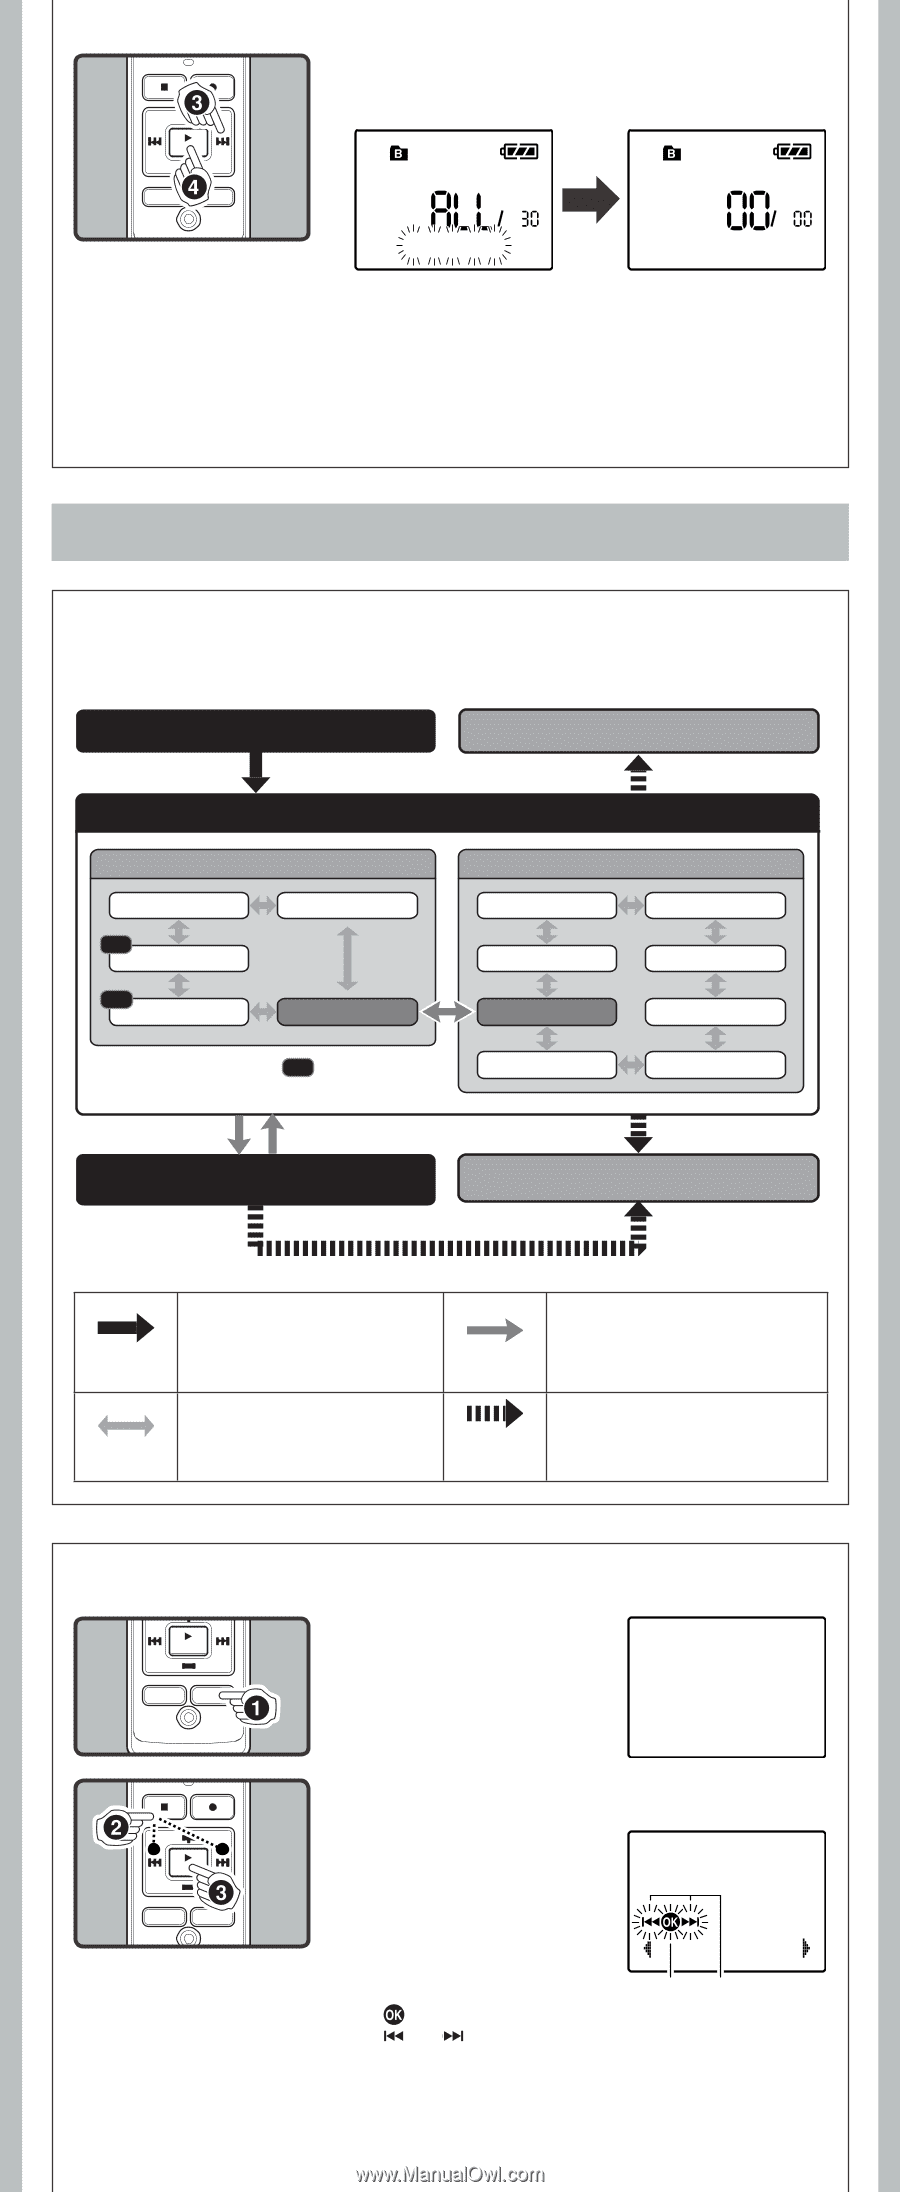
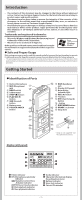
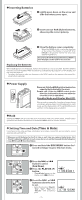
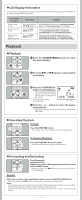
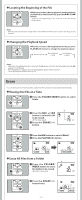
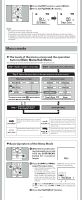
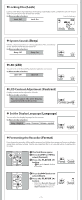
3 Press the 9 button to select [Start]. 4 Press the PLAY/OK (`) button. All Erase! Erase Done Notes: • An erased file cannot be restored. • The file set to erase lock will not be erased. • If operation is not executed for 8 seconds during the setting, it will return to the stop status. • Completion of erasing may take several seconds. Do not attempt to remove, replace battery or attempt any other functions on the voice recorder during this period because data may be corrupted. Menu mode h The levels of the menu screen and the operation buttons [Main Menu/Sub Menu] The setting can be switched by putting the recorder in menu mode. Step 1 Put the recorder in menu mode. Step 4 Complete the menu mode setting. Step 2 Select the menu item in the main menu or sub menu screen. Main menu screen Rec Mode Lock REC Mic Sense REC VCVA Sub Menu Sub menu screen Format Language System Contrast Main Menu LED The menu item with REC mark can be set even during recording. Time & Date Beep Step 3 Select the setting item in the setting screen. Cancel the setting. DISP/MENU Press and hold the button for 1 second or longer to put the recorder in menu mode. PLAY/OK (`) Go to the setting screen from the main menu or sub menu screen. Confirm the item selected in the setting screen, and go back to the main menu or sub menu screen. 0 or 9 Switch the items of the setting screen in the main menu or sub menu screen. STOP (4) or REC (s) Complete the menu mode setting. (If pressed while the setting screen is displayed, the item being selected will not be set.) h Basic Operation of the Menu Mode 1 While the recorder is during stop mode, press and hold the DISP/MENU button for 1 second or longer. Menu 2 Press the 9 or 0 to Guide icon: Tells you the next select the menu item. button to use by flashing. • Go to the setting screen of the selected menu item. • To set the sub menu, select the [Sub Menu] from the main menu screen. And select and set the menu item from the sub menu screen in the same manner. Rec Mode ab a [ ]: Press the PLAY/OK (`) button (Goes to the next screen). b [ ] or [ ]: Press the 9 or 0 button (Changes the item). 3 Press the PLAY/OK (`) button. -7-
-
 1
1 -
 2
2 -
 3
3 -
 4
4 -
 5
5 -
 6
6 -
 7
7 -
 8
8 -
 9
9 -
 10
10 -
 11
11 -
 12
12
 |
 |