Onkyo TX-SR700 Owner Manual
Onkyo TX-SR700 Manual
 |
View all Onkyo TX-SR700 manuals
Add to My Manuals
Save this manual to your list of manuals |
Onkyo TX-SR700 manual content summary:
- Onkyo TX-SR700 | Owner Manual - Page 1
AV Receiver TX-SR700/700E TX-SR600/600E Instruction Manual Before using 2 Facilities and connections 8 Setup and operation 36 Thank you for purchasing the Onkyo AV Receiver. Please read this manual thoroughly before making connections and plugging in the unit. Following the instructions - Onkyo TX-SR700 | Owner Manual - Page 2
When the power-supply cord or plug is damaged, B. If liquid has been spilled, or objects have fallen into the appliance, C. If the appliance has been exposed to rain or water, D. If the appliance does not operate normally by following the operating instructions. Adjust only those controls that are - Onkyo TX-SR700 | Owner Manual - Page 3
SERVICE EQUIPMENT NEC - NATIONAL ELECTRICAL CODE S2898A ANTENNA LEAD IN WIRE ANTENNA DISCHARGE UNIT (NEC SECTION 810-20) GROUNDING CONDUCTORS (NEC SECTION 810-21) GROUND CLAMPS POWER SERVICE GROUNDING ELECTRODE SYSTEM and used in accordance with the instructions, may cause harmful interference to - Onkyo TX-SR700 | Owner Manual - Page 4
REMOTE CONTROL 29 Connections (TX-SR600/600E 24 Connecting your audio components 24 Connecting your video components 25 AC OUTLETS 29 REMOTE CONTROL 29 Connecting speakers 30 Standard speaker setup for surround sound 30 Minimum speaker configuration for surround sound playback 30 Speaker - Onkyo TX-SR700 | Owner Manual - Page 5
Appendix Troubleshooting guide 76 POWER 76 SPEAKERS 76 FM/AM TUNER 76 VIDEO and AUDIO 77 REMOTE CONTROLLER 77 OTHER 77 If one of the messages shown below appears 78 Specifications (TX-SR700/700E 79 Specifications (TX-SR600/600E) ....... back cover Declaration of Conformity We, ONKYO EUROPE - Onkyo TX-SR700 | Owner Manual - Page 6
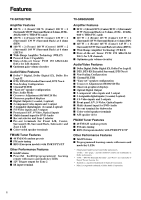
I Powerful backlit/preprogrammed learning remote with macro and mode-key LEDs I 12V Trigger output for Zone 2 I IR input terminal TX-SR600/600E Amplifier for DVD-Audio I Pre-out terminal for Subwoofer I Color-coded speaker terminals I A/B speaker drive FM/AM Tuner Features I 40 FM/AM random presets - Onkyo TX-SR700 | Owner Manual - Page 7
IN DVD IN REMOTE CONTROL PR MONITOR OUT V R ZONE 2 12 V TRIGGER OUT S IR IN OUT IN FRONT SURR CENTER L VOLTAGE VIDEO 1 R DVD SUB WOOFER SELECTOR R FRONT SURROUND CENTER L ZONE 2 L SURROUND BACK SPEAKER PRE OUT R R AV RECEIVER 120 V MODEL NO. TX-SR700E SURROUND BACK SWITCHED - Onkyo TX-SR700 | Owner Manual - Page 8
Front panel facilities Here is an explanation of the controls and displays on the front panel of the TX-SR700E/600E. Front panel 8 - Onkyo TX-SR700 | Owner Manual - Page 9
display the screen for the item that is selected in the Setup Menu. MASTER VOLUME dial [44, 45] TX-SR600/600E: Use to control the volume. TX-SR700/700E: Use to control the volume in the main zone. The volume for the remote zone (Zone 2) is independent. VIDEO 4 INPUT terminals [21, 28] For connecting - Onkyo TX-SR700 | Owner Manual - Page 10
within 5 seconds. That source will be output for recording or viewing in the remote zone. To set the output to the source channel, press the desired button (REC fixed to SOURCE. SPEAKERS A/B buttons (TX-SR600/600E only) [45] Press these buttons to turn on and off speakers systems A and B. 10 - Onkyo TX-SR700 | Owner Manual - Page 11
on. ZONE 2 indicator (TX-SR700/700E only) Lights when using the remote zone (Zone 2). REC OUT indicator (TX-SR700/700E only) Lights when recording the input source from one component to another (Rec Out). SPEAKERS A/B indicators (TX-SR600/600E only) Indicates which speaker system is currently in use - Onkyo TX-SR700 | Owner Manual - Page 12
remote controller. It also flashes when a button is pressed when the battery power is low. ON/STANDBY button [33] ON: Press to turn on the TX-SR700/700E/600/600E. STANDBY: Press to place the TX-SR700/700E/600/600E button Press to select a speaker channel when adjusting the speaker level (CH SEL). [39 - Onkyo TX-SR700 | Owner Manual - Page 13
of a multichannel source, press the DIRECT button to turn off the tone control and the SURR button to turn on the tone control. SP A, SP B: TX-SR600/600E: Switches between speakers A and B. TX-SR700/700E: Not used with the TX-SR700/700E. CINE FLTR: Depending on the listening mode, you can turn - Onkyo TX-SR700 | Owner Manual - Page 14
sure to always refer to the instructions that came with the component that you are connecting. • Do not plug in the power cord until all connections have been properly connection cables with power cords and speaker cables. Doing so may adversely affect the picture and sound quality. Optical digital - Onkyo TX-SR700 | Owner Manual - Page 15
When using the ZONE 2 PRE OUT [21] terminals [23] When using the ZONE 2 SPEAKERS terminals [23] TX-SR600/600E Connecting your audio components [24] REMOTE Connecting antennas [34] CONTROL [27] Connecting speakers [31] AC OUTLETS [26] ANTENNA FM AM 75 DIGITAL INPUT OPTICAL 2 1 DIGITAL - Onkyo TX-SR700 | Owner Manual - Page 16
the digital audio output, be sure to make the appropriate changes at "Input Setup" → "Digital Input" (see page 53). If the device has a digital input, connect it to the DIGITAL OUTPUT (OPTICAL or COAXIAL) jack of the TX-SR700/700E for digital recording of the signal from the digital input of the - Onkyo TX-SR700 | Owner Manual - Page 17
Connections (TX-SR700/700E) Connecting a DVD Player with 5.1-Channel Output ANTENNA FM AM 75 R L PHONO IN GND COMPONENT VIDEO INPUT 2 INPUT 1 OUTPUT Y PB DIGITAL INPUT OPTICAL 2 1 DIGITAL VIDEO 3 OUTPUT COAXIAL IN OPTICAL VIDEO 2 OUT IN VIDEO 1 OUT IN REMOTE CONTROL PR DVD - Onkyo TX-SR700 | Owner Manual - Page 18
(TX-SR700/700E) Connecting a DVD Player with 2-Channel (L/R) Audio Output ANTENNA FM AM 75 R L PHONO IN GND COMPONENT VIDEO INPUT 2 INPUT 1 OUTPUT Y DIGITAL INPUT OPTICAL 2 1 DIGITAL VIDEO 3 OUTPUT COAXIAL IN OPTICAL VIDEO 2 OUT IN VIDEO 1 OUT IN PB REMOTE PR CONTROL DVD - Onkyo TX-SR700 | Owner Manual - Page 19
to the COMPONENT VIDEO INPUT 1 jacks, this must be changed at "Input Setup" → "Component Video" (see page 54). Using RCA audio cables, connect the audio output jacks of the video cassette recorder to the VIDEO 1 IN audio jacks of the TX-SR700/ 700E and connect the audio input jacks of the video - Onkyo TX-SR700 | Owner Manual - Page 20
TX-SR700/700E) Video output S Video output Video input S Video input 7. DVD recorder, other digital video recording device (VIDEO 2) ANTENNA FM AM 75 R L PHONO IN GND COMPONENT VIDEO INPUT 2 INPUT 1 OUTPUT Y PB REMOT jacks on the TX-SR700/700E. Note: Note that the Setup Menu will only be - Onkyo TX-SR700 | Owner Manual - Page 21
VIDEO 1 R DVD SUB WOOFER FRONT SPEAKERS 27122974 CAUTION: SPEAKER IMPEDANCE 6 OHMS MIN. /SPEAKER ZONE 2 SPEAKERS SURROUND SPEAKERS L CENTER SPEAKER R FRONT SURROUND CENTER L ZONE 2 L SURROUND BACK SPEAKER PRE OUT R R AV RECEIVER MODEL NO. TX-SR700E SURROUND BACK AC OUTLETS AC 230 - Onkyo TX-SR700 | Owner Manual - Page 22
of those given below: • Onkyo's Multi-Room System kit (IR Remote Controller Extension System) • Multiroom A/V distribution and control system such as those from Niles® and Xantech® If the remote controller signal does not reach the TX-SR700/700E remote sensor If the TX-SR700/700E is located inside - Onkyo TX-SR700 | Owner Manual - Page 23
the TX-SR700/700E from the remote zone (Zone 2) with the remote controller even though the remote zone is physically separated. The diagram below shows how to make the proper connections for the remote zone. When using the ZONE 2 SPEAKERS terminals If you are using a 5.1-channel speaker system in - Onkyo TX-SR700 | Owner Manual - Page 24
"Input Setup" → "Digital Input" (see page 53). If the device has a digital input, connect it to the DIGITAL OUTPUT OPTICAL jack of the TX-SR600/600E for digital recording of the signal from the digital input of the TX-SR600/600E. Note: The output from the DIGITAL OUTPUT jack of the TX-SR600/ 600E is - Onkyo TX-SR700 | Owner Manual - Page 25
Connections (TX-SR600/600E) Connecting a DVD Player with 5.1-Channel Output ANTENNA FM AM 75 DIGITAL INPUT OPTICAL 2 1 DIGITAL DIGITAL OUTPUT INPUT OPTICAL COAXIAL COMPONENT VIDEO INPUT 2 INPUT 1 OUTPUT Y VIDEO 3 VIDEO 2 VIDEO 1 IN IN OUT IN PB REMOTE CONTROL PR DVD MONITOR IN - Onkyo TX-SR700 | Owner Manual - Page 26
Connections (TX-SR600/600E) Connecting a DVD Player with 2-Channel (L/R) Audio Output ANTENNA FM AM 75 DIGITAL INPUT OPTICAL 2 1 DIGITAL DIGITAL OUTPUT INPUT OPTICAL COAXIAL COMPONENT VIDEO INPUT 2 INPUT 1 OUTPUT Y VIDEO 3 VIDEO 2 VIDEO 1 IN IN OUT IN PB REMOTE CONTROL PR DVD - Onkyo TX-SR700 | Owner Manual - Page 27
PB REMOT CONTRO TXSR600/600E. Or if the video cassette recorder has component video outputs, connect them to the COMPONENT VIDEO INPUT 1 or 2 jacks on the TX-SR600/600E. With the initial settings of the TX-SR600/600E Setup → Digital Input (see page 53). With the initial settings of the TX-SR600/600E - Onkyo TX-SR700 | Owner Manual - Page 28
Connections (TX-SR600/600E) : Signal flow 6. TV monitor or projector (MONITOR OUT) ANTENNA FM AM 75 DIGITAL INPUT OPTICAL 2 1 DIGITAL DIGITAL OUTPUT INPUT OPTICAL COAXIAL COMPONENT VIDEO INPUT 2 INPUT 1 OUTPUT Y VIDEO 3 VIDEO 2 VIDEO 1 IN IN OUT IN PB REMOTE CONTROL PR DVD - Onkyo TX-SR700 | Owner Manual - Page 29
terminal, it can be operated by the remote controller supplied with the TX-SR700/ 700E/600/600E. In addition, when you connect a component to the terminal, you can also perform the system operations given below. Power on/ready function When the TX-SR700/700E/600/600E is in the standby state, if an - Onkyo TX-SR700 | Owner Manual - Page 30
. Be sure to refer to the instruction manuals that came with the speakers during placement and connection. Furthermore, be aware that for surround playback, the configuration and placement of your speakers are both very important. Standard speaker setup for surround sound • Front right and left - Onkyo TX-SR700 | Owner Manual - Page 31
speaker or listening to monaural (mono) sound, never connect a single speaker in parallel to both the right and left-channel terminals. SPEAKER B (TX-SR600/600E (-) speaker wires. Connecting a subwoofer Use the SUBWOOFER PRE OUT jack to connect a subwoofer with a built-in power amplifier. - Onkyo TX-SR700 | Owner Manual - Page 32
right speaker Surround back speaker Surround left speaker TX-SR600/600E Front right A speaker Center speaker Front left A speaker ANTENNA FM AM 75 DIGITAL INPUT OPTICAL 2 1 DIGITAL DIGITAL OUTPUT INPUT OPTICAL COAXIAL COMPONENT VIDEO INPUT 2 INPUT 1 OUTPUT Y L PB REMOTE CONTROL PR - Onkyo TX-SR700 | Owner Manual - Page 33
press the STANDBY/ON button again, the receiver returns to standby state. Turn off Diagram for RC-482M Turning on the power from the remote controller Before you can use the remote controller, you must perform step 1 above and place the TX-SR700/700E/600/600E in the standby state. 1. Press the RCVR - Onkyo TX-SR700 | Owner Manual - Page 34
AM loop antenna is for indoor use only. Set it in the direction and position where you receive the clearest sound. Put it as far away as possible from the TX-SR700/700E/600/600E, televisions, speaker cables, and power cords. If the reception is not very clear with the attached AM indoor antenna, the - Onkyo TX-SR700 | Owner Manual - Page 35
power lines. Keep it well away from power lines directional linkage type splitter. To receiver To TV (or VCR) are using the TX-SR700/700E/600/600E worldwide model in a region where AM frequencies are delineated by 10-kHz steps, be sure to set the "AM Frequency Step" Setup - Onkyo TX-SR700 | Owner Manual - Page 36
|ENTER|Quit:|SETUP| * Menu 1.Speaker Config 2.Speaker Distance 3.Level Calibration 4.Input Setup 5.OSD Setup 6.Preference |ENTER|Quit:|SETUP| 3. Press the ENTER button. TX-SR700/700E/600/600E Remote controller When the menu is not displayed on the monitor (TXSR600/600E only) The default - Onkyo TX-SR700 | Owner Manual - Page 37
/600/600E Remote controller 9. Use the and cursor buttons to select "Crossover" and then use the and cursor buttons to select the crossover frequency mode setting. Adjustable Crossover (80/100/120 Hz) for Bass Management This setting allows you to set the crossover frequency for your speaker system - Onkyo TX-SR700 | Owner Manual - Page 38
front panel or SETUP button on the remote controller button to exit the Setup menu. Calibrating the speaker levels Use this menu to set the volume for each speaker so that in the Speaker Distance menu are vital to create the proper sound space and dynamics. Note: The speaker level settings - Onkyo TX-SR700 | Owner Manual - Page 39
SETUP button on the remote controller button to exit the Setup menu. Using the remote controller 1. Press the TEST button. You will hear a pink noise will be emitted from the front left speaker. (1) Remember the volume level of this noise and then press the CH SEL button. The TX-SR700/700E/600/600E - Onkyo TX-SR700 | Owner Manual - Page 40
TX-SR700/700E/600/600E provides a number of listening modes perfect for listening to the radio and getting the most out of your audio system. Also, by presetting radio stations that you listen to frequently, you can select them easily by pressing the CH button on the remote controller the sound will - Onkyo TX-SR700 | Owner Manual - Page 41
The memory indicator turns remote controller: 1. Press the RCVR MODE button. The RCVR MODE button lights green. 2. Press the TUN button. 3. Press the CH button and select the number of the desired preset station. Erasing a preset radio station This can only be performed at the TX-SR700/700E/600/600E - Onkyo TX-SR700 | Owner Manual - Page 42
is RDS? RDS stands for Radio Data System and is a type of FM broadcasting. provides you with various services so that you can appear on the display if the TX-SR700E/600E receives characters that cannot be displayed correctly. usually from past or present sales charts (e.g., Top 40). Rock music - Onkyo TX-SR700 | Owner Manual - Page 43
displayed in the front display of the TX-SR700E/600E. If the station does not, received, the characters will scroll across the front display. • If "No Text Data" appears on the display, RT information is not available. • The display shows the frequency for 3 seconds and returns to program service - Onkyo TX-SR700 | Owner Manual - Page 44
the selected input source. Follow the operating instructions for the source device. 3. Adjust the volume to an appropriate level. TX-SR700/700E Remote controller Adjusting the main volume adjusts the volume level of all the speakers connected to the TX-SR700/700E together. If headphones are - Onkyo TX-SR700 | Owner Manual - Page 45
Min, 1 to 99, and Max. TX-SR600/600E Remote controller Selecting speakers (SPEAKERS A, B) (TX-SR600/ 600E only) SPEAKERS A: This button turns on or off the speakers connected to the FRONT SPEAKERS, CENTER SPEAKER, SURROUND SPEAKERS, SURROUND BACK SPEAKER, and SUBWOOFER terminals. When you listen - Onkyo TX-SR700 | Owner Manual - Page 46
original settings when the TX-SR700/700E/600/600E is put in standby. Using the remote controller: 1. Press the RCVR MODE button. To return the display to its original setting, perform the same procedure. This setting is necessary to allow z system functions for a connected Onkyo cassette tape or MD - Onkyo TX-SR700 | Owner Manual - Page 47
the Multichannel setting at "Input Setup" → "Multichannel" (see page 54). 1. Press the DVD input source button. 2. Select "Multich" using the AUDIO SELECTOR button on the front panel (or AUDIO SEL button on the remote controller). TX-SR700/700E/600/600E Remote controller (TX-SR700/700E only) If you - Onkyo TX-SR700 | Owner Manual - Page 48
the AUDIO ADJUST button and then the and cursor buttons to select Bass (or Treble). TX-SR700/700E/600/600E Remote controller • Be aware that the main volume display on the front panel will differ if the speaker volume of even one speaker is changed from 0 decibels. In other words, if all the - Onkyo TX-SR700 | Owner Manual - Page 49
Listening Modes The TX-SR700/700E/600/600E's surround sound enables you to enjoy the presence of a movie theater or concert hall in your room. The configuration of the speakers is very important for the surround sound. Refer to "Connecting speakers" on page 30. Before using a listening mode, make - Onkyo TX-SR700 | Owner Manual - Page 50
the acoustics that you would experience in front of the stage. Studio-Mix This mode is for rock and popular music. The lively sounds are enhanced for a powerful acoustic image that simulates the feeling of being in a club or rock concert. TV Logic This mode gives realistic acoustics to TV programs - Onkyo TX-SR700 | Owner Manual - Page 51
600E Remote controller PURE AUDIO (PURE A) (TX-SR700/700E only): Changes the listening mode for the signal type that is currently being input from the selected input source to the Pure Audio listening mode. If pressed, the corresponding setting in the "Input Setup surround back speakers. Each time - Onkyo TX-SR700 | Owner Manual - Page 52
in the "Input Setup" menu for the sound from the front speakers is too bright. This function only works in the Dolby Digital, Dolby Digital EX, Dolby Pro Logic II Movie, DTS, DTS-ES Discrete 6.1, DTS-ES Matrix 6.1, DTS Neo:6 Cinema Surround modes. Press the CINE FLTR button on the remote controller - Onkyo TX-SR700 | Owner Manual - Page 53
button to return to the main menu. Press the MENU button on the front panel or SETUP button on the remote controller to exit the Setup menu. a. Digital Input This setting tells the TX-SR700/700E/600/600E which input source button on the front panel is connected with which digital input jack on the - Onkyo TX-SR700 | Owner Manual - Page 54
Setup TX-SR700/700E/600/600E, the DTS encoded signal will not be decoded and noise will be output. This noise could damage the amplifier and speakers. OUT output analog audio signals. Do not record from CDs or LDs that support DTS using these outputs. If you do, the DTSencoded signal will be recorded - Onkyo TX-SR700 | Owner Manual - Page 55
Setup f. Analog/PCM Source This sets the listening mode for analog or PCM sources. Analog sources consist of LP records, FM and AM broadcasts, cassette tapes, and the such. PCM (Pulse Code DVD Digital satellite o o o *2 o o o *1 TX-SR700/700E only *2 This mode is not available for DTS sources - Onkyo TX-SR700 | Owner Manual - Page 56
in the main zone. Zone 2: Select when you are using the remote control sensor for operation with the remote controller in the remote zone (Zone 2). c. AM Frequency Step (TX-SR700/700E)/ b. AM Frequency Step (TX-SR600/600E) This setting only appears on the worldwide model. It determines the - Onkyo TX-SR700 | Owner Manual - Page 57
TX-SR700/700E only Bass, Treble Separately adjust the bass and treble settings in 2-decibel increments. The Bass and Treble adjustments are only enabled for the front left and right speakers dynamic range of the sound is narrowed down to allow you to easily hear minute sounds at low volumes. This - Onkyo TX-SR700 | Owner Manual - Page 58
home use, applying some width to the center signal will improve the level balance for the center and main speakers, and effect the width of the center sound image, or "weight" of the sound. Many sound recordings processed for stereo playback will be reproduced better by proper control (TX-SR700 - Onkyo TX-SR700 | Owner Manual - Page 59
Audio Adjust Settings possible for each listening mode Setting Tone Control (Bass, Treble Subwoofer (Analog/ PCM only) Listening mode Direct Pure Audio Stereo G G Dolby Pro Logic II G G Dolby Digital G Dolby Digital EX G DTS Neo:6 G G DTS G DTS-ES - Onkyo TX-SR700 | Owner Manual - Page 60
indicator on the TX-SR700/700E flashes for five seconds. During this time, you will not be able to perform operations in the main zone using the remote controller. Adjusting the volume for the remote zone When the remote zone (Zone 2) speakers are connected to the ZONE 2 SPEAKERS terminals, or to - Onkyo TX-SR700 | Owner Manual - Page 61
TX making digital recordings, consult the instruction manual that came with your digital recordings. Below is an example of recording the sound from a compact disc player connected to CD in the front display. Notes: • Be aware that the remote (Zone 2) and recording (REC OUT) outputs use the same - Onkyo TX-SR700 | Owner Manual - Page 62
Recording a source (TX-SR600/600E) Input source buttons Notes: • You cannot record the surround effects. are some restrictions on recording digital signals. When making digital recordings, consult the instruction manual that came with your digital recording equipment (e.g., MD recorder or DAT deck) - Onkyo TX-SR700 | Owner Manual - Page 63
* Diagram for RC-482M RCVR MODE CH VOL MUTING TUN Overview The RC-482M/480M remote controller is a useful tool that can not only operate the TX-SR700/700E/600/600E, but also all the other components of your home theater as well. To operate any component, first press the Mode button on the - Onkyo TX-SR700 | Owner Manual - Page 64
Using remote controller ON CD MODE DISC STANDBY VOL MUTING CD operation buttons Numeric keys Controlling an Onkyo CD player The connector of the Onkyo compact disc player must be connected to the TX-SR700/700E/600/600E (see page 29). 1. Press the CD MODE button. The CD MODE button lights green. - Onkyo TX-SR700 | Owner Manual - Page 65
Using remote controller ON RETURN ENTER, DISC TOP MENU AUDIO SEL ANGLE STANDBY DVD MODE SETUP VOL MENU MUTING SUBTITLE DVD operation buttons Numeric keys SEARCH Controlling an Onkyo DVD player The connector of the Onkyo DVD player must be connected to the TX-SR700/700E/600/600E (see page 29). 1. - Onkyo TX-SR700 | Owner Manual - Page 66
volume at TX-SR700/700E/600/600E MUTING: Activates muting function at TX-SR700/700E/600/ 600E TV MODE TV VCR MODE VCR VOL MUTING VCR and TV MODE buttons No preset codes are programmed into the VCR and TV MODE buttons. Therefore you can use these buttons to program the remote controller signals of - Onkyo TX-SR700 | Owner Manual - Page 67
, enter 613. No. 600: This code is for Onkyo DVD players that have an terminal that you are connecting to the TX-SR700/700E/600/600E with an cable. You will then operate the DVD player by pointing the remote controller at the remote control sensor on the TX-SR700/ 700E/600/600E. You do not need to - Onkyo TX-SR700 | Owner Manual - Page 68
Note: If more than one code is given in the table, try each code one by one until you reach a code that works (i.e. if the first code does not work, then try the next). DVD BRAND DENON HITACHI JVC KENWOOD MAGNAVOX MARANTZ MITSUBISHI ONKYO PANASONIC PIONEER PROSCAN RCA SONY TOSHIBA YAMAHA ZENITH - Onkyo TX-SR700 | Owner Manual - Page 69
remote controller TX-SR700/700E/600/ 600E TV MODE TV CH TV/VCR VOL MUTING TV MODE (TV Mode) 1. Press the TV MODE button. The TV button lights green. 2. Press the desired operation button. The buttons shaded in the figure to the left are the operation buttons that can be used to control - Onkyo TX-SR700 | Owner Manual - Page 70
Programming the commands of remote controllers for other devices into the remote controller INMPULUTTI-CH MOSDUER CD SLEEP POWER VIDEO-2 DVGTDRAOPUEPINPTUUTTNSUEPENRLREEERCSPTEDITHOMORNMEOR 2 to 6 inches (5 to 15 cm ) SEND/LEARN indicator MODE buttons DVD VIDEO-1 CD TOTNEEST VOLUME DISC - Onkyo TX-SR700 | Owner Manual - Page 71
buttons to program the codes for other remote controllers. If you wish to restore the Onkyo preset codes after you program new codes, you must first erase the new codes (see page 72). • The remote controller has 318 memory slots (6 modes × 53 buttons). Some remote controllers may have more commands - Onkyo TX-SR700 | Owner Manual - Page 72
lamp slowly flashes twice. The memorized command is erased. Note: If the SEND/LEARN indicator quickly flashes three times and turns off, then the remote controller has exited the erasing mode because either you have made a mistake during erasing or a time-out has occurred because no button has been - Onkyo TX-SR700 | Owner Manual - Page 73
you to reprogram the macro in order to avoid incorrect operation. • The codes programmed into the macro will be transmitted at an interval of 0.5 seconds make sure that it has been programmed properly. Point the remote controller at the TX-SR700/700E/600/ 600E and press the MACRO 1 (or 2) button. It - Onkyo TX-SR700 | Owner Manual - Page 74
macro programmed to the MACRO button is erased. Notes: • If the SEND/LEARN indicator quickly flashes three times and turns off, then the remote controller has exited the erasing mode because either you have made a mistake during erasing or a timeout has occurred because no button has been pressed - Onkyo TX-SR700 | Owner Manual - Page 75
Using the macro function Macro mode programming memo: MACRO MACRO 1 Operation 1 Operation 2 Operation 3 Operation 4 Operation 5 Operation 6 Operation 7 Operation 8 Operation 9 Operation 10 Operation 11 Operation 12 Operation 13 Operation 14 Operation 15 Operation 16 MACRO 2 75 - Onkyo TX-SR700 | Owner Manual - Page 76
Troubleshooting guide If a problem occurs while you are using the remote controller, first try to operate the controls on the front panel of the TX-SR700/700E/ 600/600E to make sure that it is not due to a malfunction (or worn out batteries) in the remote controller. POWER No power. • Power cord is - Onkyo TX-SR700 | Owner Manual - Page 77
(see page 7). • Remote controller is not pointed at the remote sensor of the TXSR700/700E/600/600E. © Point the remote controller at the remote sensor of the TXSR700/700E/600/600E (see page 7). • Remote controller is too far from the TX-SR700/700E/600/ 600E. © Operate the remote controller within 16 - Onkyo TX-SR700 | Owner Manual - Page 78
instruction manuals of the CD player, DVD player, video cassette recorder, TV monitor, etc., that compose your entertainment system. The TX-SR700/700E/600/600E the power cord from the wall outlet, wait five or more seconds, and then plug it back in. This should correct the situation. * To reset the - Onkyo TX-SR700 | Owner Manual - Page 79
, 50/60 Hz Power consumption USA & Canadian models: 6.7 A Other models: 550 W Dimensions (W × H × D): 435 × 175 × 431.5 mm 17-1/8" × 6-7/8" × 16-15/16" Weight USA & Canadian models: 27.8 lbs. Other models: 13.1 kg REMOTE CONTROLLER Transmitter: Signal range: Power supply: Infrared - Onkyo TX-SR700 | Owner Manual - Page 80
Specifications (TX-SR600/600E) AMPLIFIER SECTION Continuous average power output (FTC) All channels: 80 W per channel min. RMS at 8 Ω, 2 channels driven from 20 Hz to 20 kHz with no more than 0.08% total harmonic
-
 1
1 -
 2
2 -
 3
3 -
 4
4 -
 5
5 -
 6
6 -
 7
7 -
8
-
9
-
10
-
11
-
12
-
13
-
14
-
15
-
16
-
17
-
18
-
19
-
20
-
21
-
22
-
23
-
24
-
25
-
26
-
27
-
28
-
29
-
30
-
31
-
32
-
33
-
34
-
35
-
36
-
37
-
38
-
39
-
40
-
41
-
42
-
43
-
44
-
45
-
46
-
47
-
48
-
49
-
50
-
51
-
52
-
53
-
54
-
55
-
56
-
57
-
58
-
59
-
60
-
61
-
62
-
63
-
64
-
65
-
66
-
67
-
68
-
69
-
70
-
71
-
72
-
73
-
74
-
75
-
76
-
77
-
78
-
79
-
80
 |
 |

Contents
Thank you for purchasing the Onkyo AV Receiver.
Please read this manual thoroughly before making
connections and plugging in the unit. Following the
instructions in this manual will enable you to obtain
optimum performance and listening enjoyment from
your new AV Receiver. Please retain this manual for
future reference.
TX-SR700/700E
TX-SR600/600E
Appendix
76
Remote controller
63
Setup and operation
36
Before using
2
AV Receiver
Instruction Manual
Facilities and connections
8