Optoma OCM815W User Manual - Page 7
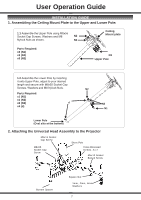
Assembling the Ceiling Mount Plate to the Upper and Lower Pole, Attaching the Universal Head
 |
View all Optoma OCM815W manuals
Add to My Manuals
Save this manual to your list of manuals |
Page 7 highlights
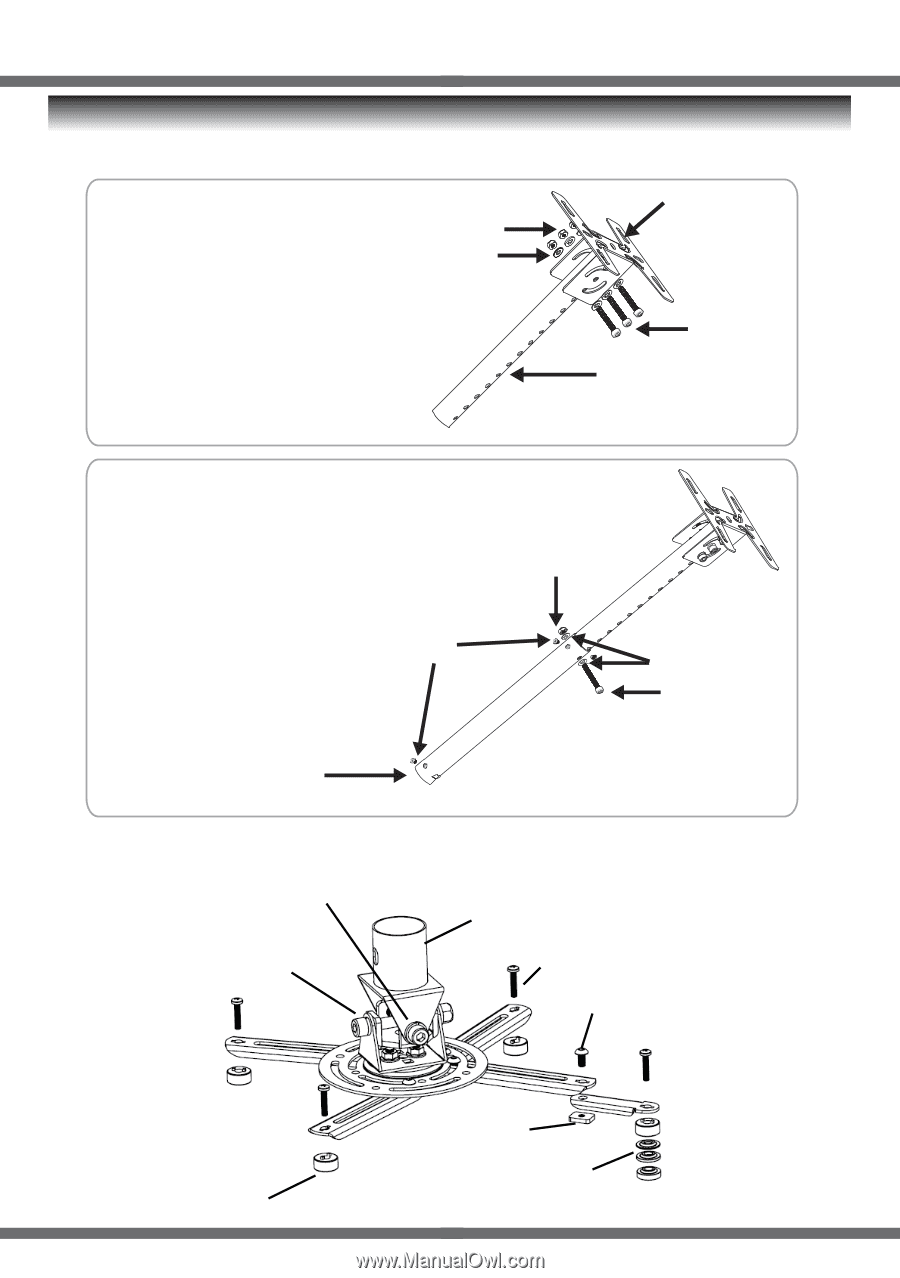
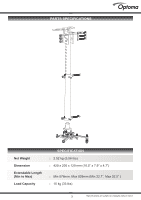
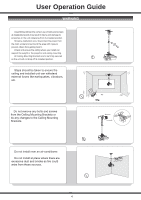
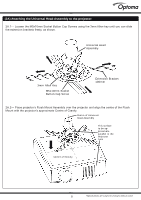
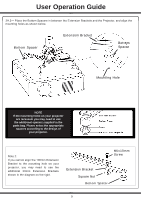
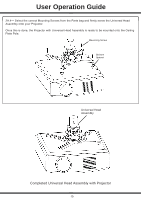
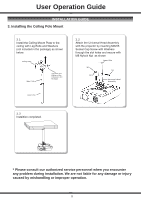
User Operation Guide INSTALLATION GUIDE 1. Assembling the Ceiling Mount Plate to the Upper and Lower Pole: 1.1 Assemble the Upper Pole using M8x55 Socket Cap Screws, Washers and M8 N2 Nylock Nuts as shown. N3 Ceiling Mount plate Parts Required: x3 (N1) x3 (N2) x6 (N3) N1 Upper Pole 1.2 Assemble the Lower Pole by inserting it onto Upper Pole, adjust to your desired length and secure with M8x55 Socket Cap Screws, Washers and M8 Nylock Nuts. Parts Required: x1 (N1) x1 (N2) x2 (N3) d x4 (d) N2 N3 N1 Lower Pole (Oval slits at the bottom) 2. Attaching the Universal Head Assembly to the Projector M8x15 Socket Cap Screw M8x65 Socket Cap Screw Short Pole Cross Recessed Screws A- I M5x10 Socket Button Screw Bottom Spacer Square Nut 1mm, 2mm, 4mm Washers 7
-
 1
1 -
 2
2 -
 3
3 -
 4
4 -
 5
5 -
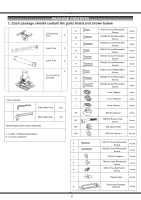 6
6 -
 7
7 -
 8
8 -
 9
9 -
 10
10 -
 11
11 -
 12
12
 |
 |