Optoma OCM818W-RU User Manual - Page 6
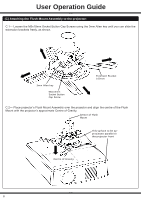
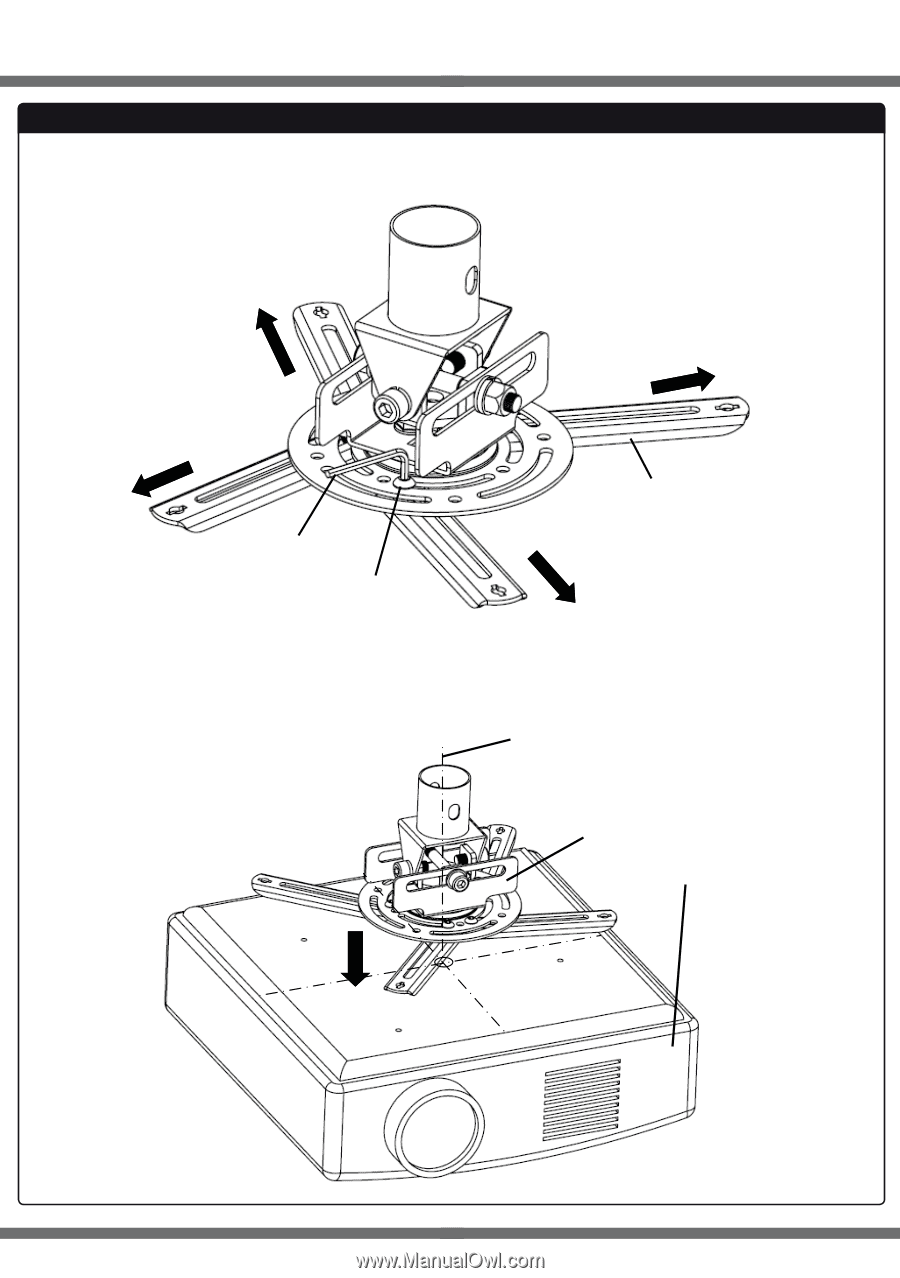
C Attaching the Flush Mount Assembly to the projector
 |
View all Optoma OCM818W-RU manuals
Add to My Manuals
Save this manual to your list of manuals |
Page 6 highlights
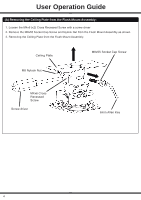
User Operation Guide (C) Attaching the Flush Mount Assembly to the projector: C.1- Loosen the M5x10mm Socket Button Cap Screws using the 3mm Allen key until you can slide the extension brackets freely, as shown. 3mm Allen key M5x10mm Socket Button Cap Screw Extension Bracket 100mm C.2- Place projector's Flush Mount Assembly over the projector and align the centre of the Flush Mount with the projector's approximate Centre of Gravity. Centre of Flush Mount This surface to be approximate parallel to the projector front Centre of Gravity 6
-
 1
1 -
 2
2 -
 3
3 -
 4
4 -
 5
5 -
 6
6 -
 7
7 -
 8
8 -
 9
9 -
 10
10 -
 11
11 -
 12
12
 |
 |
6
User Operation Guide
Centre of Flush
Mount
Centre of Gravity
This surface to be ap-
proximate parallel to
the projector front
3mm Allen key
Extension Bracket
100mm
M5x10mm
Socket Button
Cap Screw
C.1— Loosen the M5x10mm Socket Button Cap Screws using the 3mm Allen key until you can slide the
extension brackets freely, as shown.
C.2— Place projector’s Flush Mount Assembly over the projector and align the centre of the Flush
Mount with the projector’s approximate Centre of Gravity.
(C) Attaching the Flush Mount Assembly to the projector: