Optoma OCM818W-RU User Manual - Page 9
D Attaching the Flush Mount Assembly to the Ceiling Plate
 |
View all Optoma OCM818W-RU manuals
Add to My Manuals
Save this manual to your list of manuals |
Page 9 highlights
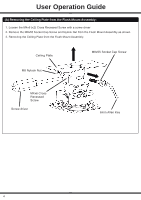
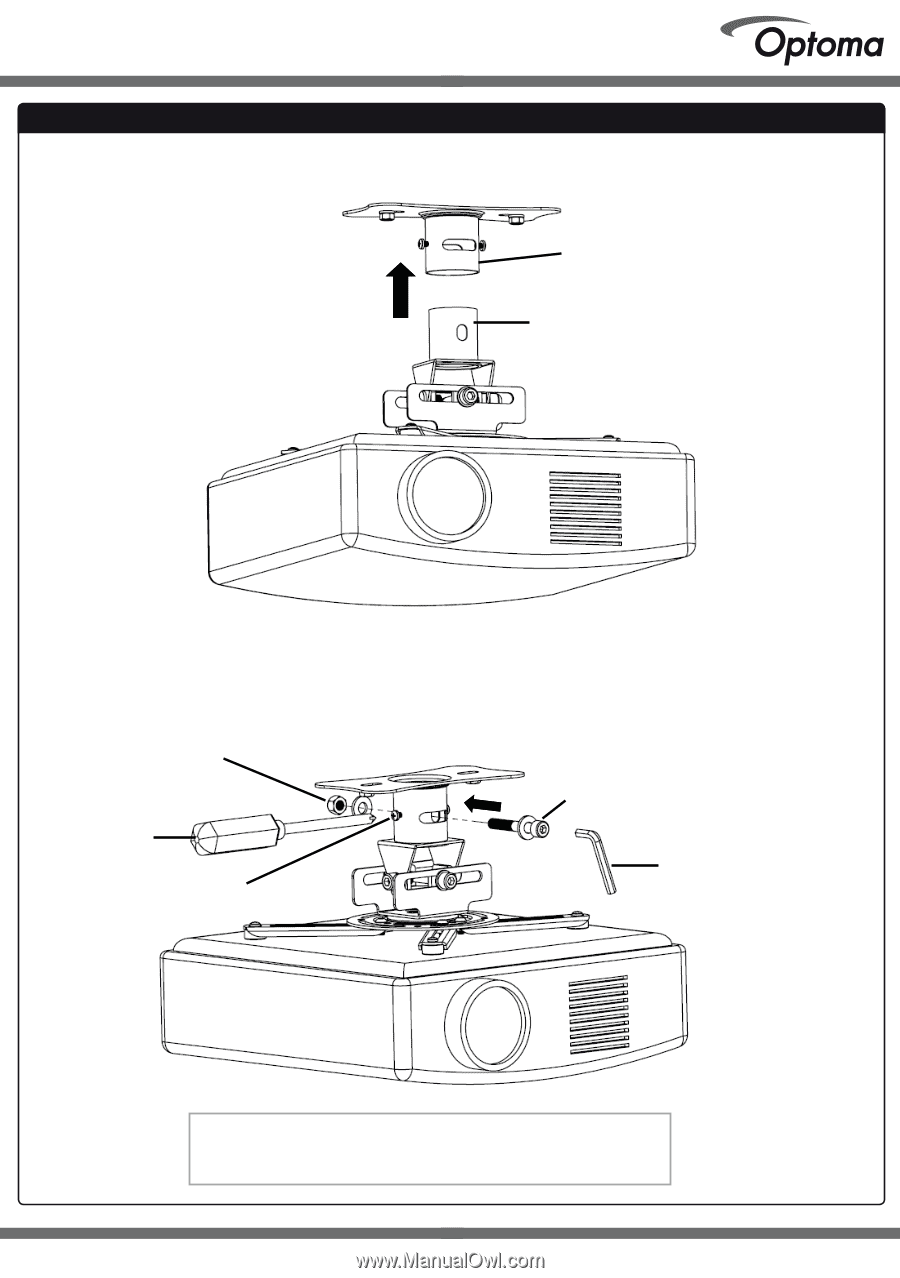
(D) Attaching the Flush Mount Assembly to the Ceiling Plate D.1- Connect the Short Pole to the Ceiling Plate as shown be- Ceiling Plate Short Pole D.2- Insert the M8x55 Socket Cap Screw into the slot on the Ceiling Plate to lock the Flush Mount Assembly with the M8 Nylock Nut. Tighten the M4x5 Cross Recessed Screws to balance the Flush Mount Assembly. M8 Nylock Nut and Washer Screw Driver M4X6 Cross Recessed Screw **M8X55 Socket Cap Screw and Washer 6mm Allen Key Tip: When the Projector required servicing, remove the Projector via the easy disconnection point** to save time. *Specifications are subject to changes without notice. 9
-
 1
1 -
2
-
3
-
 4
4 -
 5
5 -
 6
6 -
 7
7 -
 8
8 -
 9
9 -
 10
10 -
 11
11 -
 12
12
 |
 |
*Speci
fi
cations are subject to changes without notice.
9
D.1— Connect the Short Pole to the Ceiling Plate as shown be-
D.2— Insert the M8x55 Socket Cap Screw into the slot on the Ceiling Plate to lock the Flush Mount
Assembly with the M8 Nylock Nut. Tighten the M4x5 Cross Recessed Screws to balance the Flush
Mount Assembly.
(D) Attaching the Flush Mount Assembly to the Ceiling Plate
Tip: When the Projector required servicing, remove the
Projector via the easy disconnection point** to save time.
Ceiling Plate
Short Pole
**M8X55 Socket Cap
Screw and Washer
6mm Allen Key
M8 Nylock Nut
and Washer
Screw
Driver
M4X6 Cross
Recessed
Screw