Oregon Scientific WMR968 User Manual - Page 2
The Thermo-hygrometer, To Install It, The Rain Gauge, The Solar Transmitters, The Baro-thermo- - anemometer
 |
View all Oregon Scientific WMR968 manuals
Add to My Manuals
Save this manual to your list of manuals |
Page 2 highlights
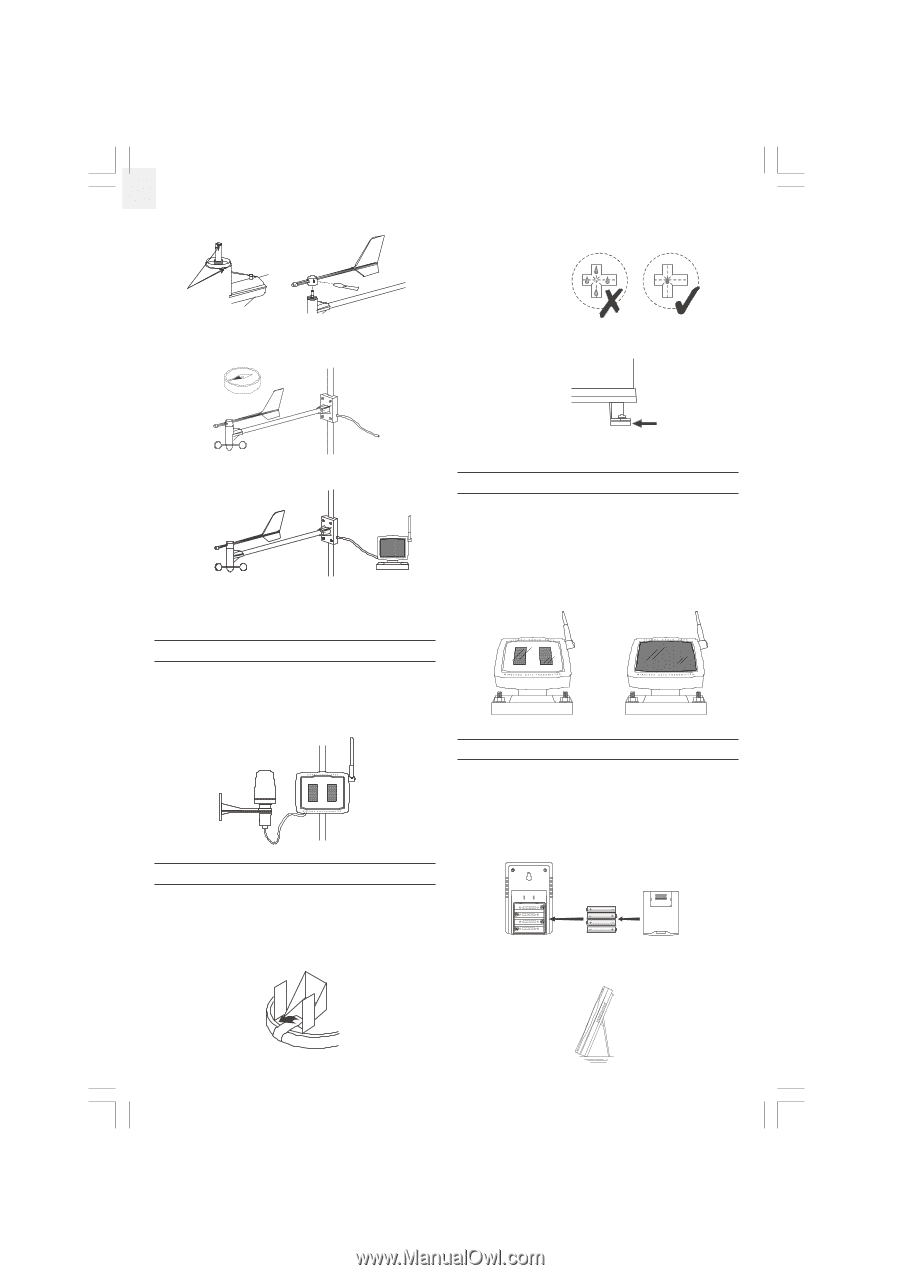
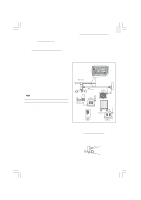
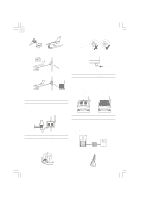
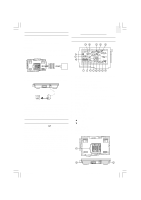
GB 3. Align the red markings on the wind vane's shaft. 3. Mount the rain gauge and its solar transmitter safely in place. 4. Put drops of water on the cross at the base on the rain collector to check the leveling. Water stay at position 1 - 4 means the gauge is not leveled 4. With the aid of a compass, face the red marking south before mounting the anemometer. 5. Use metal ring to adjust the leveling of the rain collector if necessary. 6. Close the cover of the rain collector. METAL RING 5. Mount the anemometer and its solar transmitter safely in place. The wind speed and direction window on the main unit should read 180° if the main unit is installed. THE SOLAR TRANSMITTERS The solar transmitters make use of solar energy to power the instruments they are connected to. Note: It is recommended to insert two UM3 or "AA"-sized super lithium batteries for weather condition under 0 °C (32 °F). For the solar transmitters to function properly, make sure the solar receptors on the transmitters are exposed to sunlight and the connectors of the connection cable are securely plugged in. THE THERMO-HYGROMETER The thermo-hygrometer measures outdoor temperature and humidity. To install it: Mount the thermo-hygrometer and its solar transmitter safely in place. THE BARO-THERMO-HYGROMETER The baro-thermo-hygrometer measures the atmospheric pressure, temperature and humidity. The sensor uses four UM4 or "AAA"-sized batteries. To install it, 1. Insert alkaline batteries accordingly. THE RAIN GAUGE The rain gauge measures the total amount and rate of rainfall. To install it: 1. Open the cover of the rain collector. 2. Remove the fiber tape from around the bucket assemblies. 2. Mount the unit where you want to monitor the readings. Or you can make use of its table stand to place it on a flat surface. 928N-USE.p65 2 2 08/10/2001, 12:20 PM
-
 1
1 -
 2
2 -
 3
3 -
 4
4 -
 5
5 -
 6
6 -
 7
7 -
 8
8 -
9
 |
 |