Palsonic TFTV685HD Owners Manual - Page 32
Screen Setup for D-SUBPC Mode
 |
View all Palsonic TFTV685HD manuals
Add to My Manuals
Save this manual to your list of manuals |
Page 32 highlights
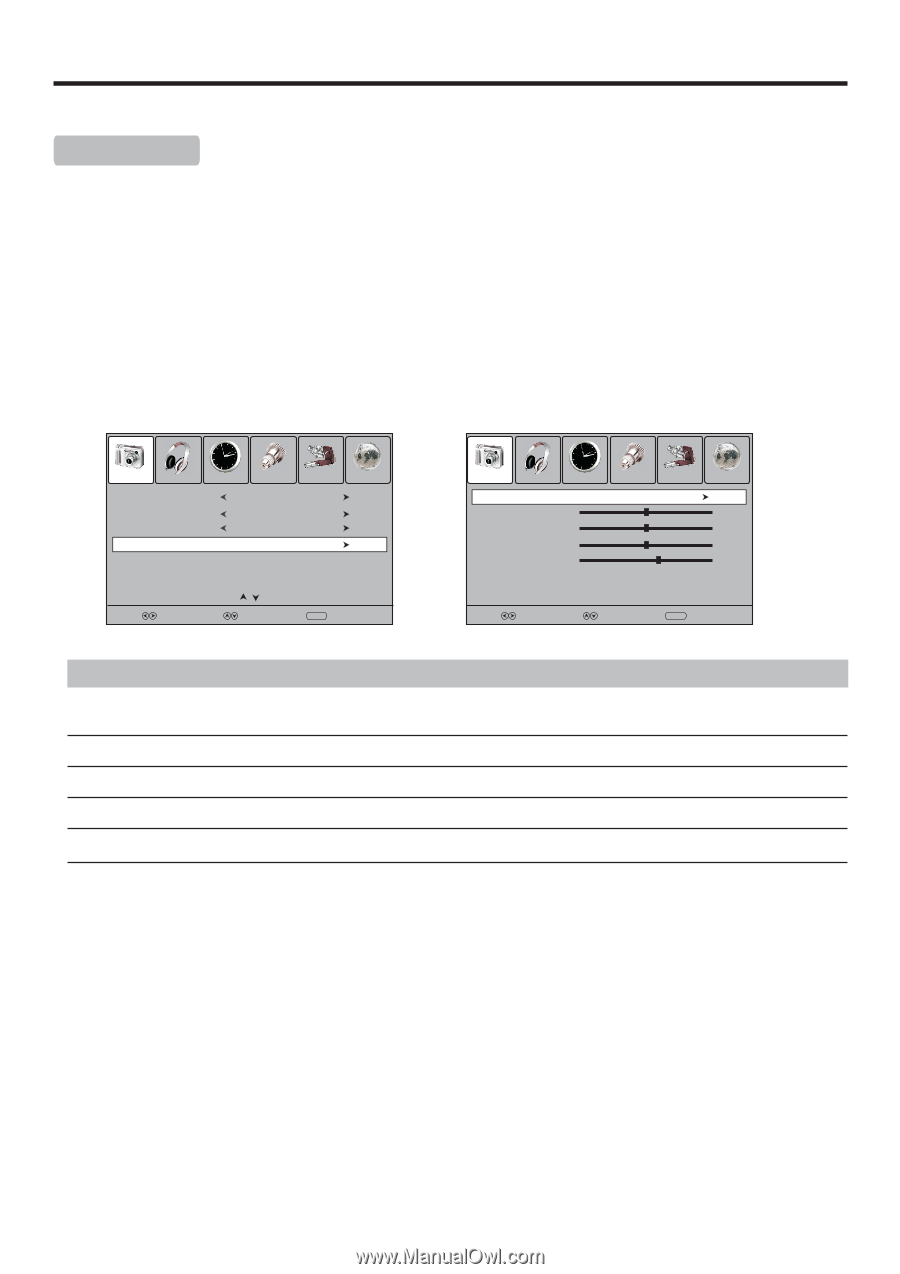
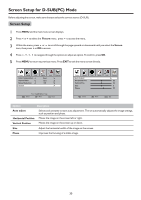
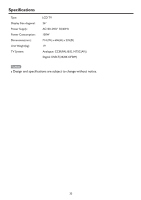
Screen Setup for D-SUB(PC) Mode Before adjusting the screen, make sure that you select the correct source (D-SUB). Screen Setup 1 Press MENU and the main menu screen displays. 2 Press 3 or4 to select the Picture menu, press 6 to access the menu. 3 Within the menu, press 5 or 6 to scroll through the page upward or downward until you select the Screen item, then press 4 or OK to access. 4 Press 5 ,6 ,3 ,4 to navigate through the options or adjust an option. To confirm, press OK. 5 Press MENU to return to previous menu. Press EXIT to exit the menu screen directly. Picture Sound Time Color Temperature Aspect Ratio Noise Reduction Screen Option Cool 16:9 Off Lock Channel Prev Page Next Page Select Move Menu Exit Picture Sound Time Auto Adjust Horizontal Pos. Vertical Pos. Size Phase Option Lock Channel 50 50 0 60 Select Move MENU Exit Option Description Auto adjust Selects and activates to start auto adjustment. The set automatically adjusts the image settings, such as position and phase. Horizontal Position Vertical Position Moves the image on the screen left or right. Moves the image on the screen up or down. Size Adjust the horizontal width of the image on the screen. Phase Improves the focusing of a stable image. 30
-
 1
1 -
2
-
3
-
4
-
5
-
6
-
7
-
8
-
9
-
10
-
11
-
12
-
13
-
14
-
15
-
16
-
17
-
18
-
19
-
20
-
21
-
22
-
23
-
24
-
25
-
26
-
 27
27 -
 28
28 -
 29
29 -
 30
30 -
 31
31 -
 32
32 -
 33
33 -
 34
34 -
 35
35 -
 36
36
 |
 |