Panasonic AG HVX200 P2 Camcoder - Page 89
Analog output (P2 card/Tape), MCR/VCR mode.
 |
View all Panasonic AG HVX200 manuals
Add to My Manuals
Save this manual to your list of manuals |
Page 89 highlights
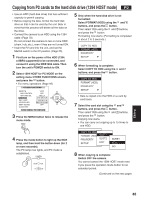
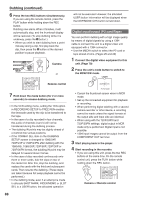
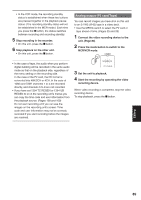
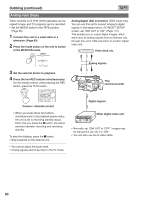
• In the VCR mode, the recording standby status is established when these two buttons are pressed together in the playback pause status. (The recording standby status will not be established in the MCR mode.) Each time you press the button, the status switches between recording and recording standby. 5 Stop recording in the recorder. • On this unit, press the button. 6 Stop playback on the other unit. • On this unit, press the button. Analog output (P2 card/Tape) You can record images you have shot on this unit to an S-VHS (VHS) tape in a video deck. • Use the MEDIA switch to select the P2 card or tape ahead of time. (Pages 25 and 29) 1 Connect the video recording device to the unit. (Page 80) 2 Press the mode button to switch to the MCR/VCR mode. CAMERA • In the case of tape, the audio when you perform digital dubbing will be recorded in the same audio mode as that on the playback side, regardless of the menu setting on the recording side. In the case of the P2 card, the DV format is converted into 48K/2CH or 4CH. In the case of 1080i and 720P, channels 1 to 4 are recorded directly, and channels 5 to 8 are not recorded. • If you have set 1394 TC REGEN or 1394 UB REGEN to on in the recording unit's menus you can copy the time code and user information from the playback source. (Pages 108 and 109) Do not start recording until you can see the images on the recording unit's screen. Time code and user information may not be correctly recorded if you start recording before the images are received. MCR VCR PC DUB 3 Set the unit to playback. 4 Start the recording by operating the video recording device. When video recording is completed, stop the video recording device. To stop playback, press the button. Editing 89
-
 1
1 -
2
-
3
-
4
-
5
-
6
-
7
-
8
-
9
-
10
-
11
-
12
-
13
-
14
-
15
-
16
-
17
-
18
-
19
-
20
-
21
-
22
-
23
-
24
-
25
-
26
-
27
-
28
-
29
-
30
-
31
-
32
-
33
-
34
-
35
-
36
-
37
-
38
-
39
-
40
-
41
-
42
-
43
-
44
-
45
-
46
-
47
-
48
-
49
-
50
-
51
-
52
-
53
-
54
-
55
-
56
-
57
-
58
-
59
-
60
-
61
-
62
-
63
-
64
-
65
-
66
-
67
-
68
-
69
-
70
-
71
-
72
-
73
-
74
-
75
-
76
-
77
-
78
-
79
-
80
-
81
-
82
-
83
-
 84
84 -
 85
85 -
 86
86 -
 87
87 -
 88
88 -
 89
89 -
 90
90 -
 91
91 -
 92
92 -
 93
93 -
 94
94 -
95
-
96
-
97
-
98
-
99
-
100
-
101
-
102
-
103
-
104
-
105
-
106
-
107
-
108
-
109
-
110
-
111
-
112
-
113
-
114
-
115
-
116
-
117
-
118
-
119
-
120
-
121
-
122
-
123
-
124
-
125
-
126
-
127
-
128
-
129
-
130
-
131
-
132
-
133
-
134
-
135
-
136
-
137
-
138
 |
 |