Panasonic CQ4500U CQ4300U User Guide - Page 19
Installation Guide
 |
View all Panasonic CQ4500U manuals
Add to My Manuals
Save this manual to your list of manuals |
Page 19 highlights
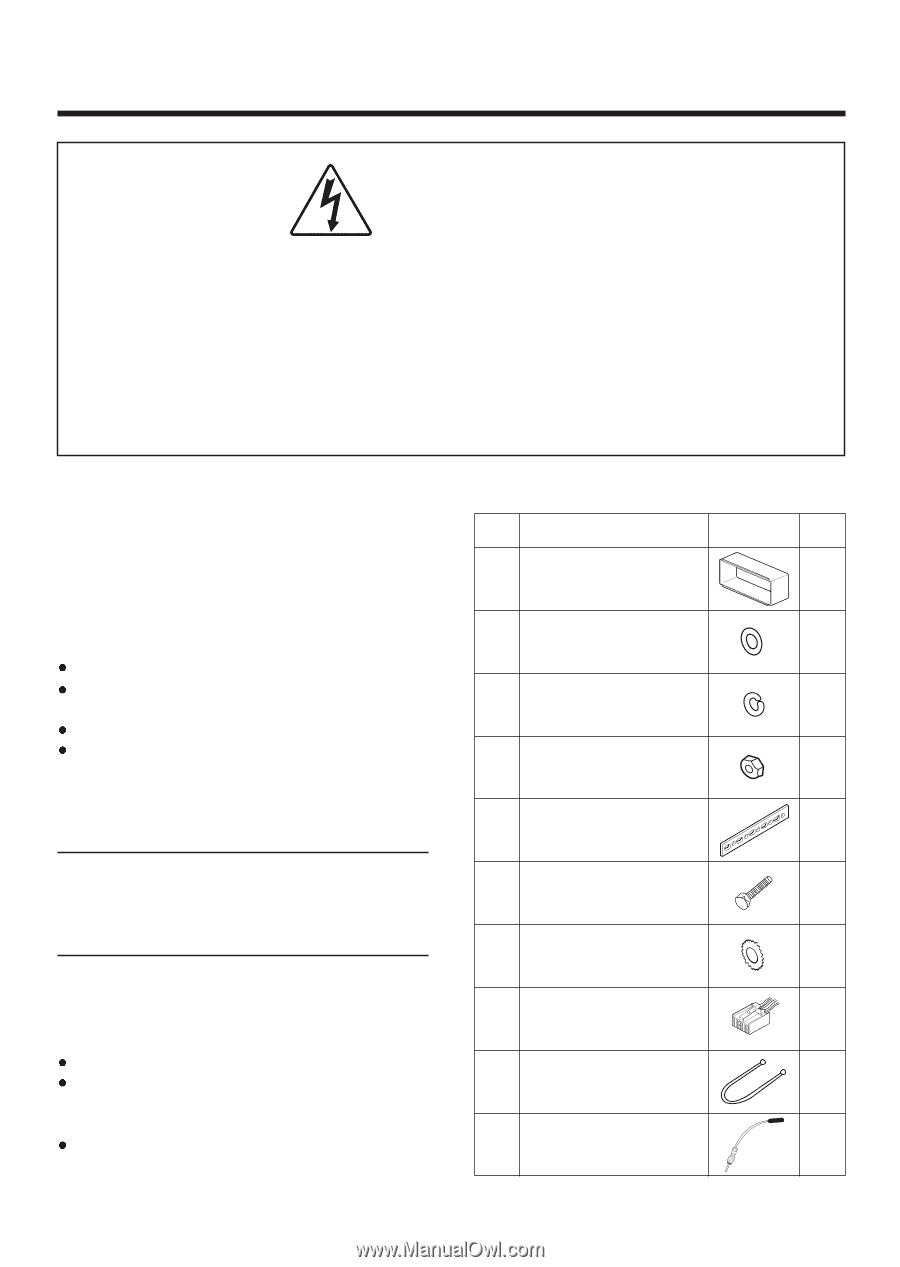
Installation Guide WARNING This installation information is designed for experienced installers and is not intended for non-technical individuals. It does not contain warnings or cautions of potential dangers in attempting to install this product. Any attempt to install this product in a motor vehicle by anyone other than qualified installer could cause damage to the electrical system and could result in serious personal injury or death. ❏ Overview This equipment should be installed by a professional. However, if you plan to install this unit yourself, your first step is to decide where to install it. The instructions in these pages will guide you through the remaining steps: (Please refer to "WARNING" statement above). Identify and label the vehicle wires Connect the vehicle wires to the wires of the power connector Install the unit in the dash Check the operation of the unit If you do encounter problems, please consult your nearest authorized dealer. Caution: This unit will operate with a 12 volt DC negative ground auto battery system only. Do not attempt to use it in any other system. Doing so could cause serious damage. Before you begin installation, look for the following items included in the packing with your unit. Warranty Card ...... Fill this out promptly Panasonic Servicenter for service Directory ...... Keep this for future reference in case the unit needs servicing Installation Hardware ...... Needed for in-dash installation ❏ Installation Hardware No. Item Diagram Qty ቢ Mounting Collar 1 ባ Plain Washer (5 mmφ) 2 ቤ Spring Washer (5 mmφ) 2 ብ Hex. Nut (5 mmφ) 2 ቦ Rear Support Strap 1 ቧ Hex. Bolt (5 mmφ × 25 mm) 1 ቨ Toothed Lock Washer (5 mmφ) 1 ቩ Power Connector 1 ቪ Removal Tool (U-shaped) 2 ቫ Antenna Connector 1 19
-
 1
1 -
2
-
3
-
4
-
5
-
6
-
7
-
8
-
9
-
10
-
11
-
12
-
13
-
 14
14 -
 15
15 -
 16
16 -
 17
17 -
 18
18 -
 19
19 -
 20
20 -
 21
21 -
 22
22 -
 23
23 -
 24
24 -
25
-
26
-
27
-
28
-
29
-
30
-
31
-
32
 |
 |