Panasonic DMC-FX5 Digital Still Camera - Page 58
Setting The White Balance
 |
UPC - 037988977581
View all Panasonic DMC-FX5 manuals
Add to My Manuals
Save this manual to your list of manuals |
Page 58 highlights
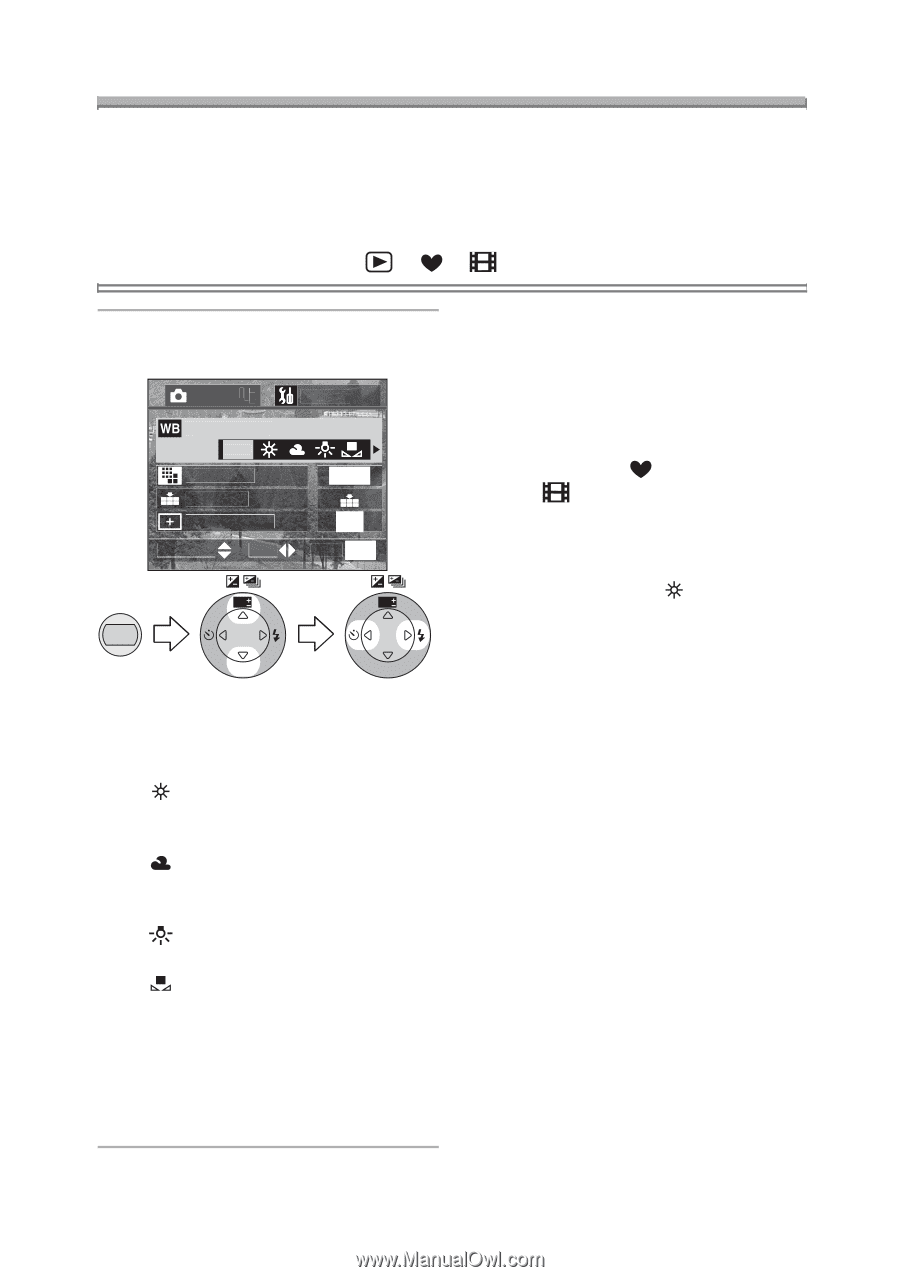
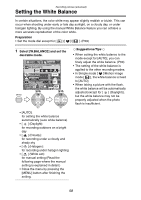
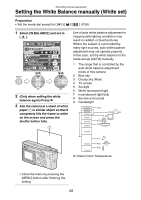
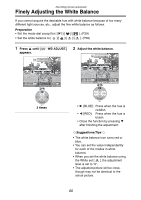
Recording pictures (advanced) Setting the White Balance In certain situations, the color white may appear slightly reddish or bluish. This can occur when shooting under early or late day sunlight, on a cloudy day, or under halogen lighting. By using the manual White Balance feature you can achieve a more accurate reproduction of the color white. Preparation • Set the mode dial except for [ ]/[ ]/[ ]. (P29) 1 Select [W.BALANCE] and set the desirable mode. REC 1/3 W.BALANCE AUTO PICT.SIZE QUALITY SPOT MODE SELECT SET SETUP 1600 OFF EXIT MENU MENU WB WB REVIEW SET REVIEW SET • [AUTO]: for setting the white balance automatically (auto white balance) • [ ] (Daylight): for recording outdoors on a bright day • [ ] (Cloudy): for recording under a cloudy and shady sky • [ ] (Halogen): for recording under halogen lighting • [ ] (White set): for manual setting (Read the following page where the manual setting is explained in detail.) • Close the menu by pressing the [MENU] button after finishing the setting. ¬Suggestions/Tips ¬ • When setting the white balance to the mode except for [AUTO], you can finely adjust the white balance. (P60) • The setting of the white balance is applied to the other recording modes. • In Simple mode [ ]/Motion image mode [ ], the white balance is fixed to [AUTO]. • When taking a picture with the flash, the white balance will be automatically adjusted [except for [ ] (Daylight)], but the white balance may not be properly adjusted when the photo flash is insufficient. 58
-
 1
1 -
2
-
3
-
4
-
5
-
6
-
7
-
8
-
9
-
10
-
11
-
12
-
13
-
14
-
15
-
16
-
17
-
18
-
19
-
20
-
21
-
22
-
23
-
24
-
25
-
26
-
27
-
28
-
29
-
30
-
31
-
32
-
33
-
34
-
35
-
36
-
37
-
38
-
39
-
40
-
41
-
42
-
43
-
44
-
45
-
46
-
47
-
48
-
49
-
50
-
51
-
52
-
 53
53 -
 54
54 -
 55
55 -
 56
56 -
 57
57 -
 58
58 -
 59
59 -
 60
60 -
 61
61 -
 62
62 -
 63
63 -
64
-
65
-
66
-
67
-
68
-
69
-
70
-
71
-
72
-
73
-
74
-
75
-
76
-
77
-
78
-
79
-
80
-
81
-
82
-
83
-
84
-
85
-
86
-
87
-
88
-
89
-
90
-
91
-
92
-
93
-
94
-
95
-
96
-
97
-
98
-
99
-
100
-
101
-
102
-
103
-
104
-
105
-
106
-
107
-
108
-
109
-
110
-
111
-
112
-
113
-
114
-
115
-
116
-
117
-
118
-
119
-
120
-
121
-
122
-
123
-
124
-
125
-
126
-
127
-
128
-
129
-
130
-
131
-
132
 |
 |