Panasonic DVDLX95 Portable Dvd Player - Page 5
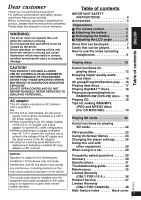
Accessories, Preparations, The Remote Control, Attaching The Battery
 |
View all Panasonic DVDLX95 manuals
Add to My Manuals
Save this manual to your list of manuals |
Page 5 highlights
Accessories Use numbers indicated in parentheses when asking for replacement parts. (Product numbers correct as of March 2005. These may be subject to change.) (For U.S.A.) To order accessories, refer to "Accessory Purchases" on page 37. (For Canada) To order accessories, call the dealer from whom you have made your purchase. ∑ 1 Remote control (N2QAHC000021) ∑ 1 Car DC Adaptor (RFEC201M) ∑ 1 Button-type battery§ for remote control ∑ 1 Noise canceling headphones (L0BAD0000179) (for replacement, see below) ∑ 1 Battery§ for noise canceling headphones ∑ 1 Audio/video cable (K2KA6CB00003) ∑ 1 Rechargeable battery pack (CGR-H703) ∑ 1 AC adaptor (RFEA213W) ∑ 1 AC power supply cord (K2CB2CB00018) For replacement: Available from Panasonic dealers (CGR-H702), (CGR-H703) ≥ The included AC power supply cord and AC adaptor are for use with this unit only. Do not use them with other equipment. §Keep out of the small children. Accidental swallowing of batteries can result in stomach and intestinal damage. Preparations 1 The remote control Insert the button-type battery (included) Range of use Bottom Accessories/Preparations 3 12 30o While sliding (1), pull out (2). _ facing up Lithium battery: CR2025 30o Aim at the sensor. Maximum range is up to 7 m (23 feet). 2 Attaching the battery (When the unit is off) Bottom side of this unit RELEASE DETACH ATTACH Battery pack RELEASE DETACH ATTACH Detaching ≥ Turn the unit off before detaching the battery pack. Clicks into place Check to make sure it is securely fastened. 2 RELEASE DETACH ATTACH 1 Press and hold When not using for long periods of time ≥ Remove the battery pack (➜ left). (Even when the unit is turned off, there is a small amount of voltage running through the unit, and this may result in a malfunction.) ≥ Recharge the battery for re-use. (Continued on next page) 5 5 RQT8075
-
 1
1 -
 2
2 -
 3
3 -
 4
4 -
 5
5 -
 6
6 -
 7
7 -
 8
8 -
 9
9 -
 10
10 -
 11
11 -
12
-
13
-
14
-
15
-
16
-
17
-
18
-
19
-
20
-
21
-
22
-
23
-
24
-
25
-
26
-
27
-
28
-
29
-
30
-
31
-
32
-
33
-
34
-
35
-
36
-
37
-
38
-
39
-
40
-
41
-
42
-
43
-
44
-
45
-
46
-
47
-
48
-
49
-
50
-
51
-
52
-
53
-
54
-
55
-
56
-
57
-
58
-
59
-
60
-
61
-
62
-
63
-
64
-
65
-
66
-
67
-
68
-
69
-
70
-
71
-
72
-
73
-
74
-
75
-
76
 |
 |
