Panasonic FV30VQ3 FV10NLF1 User Guide - Page 5
Installation, Horizontally Between, Joists, Caution
 |
View all Panasonic FV30VQ3 manuals
Add to My Manuals
Save this manual to your list of manuals |
Page 5 highlights
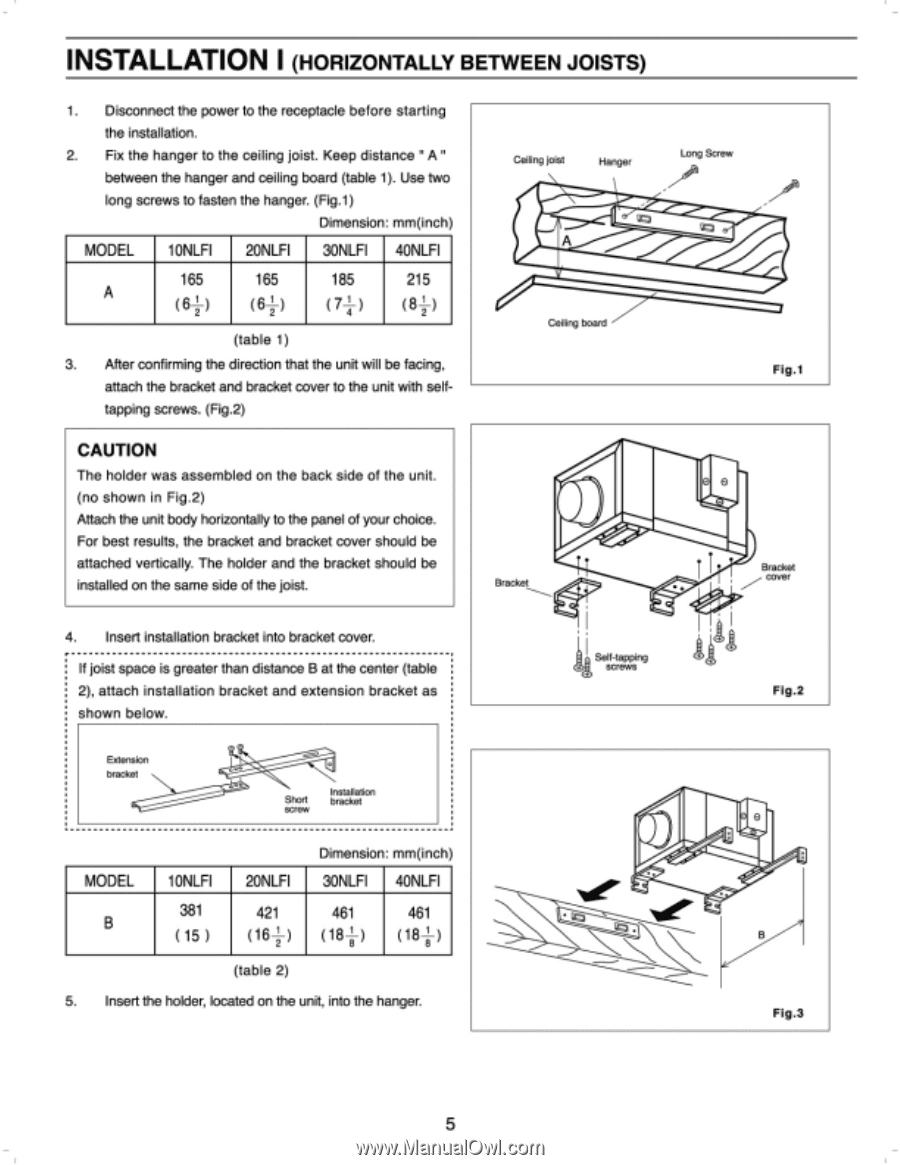
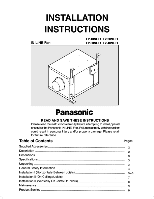
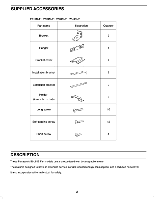
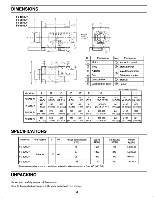
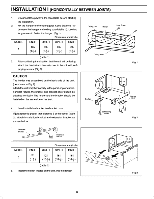
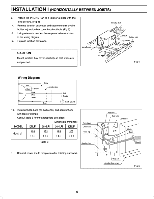
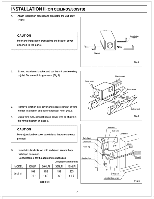
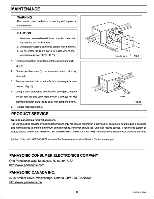
INSTALLATION I (HORIZONTALLY BETWEEN JOISTS) 1. Disconnect the power to the receptacle belore starting the installation. 2. Fix the hanger to the ceiling joist. Keep distance • A" between the hanger and ceiling board (table 1). Use two long screws to fasten the hanger. (Flg.1) Dimension: mm(inch) MODEL 1ONLFI 2061LFI 3ONLF1 4ONLFI 165 165 185 215 A (6+) (8f) (7I) (Of) (table I) 3. After confirming the direction that the unit will be facing, attach the bracket and tracket cover to the unit with selftapping screws. (Fig.2) CAUTION The holder was assembled on the back side of the unit. (no shown in FIg.2) Attach the unit body horizontally to the panel of your Choke. For best results, the bracket and bracket cover should be attached vertically. The holder and the bracket should be installed on the same side of the joist. Ctillegjoag Hires LOCO Sae va 4. Insert Installation bracket Into bracket cover. SOH If joist space is greater than distance Et al the center (table 2), attach installation bracket and extension bracket as shown below. aie9 beactsi l Bert tar. OWN MMail MODEL 1ONLFI 2ONLFI Dimension: mm(in h 33NLFI 4ONLFI B 381 421 461 461 (15 ) (18 2' ) (18:1 (18 el ) (table 2) 5. Insert the holder, located on the und. into the hanger. Flo Flp.2 Flea 5
-
 1
1 -
 2
2 -
 3
3 -
 4
4 -
 5
5 -
 6
6 -
 7
7 -
 8
8 -
 9
9
 |
 |