Panasonic FV30VQ3 FV10NLF1 User Guide - Page 7
Installation
 |
View all Panasonic FV30VQ3 manuals
Add to My Manuals
Save this manual to your list of manuals |
Page 7 highlights
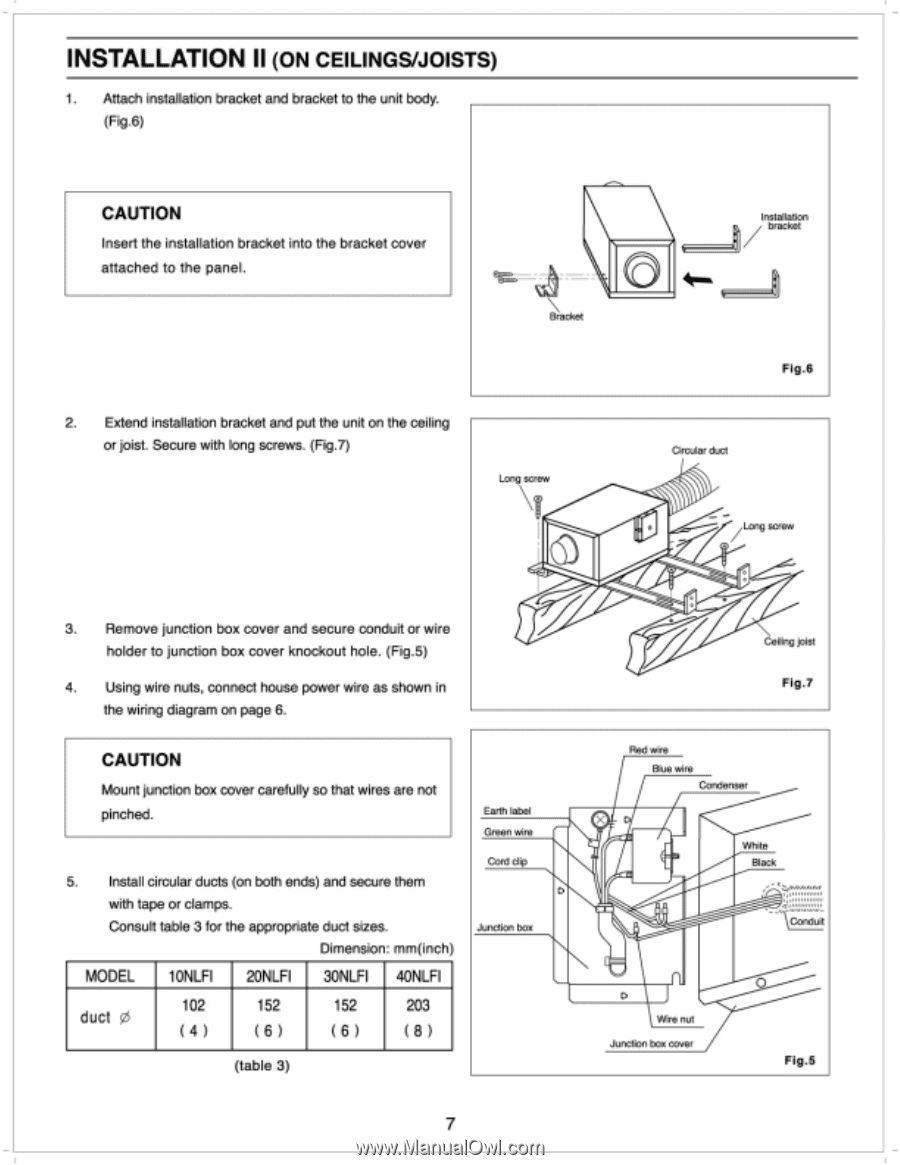
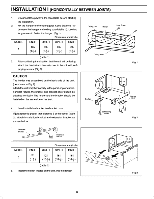
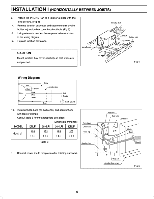
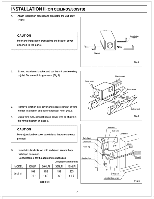
INSTALLATIONII (ON CEILINGS/JOISTS) I. Machinstallationbracket andbracket to the unit body. (Fig.6) CAUTION Insert the installationbracket into the bracket cover attached to the panel. 2. Extend installation bracket and put the unit on the ceiling or joist. Securewith long sass (RV) 4 \ \ ,k2ta' Ana algal Owletdal 3. Remove junction box cover and secure conduit or wire holderto junctionbox cover knockout hole. (Fig.5) 4. Using wire nuts. conned house power wire as shown in the wiring diagramon page 6. CAUTION Mount function box cover carefully so that wires we not pinched. 5. Installcircular ducts(on both ends) and securethem with tape or clamps. Consult table 3 for the appropriatedud saes Dimension: mm(inch) MODEL I0NLFI 2ONLEI 3ONLFI 40NLF1 102 152 152 203 duct d (4) (6) (6) (8) ESSI 0~ Cara At Ws (table 3) 7 ffres aw FIg.? vnrro DIS 0 Juidentoc met Flg.6
-
 1
1 -
 2
2 -
 3
3 -
 4
4 -
 5
5 -
 6
6 -
 7
7 -
 8
8 -
 9
9
 |
 |