Panasonic KX-DT343-B Digital Proprietary Telephone - Page 14
Caution, Kx-nt303 - telephone kx
 |
UPC - 037988852437
View all Panasonic KX-DT343-B manuals
Add to My Manuals
Save this manual to your list of manuals |
Page 14 highlights
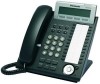
Installing KX-DT301/KX-NT303 Installing KX-DT301/KX-NT303 CAUTION: • To prevent damage to the telephone, be sure to unplug the extension line before you set up or remove the KX-DT301 (USB Module) or the KX-NT303 (Add-on 12 Key Module). • Connect the KX-NT303 first when installing both the KX-DT301 and the KX-NT303. KX-NT303 The Add-on 12 Key Module allows 12 additional flexible buttons to be added to this unit. These buttons are used to seize a CO line, make a call using One-touch Dialing, or perform a feature that has been assigned to the key. 1. Open the cover. 2. Attach the KX-NT303 to your unit with the screws (included with KX-NT303). 3. Plug the flat cable into the 4. Close the cover. connector (A), then bend the cable slightly as shown (B). 14 Document Version 2009-03
-
 1
1 -
2
-
3
-
4
-
5
-
6
-
7
-
8
-
 9
9 -
 10
10 -
 11
11 -
 12
12 -
 13
13 -
 14
14 -
 15
15 -
 16
16 -
 17
17 -
 18
18 -
 19
19 -
20
-
21
-
22
-
23
-
24
 |
 |
