Panasonic KX-TGE274S KX-TGE263S Owner's Manual (English) - Page 64
Wall mounting, Useful Information
 |
View all Panasonic KX-TGE274S manuals
Add to My Manuals
Save this manual to your list of manuals |
Page 64 highlights
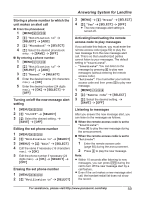
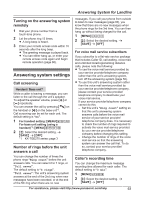
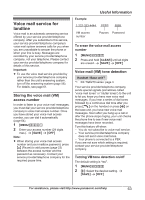
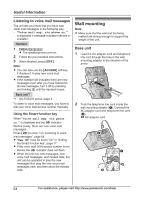
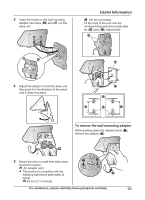
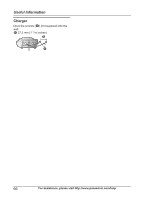
Useful Information Listening to voice mail messages The unit lets you know that you have new voice mail messages in the following way: - "Voice mail msg. via phone co." is displayed if message indication service is available. Handset 1 MMENUN#330 R The speakerphone turns on. 2 Follow the pre-recorded instructions. 3 When finished, press MOFFN. Note: R You can also use the MACCESSN soft key, if displayed, to play new voice mail messages. R If the handset still indicates there are new messages even after you have listened to all new messages, turn it off by pressing and holding # until the handset beeps. Base unit*1 *1 KX-TGE270 series: page 3 To listen to voice mail messages, you have to dial your voice mail access number manually. Using the Smart function key When "Voice mail msg. via phone co." is displayed and the indicator flashes slowly, there are new voice mail messages. Press M N in step 1 on "Listening to voice mail messages", page 64. R "New VM" must be set to "On" in "Setting the Smart function key", page 17. R If the voice mail (VM) access number is not stored, the indicator does not flash. R When the unit has new messages, new voice mail messages, and missed calls, the unit can be operated to play the new messages first, play the new voice mail messages next, and then show the missed calls. Wall mounting Note: R Make sure that the wall and the fixing method are strong enough to support the weight of the unit. Base unit 1 Lead the AC adaptor cord and telephone line cord through the hole in the wall mounting adaptor in the direction of the arrow. 2 Tuck the telephone line cord inside the wall mounting adaptor (A). Connect the AC adaptor cord and telephone line cord (B). 1 AC adaptor cord B A 1 64 For assistance, please visit http://www.panasonic.com/help
-
 1
1 -
2
-
3
-
4
-
5
-
6
-
7
-
8
-
9
-
10
-
11
-
12
-
13
-
14
-
15
-
16
-
17
-
18
-
19
-
20
-
21
-
22
-
23
-
24
-
25
-
26
-
27
-
28
-
29
-
30
-
31
-
32
-
33
-
34
-
35
-
36
-
37
-
38
-
39
-
40
-
41
-
42
-
43
-
44
-
45
-
46
-
47
-
48
-
49
-
50
-
51
-
52
-
53
-
54
-
55
-
56
-
57
-
58
-
 59
59 -
 60
60 -
 61
61 -
 62
62 -
 63
63 -
 64
64 -
 65
65 -
 66
66 -
 67
67 -
 68
68 -
 69
69 -
70
-
71
-
72
-
73
-
74
-
75
-
76
-
77
-
78
-
79
-
80
-
81
-
82
-
83
-
84
-
85
-
86
-
87
-
88
-
89
-
90
-
91
-
92
-
93
-
94
-
95
-
96
 |
 |