Panasonic PT-DW6300US Functional Instructions - Page 28
Projector Setup Menu, Projector Id, Installation, High Altitude Mode, Cooling Condition - lamp life
 |
UPC - 791871111888
View all Panasonic PT-DW6300US manuals
Add to My Manuals
Save this manual to your list of manuals |
Page 28 highlights
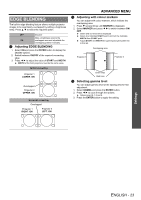
PROJECTOR SETUP menu Remote control HIGH ALTITUDE MODE If you use the projector at high elevation, the HIGH ALTITUDE MODE setting needs to be ON to set the fan speed high. Press I H to select the required option. See "Navigating through the menu" on page 15. See "Main menu and Sub-menu" on page 12. PROJECTOR ID The projector has an ID number setting function that helps the user to control multiple projectors either simultaneously or separately with a single remote control. Press I H to cycle through the options. ALL 1 - 64 Available to control from any ID numbered remote control or computer. Available to control from the same ID numbered remote control. NOTE: • See "Remote control ID" in the operating instructions booklet that is provided with the projector. INSTALLATION When installing the projector, select the projection method according to the projector position. Press I H to cycle through the options. FRONT/FLOOR FRONT/CEILING REAR/FLOOR REAR/CEILING Setting on a desk/floor and projecting from front Mounting on the ceiling and projecting from front Setting on a desk/floor and projecting from rear Mounting on the ceiling and projecting from rear OFF ON The fan speed is low. The fan speed is high. NOTE: • At 1 400 - 2 700 m (4 593 - 8 858 ft) sea level, the setting must be ON. • The loudness of fan noise depends on the HIGH ALTITUDE MODE setting. COOLING CONDITION You can control the fan speed for projecting angle. Press I H to cycle through the options. VERTICAL UP SETTING FLOOR SETTING CEILING SETTING VERTICAL DOWN SETTING NOTE: • When the projector is angled, COOLING CONDITION setting must be set correctly. Failure to observe this may result in malfunctions, or the life of the lamp or the other components may be shortened. NOTE: • See "Projection method" in the operating instructions booklet that is provided with the projector. Settings ENGLISH - 28
-
 1
1 -
2
-
3
-
4
-
5
-
6
-
7
-
8
-
9
-
10
-
11
-
12
-
13
-
14
-
15
-
16
-
17
-
18
-
19
-
20
-
21
-
22
-
 23
23 -
 24
24 -
 25
25 -
 26
26 -
 27
27 -
 28
28 -
 29
29 -
 30
30 -
 31
31 -
 32
32 -
 33
33 -
34
-
35
-
36
-
37
-
38
-
39
-
40
-
41
-
42
-
43
-
44
-
45
-
46
-
47
-
48
-
49
-
50
-
51
-
52
 |
 |
