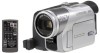
Panasonic PV GS120 Digital Video Camcorder - Page 54
Pc Connection With Dv Interface Cable - firewire
 |
UPC - 037988977758
View all Panasonic PV GS120 manuals
Add to My Manuals
Save this manual to your list of manuals |
Page 54 highlights
Editing Mode Recorder: 3 While pressing the [¥REC] Button (61), press the [1] Button (79) on the Remote Controller. Or while pressing the [REC] Button (7), press the [BACK LIGHT] Button (8) on the Camcorder. ≥Recording starts. To Stop Dubbing Press the [;] Button (76) or the [∫] Button (77). ≥For other notes concerning this item, see -78-. CAUTION: Unauthorized exchanging and/or copying of copyrighted recordings may be copyright infringement. PC Connection With DV Interface Cable A video clip can be transferred directly to your PC (Personal Computer) via a DV Interface Cable (optional) using products and software from a number of video editing software companies. Using products from video editing software companies allows you to capture and edit video clips using the DV Interface. Our DVC being OHCI compliant should have no problem working with any OHCI compliant Firewire Card/Video - Editing software package. Printing pictures by directly connecting to the printer (PictBridge) After connecting the Camcorder with a printer compatible with PictBridge, start the following procedures. ≥To print pictures by directly connecting the Camcorder to the printer, prepare a printer compatible with PictBridge. (Also read the operating instructions of the printer.) ≥You cannot print images which cannot be played on the Camcorder. ≥Check the settings for the paper size, quality of print, etc. on the printer. ≥We recommend using the AC Adaptor as the power source. 1 Set the Mode Dial (39) to Picture Playback Mode. PC (39) S D 2 Connect the printer with the supplied USB Cable. REMOTE/MIC (PLUG IN POWER) AV IN/OUT PHONES 1 DV ≥Personal Computer must be equipped with an DV Terminal. ≥During Camcorder playback, do not disconnect the DV Interface Cable or turn the Camcorder off as this may cause a PC hang-up error. ≥1394 (i. LINK) Interface must conform to OHCI (Open Host Controller Interface Specification). ≥DV STUDIO 3.1E-SE allows you to capture a still image from your motion video on the tape and transfer it to a PC with USB Cable. 1 USB Cable PRINT ≥The [PRINT] Indication appears on the screen of the Camcorder. Highlighted: Printable Blinking: Printer is being recognized. -54-
-
 1
1 -
2
-
3
-
4
-
5
-
6
-
7
-
8
-
9
-
10
-
11
-
12
-
13
-
14
-
15
-
16
-
17
-
18
-
19
-
20
-
21
-
22
-
23
-
24
-
25
-
26
-
27
-
28
-
29
-
30
-
31
-
32
-
33
-
34
-
35
-
36
-
37
-
38
-
39
-
40
-
41
-
42
-
43
-
44
-
45
-
46
-
47
-
48
-
 49
49 -
 50
50 -
 51
51 -
 52
52 -
 53
53 -
 54
54 -
 55
55 -
 56
56 -
 57
57 -
 58
58 -
 59
59 -
60
-
61
-
62
-
63
-
64
-
65
-
66
-
67
-
68
-
69
-
70
-
71
-
72
-
73
-
74
-
75
-
76
-
77
-
78
-
79
-
80
-
81
-
82
-
83
-
84
-
85
-
86
-
87
-
88
-
89
-
90
-
91
-
92
-
93
-
94
-
95
-
96
-
97
-
98
-
99
-
100
-
101
-
102
-
103
-
104
-
105
-
106
-
107
-
108
-
109
-
110
-
111
-
112
-
113
-
114
-
115
-
116
-
117
-
118
-
119
-
120
-
121
-
122
-
123
-
124
-
125
-
126
-
127
-
128
-
129
-
130
-
131
-
132
-
133
-
134
-
135
-
136
-
137
-
138
-
139
-
140
-
141
-
142
-
143
-
144
-
145
-
146
-
147
-
148
-
149
-
150
-
151
-
152
-
153
-
154
-
155
-
156
-
157
-
158
-
159
-
160
-
161
-
162
-
163
-
164
-
165
-
166
-
167
-
168
-
169
-
170
-
171
-
172
-
173
-
174
-
175
-
176
-
177
-
178
-
179
-
180
-
181
-
182
-
183
-
184
-
185
-
186
-
187
-
188
-
189
-
190
-
191
-
192
-
193
-
194
-
195
-
196
 |
 |
