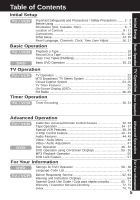
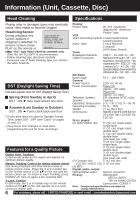
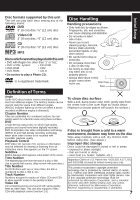
Panasonic PVDM2092 PVDM2092 User Guide - Page 10
Location of Controls continued
 |
View all Panasonic PVDM2092 manuals
Add to My Manuals
Save this manual to your list of manuals |
Page 10 highlights
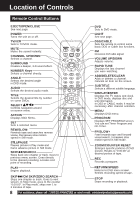
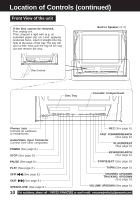
Location of Controls (continued) Front View of the unit If the disc cannot be removed, First unplug unit. Then, prepare a rigid wire (e.g. an extended paper clip, etc.) and, applying moderate force, insert it straight into the hole at the base of the tray. The tray will eject a little. Now, pull the tray all the way out and remove the disc. Built In Speaker (✕ 2) Disc Tray Cassette Compartment Phones Jack Connect an earphone or headphones. Audio/Video Input Connector Connect from other component. POWER (See page 8.) STOP (See page 8.) REC (See page 8.) FAST FORWARD/SEARCH (See page 8.) PLAY/REPEAT (See page 8.) REWIND/SEARCH (See page 8.) PAUSE (See page 8.) STOP/EJECT (See page 8.) PLAY (See page 8.) TV/FM (See page 8.) SKIP SKIP (See page 8.) (See page 8.) CHANNEL UP/DOWN TRACKING UP/DOWN (See page 8.) OPEN/CLOSE (See page 8.) VOLUME UP/DOWN (See page 8.) 10 For assistance, please call : 1-800-211-PANA(7262) or send e-mail : [email protected]
-
 1
1 -
2
-
3
-
4
-
 5
5 -
 6
6 -
 7
7 -
 8
8 -
 9
9 -
 10
10 -
 11
11 -
 12
12 -
 13
13 -
 14
14 -
 15
15 -
16
-
17
-
18
-
19
-
20
-
21
-
22
-
23
-
24
-
25
-
26
-
27
-
28
-
29
-
30
-
31
-
32
-
33
-
34
-
35
-
36
-
37
-
38
-
39
-
40
-
41
-
42
-
43
-
44
-
45
-
46
-
47
-
48
-
49
-
50
-
51
-
52
-
53
-
54
-
55
-
56
-
57
-
58
-
59
-
60
-
61
-
62
-
63
-
64
-
65
-
66
-
67
-
68
-
69
-
70
-
71
-
72
-
73
-
74
-
75
-
76
 |
 |
