Panasonic PVGS200 Digital Video Camcorder - Page 61
USING THE G.726 AUDIO DECODER, Installation of DV STUDIO 3.1E-SE, To start DV STUDIO 3.1E-SE - pv gs200 software
 |
View all Panasonic PVGS200 manuals
Add to My Manuals
Save this manual to your list of manuals |
Page 61 highlights
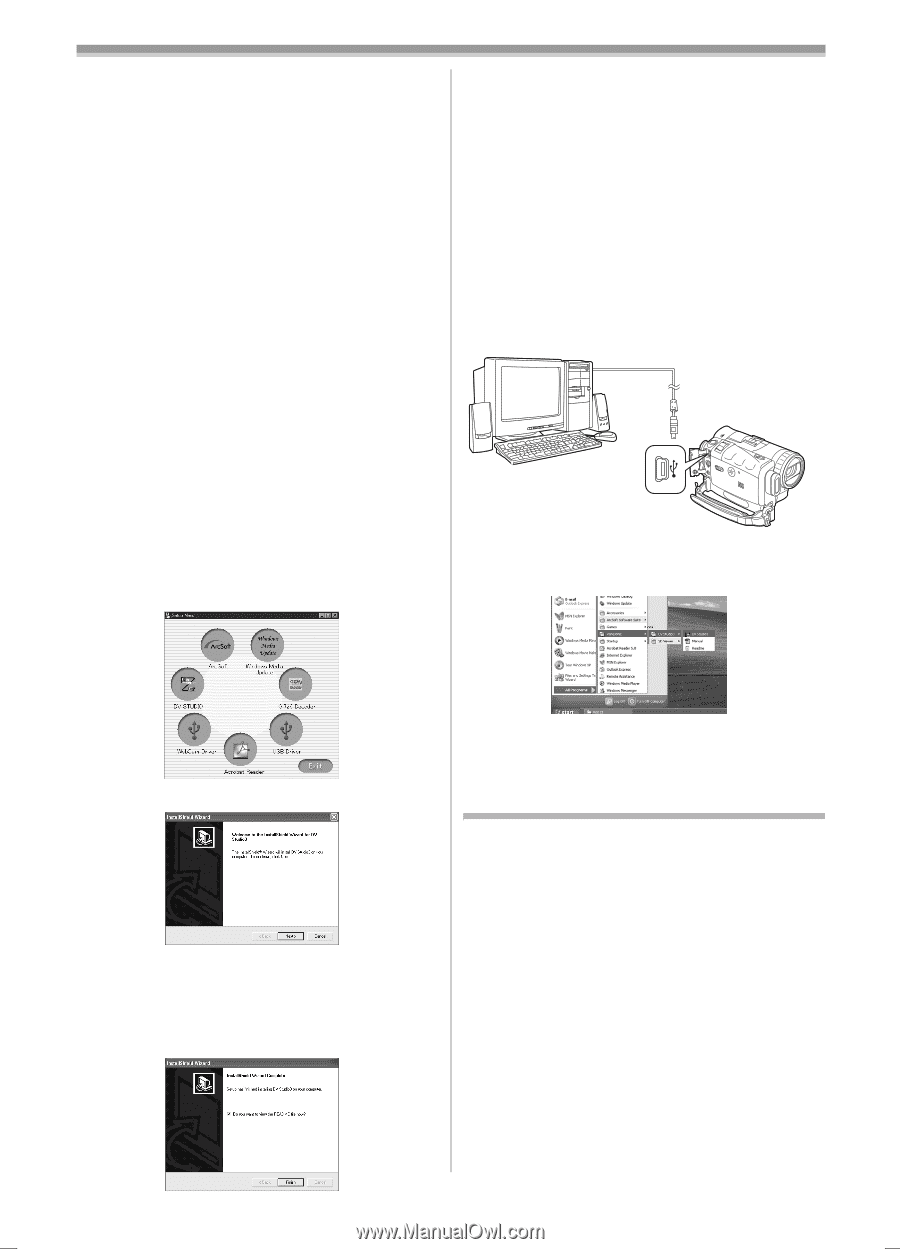
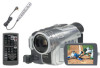
With a PC ≥DV STUDIO 3.1E-SE cannot be operated on Windows 2000. ≥When 2 or more USB devices are connected to a personal computer, or when devices are connected through USB hubs or by using extension cables, proper operation is not guaranteed. ≥When connected to the keyboard USB terminal, normal function may not be possible. ≥This instruction manual describes only the procedures for installation, connection and start-up. Please read the PDF-based instructions for how to use DV STUDIO 3.1E-SE. ≥To view the installed operating instructions, Adobe Acrobat Reader 5.0 or later is required. Please install Adobe Acrobat Reader from the supplied CD-ROM. ≥Before using for the first time, select [Readme] from [Start] >> [All programs (Programs)] >> [Panasonic] >> [DV Studio3], and read any supplementary details or updates. ª Installation of DV STUDIO 3.1E-SE 1 Insert the supplied CD-ROM into the personal computer's CD-ROM drive. 2 Select the software to be installed from [Setup Menu]. ≥Installation will be completed. ≥Sample data is installed concurrently with the DV STUDIO 3.1E-SE software. ª To start DV STUDIO 3.1E-SE 1 Set the Mode Dial to Tape Recording Mode or Tape Playback Mode. ≥If you wish to capture data from a tape, set the Camcorder to Tape Playback Mode and insert the tape. 2 Set [CAMERA] or [PLAYBACK] >> [USB FUNCTION] >> [DV STUDIO]. 3 Connect the Camcorder to the Personal Computer with auxiliary USB Connection Cable. 4 Select [Start] >> [All Programs (Programs)] >> [Panasonic] >> [DV Studio3] >> [DV Studio3]. 3 Click [Next]. ≥After reading the displayed contents, please carry out the installation according to instructions. 4 After the completion of setup, click on [Finish]. ≥If a shortcut icon was created on the desktop during installation, it is also possible to start by double-clicking on the icon. Using the G.726 Audio Decoder G.726 Audio Decoder allows you to listen to MPEG4° sound with Windows Media Player. Install it from enclosed CD-ROM. In order for the G.726 Audio Decoder to be installed, the hard disk must have at least 16 MB of free space. Before proceeding with installation, check the amount of free space on the hard disk. °MPEG4 moving picture files can be recorded by PV-GS200 only. -61-
-
 1
1 -
2
-
3
-
4
-
5
-
6
-
7
-
8
-
9
-
10
-
11
-
12
-
13
-
14
-
15
-
16
-
17
-
18
-
19
-
20
-
21
-
22
-
23
-
24
-
25
-
26
-
27
-
28
-
29
-
30
-
31
-
32
-
33
-
34
-
35
-
36
-
37
-
38
-
39
-
40
-
41
-
42
-
43
-
44
-
45
-
46
-
47
-
48
-
49
-
50
-
51
-
52
-
53
-
54
-
55
-
 56
56 -
 57
57 -
 58
58 -
 59
59 -
 60
60 -
 61
61 -
 62
62 -
 63
63 -
 64
64 -
 65
65 -
 66
66 -
67
-
68
-
69
-
70
-
71
-
72
-
73
-
74
-
75
-
76
-
77
-
78
-
79
-
80
-
81
-
82
-
83
-
84
-
85
-
86
-
87
-
88
-
89
-
90
-
91
-
92
-
93
-
94
-
95
-
96
-
97
-
98
-
99
-
100
-
101
-
102
-
103
-
104
-
105
-
106
-
107
-
108
-
109
-
110
-
111
-
112
-
113
-
114
-
115
-
116
-
117
-
118
-
119
-
120
-
121
-
122
-
123
-
124
-
125
-
126
-
127
-
128
-
129
-
130
-
131
-
132
-
133
-
134
-
135
-
136
-
137
-
138
-
139
-
140
-
141
-
142
-
143
-
144
-
145
-
146
-
147
-
148
-
149
-
150
-
151
-
152
-
153
-
154
-
155
-
156
-
157
-
158
-
159
-
160
-
161
-
162
-
163
-
164
-
165
-
166
-
167
-
168
-
169
-
170
-
171
-
172
-
173
-
174
-
175
-
176
-
177
-
178
-
179
-
180
-
181
-
182
-
183
-
184
-
185
-
186
-
187
-
188
-
189
-
190
-
191
-
192
-
193
-
194
-
195
-
196
 |
 |