Panasonic SAPT480 SAPT480 User Guide - Page 8
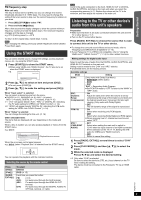
Listening to the radio
 |
View all Panasonic SAPT480 manuals
Add to My Manuals
Save this manual to your list of manuals |
Page 8 highlights
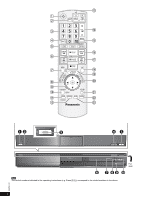
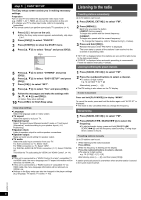
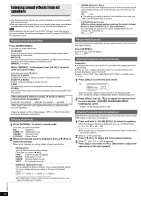
step 5 EASY SETUP The Easy setup screen assists you in making necessary settings. Preparation Turn on your TV and select the appropriate video input mode (e.g. VIDEO 1, AV 1, HDMI, etc.) to suit the connection to this unit. ≥ To change your TV's video input mode, refer to its operating instructions. ≥ This remote control can perform some basic TV operations (B 4). 1 Press [Í]1 to turn on the unit. ≥ When the Easy setup screen appears automatically, skip steps 2 to 7. 2 Press [DVD]5 to select "DVD/CD". 3 Press [START]C to show the START menu. 4 Press [3, 4]9 to select "Setup" and press [OK]9. Menu MAIN DISC VIDEO AUDIO DISPLAY HDMI OTHERS SET RETURN 5 Press [3, 4]9 to select "OTHERS" and press [OK]9. 6 Press [3, 4]9 to select "EASY SETUP" and press [OK]9. 7 Press [OK]9 to select "SET". 8 Press [3, 4]9 to select "Yes" and press [OK]9. 9 Follow the messages and make the settings with [3, 4, 2, 1]9 and [OK]9. (B below, Easy setup settings) 10 Press [OK]9 to finish Easy setup. Easy setup settings ≥Language Select the language used on menu screen. ≥TV aspect Select the aspect to suit your TV. ≥Speaker layout Select "Surround layout (Recommended)" mode or "Front layout (Alternative)" mode according to your speaker layout (B 6, Positioning). ≥Speaker check Listen to speaker output to confirm speaker connections. ≥Speaker output Make surround sound setting for speaker output. ≥TV audio Select the audio input connection from your TV. For AUX connection (B 7): Select "AUX". For HDMI connection (B 7): Select "ARC". For DIGITAL AUDIO IN OPTICAL connection (B 7): Select "DIGITAL IN". This will be the TV audio setting for VIERA Link "HDAVI Control". (B 14) [Note] ≥ If this unit is connected to a "HDAVI Control 3 or later" compatible TV via HDMI cable, the menu language and TV aspect information will be retrieved via VIERA Link. ≥ If this unit is connected to a "HDAVI Control 2" compatible TV via HDMI cable, the menu language information will be retrieved via VIERA Link. ≥ Settings in the Easy setup can also be changed in the player settings [e.g. language, TV aspect, TV audio (B 16)]. Listening to the radio Presetting stations automatically Up to 30 stations can be set. 1 Press [RADIO, EXT-IN]5 to select "FM". 2 Press [MENU]7. Each time you press the button: LOWEST (factory preset): To begin auto preset with the lowest frequency. CURRENT: To begin auto preset with the current frequency.§ § To change the frequency, refer to "Manual tuning" (B below). 3 Press and hold [OK]9. Release the button when "FM AUTO" is displayed. The tuner starts to preset all the stations it can receive into the channels in ascending order. ≥ "SET OK" is displayed when the stations are set, and the radio tunes to the last preset station. ≥ "ERROR" is displayed when automatic presetting is unsuccessful. Preset the stations manually (B below). Listening/confirming the preset channels 1 Press [RADIO, EXT-IN]5 to select "FM". 2 Press the numbered buttons to select a channel. ≥ To select a 2-digit number e.g. 12: [S10]3 B [1] B [2] Alternatively, press [X, W]A. ≥ The FM setting is also shown on the TV display. If noise is excessive Press and hold [PLAY MODE]: to display "MONO". To cancel the mode, press and hold the button again until "AUTO ST" is displayed. ≥ The mode is also cancelled when you change the frequency. Manual tuning 1 Press [RADIO, EXT-IN]5 to select "FM". 2 Press [SEARCH6, SEARCH5]@ to select the frequency. ≥ To start automatic tuning, press and hold [SEARCH6, SEARCH5]@ until the frequency starts scrolling. Tuning stops when a station is found. Presetting stations manually Up to 30 stations can be set. 1 While listening to the radio broadcast Press [OK]9. 2 While the frequency is flashing on the display Press the numbered buttons to select a channel. ≥ To select a 2-digit number e.g. 12: [S10]3 B [1] B [2] Alternatively, press [X, W]A, and then press [OK]9. A station previously stored is overwritten when another station is stored in the same channel preset. RQTX1101 8
-
 1
1 -
2
-
 3
3 -
 4
4 -
 5
5 -
 6
6 -
 7
7 -
 8
8 -
 9
9 -
 10
10 -
 11
11 -
 12
12 -
 13
13 -
14
-
15
-
16
-
17
-
18
-
19
-
20
-
21
-
22
-
23
-
24
-
25
-
26
 |
 |