Panasonic SDR H200 Sd/hdd Video Camcorder - Page 90
Disk] SD card in [Source]., Click [Playback/Import Video].
 |
UPC - 037988980345
View all Panasonic SDR H200 manuals
Add to My Manuals
Save this manual to your list of manuals |
Page 90 highlights
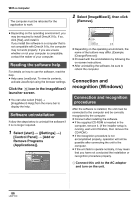
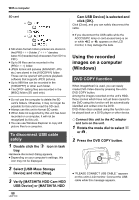
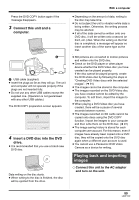
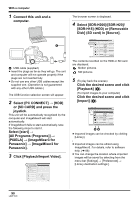
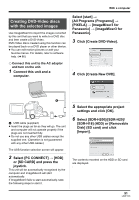
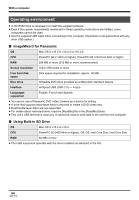
With a computer 1 Connect this unit and a computer. A The browser screen is displayed. 4 Select [SDR-H200]/[SDR-H20]/ [SDR-H18] (HDD) or [Removable Disk] (SD card) in [Source]. A USB cable (supplied) ≥ Insert the plugs as far as they will go. The unit and computer will not operate properly if the plugs are not inserted fully. ≥ Do not use any other USB cables except the supplied one. (Operation is not guaranteed with any other USB cables.) The USB function selection screen will appear. 2 Select [PC CONNECT] # [HDD] or [SD CARD] and press the joystick. This unit will be automatically recognized by the computer and ImageMixer3 will start automatically. If ImageMixer3 fails to start automatically, take the following steps to start it. Select [start] # [All Programs (Programs)] # [PIXELA] # [ImageMixer3 for Panasonic] # [ImageMixer3 for Panasonic]. 3 Click [Playback/Import Video]. The contents recorded on the HDD or SD card are displayed. Motion pictures Still pictures 5 (To play back the scenes) Click the desired scene and click [Playback] (A). (To import images to your computer) Click the desired scene and click [Import] (B). AB ≥ Imported images can be checked by clicking [Library]. ≥ Imported images can be edited using ImageMixer3. For details, refer to software help. (l 86) ≥ You can change the location where imported images will be saved by selecting from the menu bar [Settings] # [Preferences] # [Library destination settings:]. 90 LSQT1190
-
 1
1 -
2
-
3
-
4
-
5
-
6
-
7
-
8
-
9
-
10
-
11
-
12
-
13
-
14
-
15
-
16
-
17
-
18
-
19
-
20
-
21
-
22
-
23
-
24
-
25
-
26
-
27
-
28
-
29
-
30
-
31
-
32
-
33
-
34
-
35
-
36
-
37
-
38
-
39
-
40
-
41
-
42
-
43
-
44
-
45
-
46
-
47
-
48
-
49
-
50
-
51
-
52
-
53
-
54
-
55
-
56
-
57
-
58
-
59
-
60
-
61
-
62
-
63
-
64
-
65
-
66
-
67
-
68
-
69
-
70
-
71
-
72
-
73
-
74
-
75
-
76
-
77
-
78
-
79
-
80
-
81
-
82
-
83
-
84
-
 85
85 -
 86
86 -
 87
87 -
 88
88 -
 89
89 -
 90
90 -
 91
91 -
 92
92 -
 93
93 -
 94
94 -
 95
95 -
96
-
97
-
98
-
99
-
100
-
101
-
102
-
103
-
104
-
105
-
106
-
107
-
108
-
109
-
110
-
111
-
112
-
113
-
114
-
115
-
116
-
117
-
118
-
119
-
120
-
121
-
122
-
123
-
124
-
125
-
126
-
127
-
128
-
129
-
130
-
131
-
132
-
133
-
134
-
135
-
136
-
137
-
138
-
139
-
140
-
141
-
142
-
143
-
144
 |
 |
