Panasonic TH-L32C10 User Manual
Panasonic TH-L32C10 Manual
 |
View all Panasonic TH-L32C10 manuals
Add to My Manuals
Save this manual to your list of manuals |
Panasonic TH-L32C10 manual content summary:
- Panasonic TH-L32C10 | User Manual - Page 1
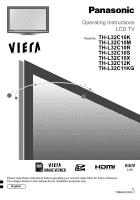
Operating Instructions LCD TV Model No. TH-L32C10K TH-L32C10M TH-L32C10R TH-L32C10S TH-L32C10X TH-L32C12K TH-L32C11KG Please read these instructions before operating your set and retain them for future reference. The images shown in this manual are for illustrative purposes only. English TL - Panasonic TH-L32C10 | User Manual - Page 2
Turn your own living room into a movie theatre! Experience an amazing level of multi- Sharp pictures with HDMI terminal Create home theatre and DVD recorder link-ups with "VIERA Link" without complicated settings! 2 - Panasonic TH-L32C10 | User Manual - Page 3
Restore Settings 28 Displaying PC Screen on TV 29 Viewing from SD Card (VIERA IMAGE VIEWER 30 VIERA Link "HDAVI Control 32 VIERA Tools 39 External Equipment 40 Technical Features Technical Information 42 FAQs 47 Licence 49 Specifications 50 3 Technical Advanced Basic Quick Start Guide - Panasonic TH-L32C10 | User Manual - Page 4
TH-L32C10R only: AC Single 220-240 V, 50/60 Hz) Mains plug types vary between countries. Power Source This TV is designed to operate on AC AUTO 110-240 V, 50/60 Hz. (TH-L32C10R other fixtures may make the TV unstable, risking injury. Be sure to ask your local Panasonic dealer to perform setup. Use - Panasonic TH-L32C10 | User Manual - Page 5
equipment near the TV. Electromagnetic interference may distort images / sound. Equipment with an infrared sensor This TV also emits infrared the space between the bottom of the TV and the surface where the TV is set. In case of using Wall-hanging bracket, follow the manual of it. Do not block the - Panasonic TH-L32C10 | User Manual - Page 6
M4 Cleaning cloth (Not applicable for TH-L32C11KG) Pedestal hole cover sheet Operating Instructions Caution This product contains possibly dangerous parts the wallhanging bracket installation manual. WARNING! Failure to use a Panasonic bracket or choosing to mount the TV yourself will be done - Panasonic TH-L32C10 | User Manual - Page 7
may result. Contact your nearest Panasonic Dealer immediately. During set-up, make sure that all screws are securely tightened. If sufficient care is not taken to ensure screws are properly tightened during assembly, the pedestal will not be strong enough to support the TV, and it might fall over - Panasonic TH-L32C10 | User Manual - Page 8
sound mute On or Off Volume Up / Down POWER INPUT PC TV AV MENU SURROUND OFF TIMER ASPECT EXIT k VIERA TOOLS S VIERA Lin D CARD OK OPTION RETURN R G Y B TEXT F.P. Information (p. 12) Channel Up / Down Selects channel in sequence VCR / DVD Panasonic equipment operations (p. 17) 8 - Panasonic TH-L32C10 | User Manual - Page 9
R AUDIO COMPONENT AV 2 IN RF cable TV, DVD Recorder or VCR AC AUTO 110-240 V, 50/60 Hz (TH-L32C10R only: AC Single 220-240 V, 50/60 the wall Aerial socket and the TV. Your local Television Service Centre or dealer may be able to VIERA Link connection p. 33 Read the manual of the equipment too. 9 - Panasonic TH-L32C10 | User Manual - Page 10
mistake Return to the "Home" or "Shop" Selection menu Select "Home" Automatic Demo Off On Once you press the OK button in this menu, the TV is set to Shop mode. Please reset all settings to set to "Home" mode. "Shipping Condition" (p. 28) Please select your viewing environment. Home Shop - Panasonic TH-L32C10 | User Manual - Page 11
Quick Start Guide Auto Tuning Language Setting Using the On-Screen Displays Many features available on this TV can be accessed via the On-Screen Display menu. ON-SCREEN HELP Instructions box (example: Sound Menu) Sound Menu Mode Bass Treble Balance Surround Volume Correction Speaker Distance to - Panasonic TH-L32C10 | User Manual - Page 12
select the two-digit channel number, e.g. 39 (in a short time) If one or two-digit channel number quickly changes the channel Note When the TV is switched to standby, there will be a clicking sound after a short delay. This is normal. Other useful functions Hold Freeze / unfreeze picture Display - Panasonic TH-L32C10 | User Manual - Page 13
fullscreen without distortion. 14:9 4:3 Full Zoom3 Just Displays the image at the standard "14:9" without distortion. Displays a "4:3" image enlarged horizontally to fit the screen. HD signal only Zoom1 Displays a "4:3" image full-screen. Stretching is only noticeable at the left and right - Panasonic TH-L32C10 | User Manual - Page 14
the colour bar) To adjust contrast (Press three times) To return to TV As the blue bar is displayed or What is FASTEXT mode? In a particular improvement of the standard teletext service that results in an easier search and effective guide. Fast overview of the teletext information available - Panasonic TH-L32C10 | User Manual - Page 15
page stored in "blue". Factory setting is "P103". View in multiwindow Watch TV and Teletext in two windows at once Operations can be made only in Teletext more than one page) Appears at top of the screen Basic To view specific sub page example: P6 Enter the 4-digit number T0006 Sub pages: - Panasonic TH-L32C10 | User Manual - Page 16
can operate some functions of selected Panasonic external equipment with this remote control. AV2 PC HDMI1 *2 HDMI2 1 select TV *2) For TH-L32C12K only: "HDMI1" will be displayed TV Note If the external equipment has an aspect adjustment function, set to "16:9". For details, see the manual - Panasonic TH-L32C10 | User Manual - Page 17
Watching Videos and DVDs Panasonic equipment connected to the TV can be directly operated with the remote control. Standby Set equipment DVD Recorder / DVD Player Player theatre / Blu-ray Disc theatre VCR VIERA Link compatible equipment "VIERA Link Control" (p. 37) Code 70 (default) 71 72 73 Note - Panasonic TH-L32C10 | User Manual - Page 18
Channel Colour Set Colour Management Normal Normal On (example) 1/2 90 0 50 50 0 0 1 change 2 store or access (Required by some functions) (example) To return to TV at any time To return to the previous screen To change menu pages up down 18 Choose from among alternatives To reset the settings - Panasonic TH-L32C10 | User Manual - Page 19
Tuning Menu Channel List Edit Auto Tuning Manual Tuning OSD Language Access Access Access (p. 21 English Access 3 seconds On VIERA Link Settings VIERA Link On Power on Link received signals, available items are varied. *3) For TH-L32C12K only : "HDMI1 Input" will be displayed as "HDMI - Panasonic TH-L32C10 | User Manual - Page 20
: Recommended when the back space between the TV and wall is within 30 cm MPX Select stereo / monaural (Mono / Stereo) (p. 43) Normally : Stereo Stereo signal cannot be received : Mono M1/M2 : Available while mono signal is transmitted HDMI1 Input (For TH-L32C12K only : HDMI Input) Select to fit - Panasonic TH-L32C10 | User Manual - Page 21
to AV2 component or HDMI1 / HDMI2 terminals (for TH-L32C12K, only HDMI1 terminal is available). Select SD or HD to adjust suitable colour parameters for SD (standard definition) or HD (high definition) SD: Input signal is a normal TV system HD: Input signal is a high definition system Other - Panasonic TH-L32C10 | User Manual - Page 22
To return to TV 3 Select "Display Settings" Setup Menu Off Timer Child Lock Tuning Menu OSD Language Display Settings VIERA Link Settings System AV1 AV2 AV2 PC PC HDMI1 HDMI1 *2 HDMI2 HDMI2 2 set 1 select *2) For TH-L32C12K only: "HDMI1" will be displayed as "HDMI" and "HDMI2" is not - Panasonic TH-L32C10 | User Manual - Page 23
Control Channel Audience You can lock specific channels / AV input terminals and control who watches them. Menu OSD Language Display Settings VIERA Link Settings System Menu Other Settings Off Access 2 access 1 select 2 access 1 select 4 Set To return to TV Control channel audience Child Lock - Panasonic TH-L32C10 | User Manual - Page 24
the menu 2 Select "Setup" Main Menu Picture Sound Setup 3 Select "Tuning Menu" Setup Menu Off Timer Child Lock Tuning Menu OSD Language Display Settings VIERA Link Settings System Menu Other Settings Off Access 4 Select "Channel List Edit" Tuning Menu Channel List Edit Auto Tuning - Panasonic TH-L32C10 | User Manual - Page 25
:delete (skip) You can edit channels. If a VCR is connected only with the RF cable, edit "VCR". To retune each channel (Manual Tuning) (p. 27) 1 Select a channel to edit Channel List Editor 1 BBC1 2 ***** 3 ***** 4 ***** 5 ***** 6 ***** 7 ***** or select Page up Page down 2 Edit To change the - Panasonic TH-L32C10 | User Manual - Page 26
Menu Off Timer Child Lock Tuning Menu OSD Language Display Settings VIERA Link Settings System Menu Other Settings Off Access 4 Select a function Tuning Menu Channel List Edit Auto Tuning Manual Tuning Access 5 Set To return to TV 2 access 1 select 2 access 1 select 2 access 1 select 26 - Panasonic TH-L32C10 | User Manual - Page 27
Tuning" For Auto Tuning, using the buttons on the side panel of the TV (p. 7) 1 Press repeatedly until "Auto Tuning" appears 2 Access "Auto Tuning" 3 Start "Auto Tuning" To return to TV Set channel manually Manual Tuning Fine Tuning Use to make small adjustments to the tuning of an individual - Panasonic TH-L32C10 | User Manual - Page 28
.) are reset. 1 Display the menu To return to TV 2 Select "Setup" Main Menu Picture Sound Setup 3 Tuning Menu OSD Language Display Settings VIERA Link Settings System Menu Other Settings EXIT RETURN 2 Follow the on-screen instructions "Auto Tuning" will automatically start when Mains power On / - Panasonic TH-L32C10 | User Manual - Page 29
see the table below Restore Settings Displaying PC Screen on TV Advanced To return to TV PC menu setting (changed as desired) Menu Item freq." or "V-freq." is shown in red, the signals may not be supported. Set to the minimum level if noise occurs Adjusts horizontal position H-pos Setup - Panasonic TH-L32C10 | User Manual - Page 30
Viewing from SD Card (VIERA IMAGE VIEWER) Photo View: Still images recorded by digital cameras will be displayed. To return to TV or 30 Single view Rotate Prev EXIT Select List Rotate Slideshow Operation guide Displayed one at a time To display / hide the operation guide (Single view) - Panasonic TH-L32C10 | User Manual - Page 31
Viewing from SD Card (VIERA IMAGE VIEWER) Start Slideshow (operate in step 4 ) Select the photo for the first view Slideshow Start Slideshow To pause Note Slideshow is done within the thumbnail. - Panasonic TH-L32C10 | User Manual - Page 32
VIERA Link " Control™" Enjoy additional HDMI interoperability with Panasonic products which have "HDAVI Control" function. This TV supports "HDAVI Control 4" function. Connections to the equipment (DIGA Recorder, HD Video Camera, Player theatre, Amplifier, etc.) with HDMI cable allow you to - Panasonic TH-L32C10 | User Manual - Page 33
ray Disc Player / HD Video Camera / LUMIX Camera with VIERA function, connect to HDMI1 or HDMI2 terminal (for TH-L32C12K, only HDMI1 cable for audio output from the TV. Use fully wired HDMI compliant cable. Non-HDMI-compliant cables cannot be utilized. Recommended Panasonic's HDMI cable part number: - Panasonic TH-L32C10 | User Manual - Page 34
manual of the recorder. Set VIERA Link On in Setup Menu "VIERA Link Settings" "VIERA Link" (p. 21) Set up the TV After connection, turn the equipment on and then switch the TV on. Select the input mode to HDMI1 or HDMI2 (for TH-L32C12K, only HDMI1 is available) (p. 16), and make sure that an image - Panasonic TH-L32C10 | User Manual - Page 35
operate, check the settings and the equipment "VIERA Link features and connections" (p. 32 - 33) 1 Display "VIERA Link Menu" 2 Select "Direct TV Rec" and start recording VIERA Link Menu Pause Live TV Direct TV Rec SVpIEeRaAkeLr iSnkelCecotniotrnol Speaker Selection Start Start HRoemcoerdCeirnema - Panasonic TH-L32C10 | User Manual - Page 36
, check the settings and the equipment "VIERA Link features and connections" (p. 32 - 33) Access and pause the live TV programme 1 Display "VIERA Link Menu" 2 Select "Pause Live TV" and pause VIERA Link Menu Pause Live TV Direct TV Rec SVpIEeRaAkeLr iSnkelCecotniotrnol Speaker Selection Start - Panasonic TH-L32C10 | User Manual - Page 37
"VIERA Link features and connections" (p. 32 - 33) For details of the operations for the connected equipment, read the manual of the equipment. Access and operate the menu of the equipment 1 Display "VIERA Link Menu" 2 Select "VIERA Link Control" VIERA Link Menu Pause Live TV Start Direct TV - Panasonic TH-L32C10 | User Manual - Page 38
VIERA Link features and connections" (p. 32 - 33) Access and control the speaker volume 1 Display "VIERA Link Menu" 2 Select "Speaker Selection" VIERA Link Menu Pause Live TV Direct TV depending on the connected equipment. Image or sound may not be or Amplifier. Read the manual of the equipment. " - Panasonic TH-L32C10 | User Manual - Page 39
37) The connected device can be operated with the VIERA remote control. When multiple devices are connected, an VIERA Link Control indicator appears below the icon so that one device can be selected. Pause Live TV Pause Live TV (p. 36) A live TV programme can be paused and resumed later. Direct - Panasonic TH-L32C10 | User Manual - Page 40
the TV to your various equipment. For other connections, consult the instructions for each piece of equipment, the table below, and the specifications (p. (VCR / DVD recorder) To watch DVDs (DVD player) To watch camcorder images (Video camera) To watch satellite broadcasts (Set top box) To play games - Panasonic TH-L32C10 | User Manual - Page 41
- 9 10 TMDS Clock+ 7 8 TMDS Data0 Shield 5 6 TMDS Data1- 3 4 TMDS Data1+ 1 2 TMDS Data2 Shield Connect the COMPONENT or VIDEO terminal when using AV2 IN terminals. *4) For TH-L32C12K, only HDMI1 terminal is available. 41 - Panasonic TH-L32C10 | User Manual - Page 42
- 69 - 69 69 69 69 31 69 69 69 70 - - - - - 32 - - - - - - - - - - - 73 - - - - - - - - 74 - S'1 S'1 S'1 S'1 S'1 S'1 - 75 - S'2 S'2 S'2 - - S'2 - 76 - S'3 S'3 S'3 - - S'3 - 77 - - - - - - - - 78 - - - - - - - - 79 - Panasonic TH-L32C10 | User Manual - Page 43
Stereo / Bilingual Sound Selection When you receive the stereo / bilingual sound system, sound output modes can be selected by pressing the Stereo / Bilingual Sound Selection button. Audio Signal STEREO MAIN SUB MONO Mode Indicator NICAM .......Used in New Zealand, Singapore, Hong Kong etc. - Panasonic TH-L32C10 | User Manual - Page 44
the TV. (Panasonic is not liable for any deterioration or damage of recorded data.) Data format for Card browsing Photo : Still images The TV does not support the format. (For the applicable formats and data, see above.) Please confirm the SD card is OK The inserted SD card has a problem. - Panasonic TH-L32C10 | User Manual - Page 45
allows you to enjoy high-definition digital images and highquality sound by connecting the TV and the equipment. HDMI-compatible equipment 48 kHz, 44.1 kHz, 32 kHz HDMI2 terminal is for digital audio signal only and is not available for TH-L32C12K. Use with a connected) HD VD NC (not connected) 45 - Panasonic TH-L32C10 | User Manual - Page 46
.02 68.68 63.98 47.70 48.39 35.00 49.73 68.68 Vertical frequency (Hz) 70.07 59.94 75.00 60.32 75.00 85.06 59.89 60.00 70.07 75.03 85.00 60.02 60.00 60.04 66.67 74.55 75 - Panasonic TH-L32C10 | User Manual - Page 47
FAQs Before requesting service or assistance, please follow these simple guides to resolve the problem. If problem still persists, please contact your local Panasonic dealer for assistance. White spots or shadow images (noise) Check the position, direction, and connection of the aerial. The main - Panasonic TH-L32C10 | User Manual - Page 48
Set the sound setting of the connected equipment to "2ch L.PCM". Check the "HDMI1 Input" (or "HDMI Input" for TH-L32C12K) setting in the Sound Menu. (p. 20) If digital sound connection has a problem, select analogue sound connection. (p. 43) Is the HDMI cable connected properly? (p. 45) Turn Off the - Panasonic TH-L32C10 | User Manual - Page 49
, the HDMI Logo and High-Definition Multimedia Interface are trademarks or registered trademarks of HDMI Licensing LLC. HDAVI Control™ is a trademark of Panasonic Corporation. SDHC Logo is a trademark. Even if no special notation has been made of company or product trademarks, these trademarks have - Panasonic TH-L32C10 | User Manual - Page 50
TV supports "HDAVI Control 4" function. HDMI2 is not available for TH-L32C12K. HIGH-DENSITY D-SUB 15PIN R, G, B/0.7 V[p-p] (75 ) HD, mm (TV only) 13.5 kg Net (With Pedestal) 11.5 kg Net (TV only) Note Design and Specifications are subject to change without notice. Weight and Dimensions shown are - Panasonic TH-L32C10 | User Manual - Page 51
Memo 51 Technical Specifications - Panasonic TH-L32C10 | User Manual - Page 52
book, plus your purchase receipt, as a permanent record of your purchase to aid in identification in the event of theft or loss, and for Warranty Service purposes. Model Number Serial Number Web Site: http://panasonic.net/ © Panasonic Corporation 2009 Printed in Malaysia
-
 1
1 -
 2
2 -
 3
3 -
 4
4 -
 5
5 -
 6
6 -
 7
7 -
8
-
9
-
10
-
11
-
12
-
13
-
14
-
15
-
16
-
17
-
18
-
19
-
20
-
21
-
22
-
23
-
24
-
25
-
26
-
27
-
28
-
29
-
30
-
31
-
32
-
33
-
34
-
35
-
36
-
37
-
38
-
39
-
40
-
41
-
42
-
43
-
44
-
45
-
46
-
47
-
48
-
49
-
50
-
51
-
52
 |
 |

TL
TQB4GC0300-1
Please read these instructions before operating your set and retain them for future reference.
The images shown in this manual are for illustrative purposes only.
English
Model No.
TH-L32C10K
TH-L32C10M
TH-L32C10R
TH-L32C10S
TH-L32C10X
TH-L32C12K
TH-L32C11KG
Operating Instructions
LCD TV