Panasonic WJ-NV300 Quick Start Guide - Page 1
Panasonic WJ-NV300 Manual
 |
View all Panasonic WJ-NV300 manuals
Add to My Manuals
Save this manual to your list of manuals |
Page 1 highlights
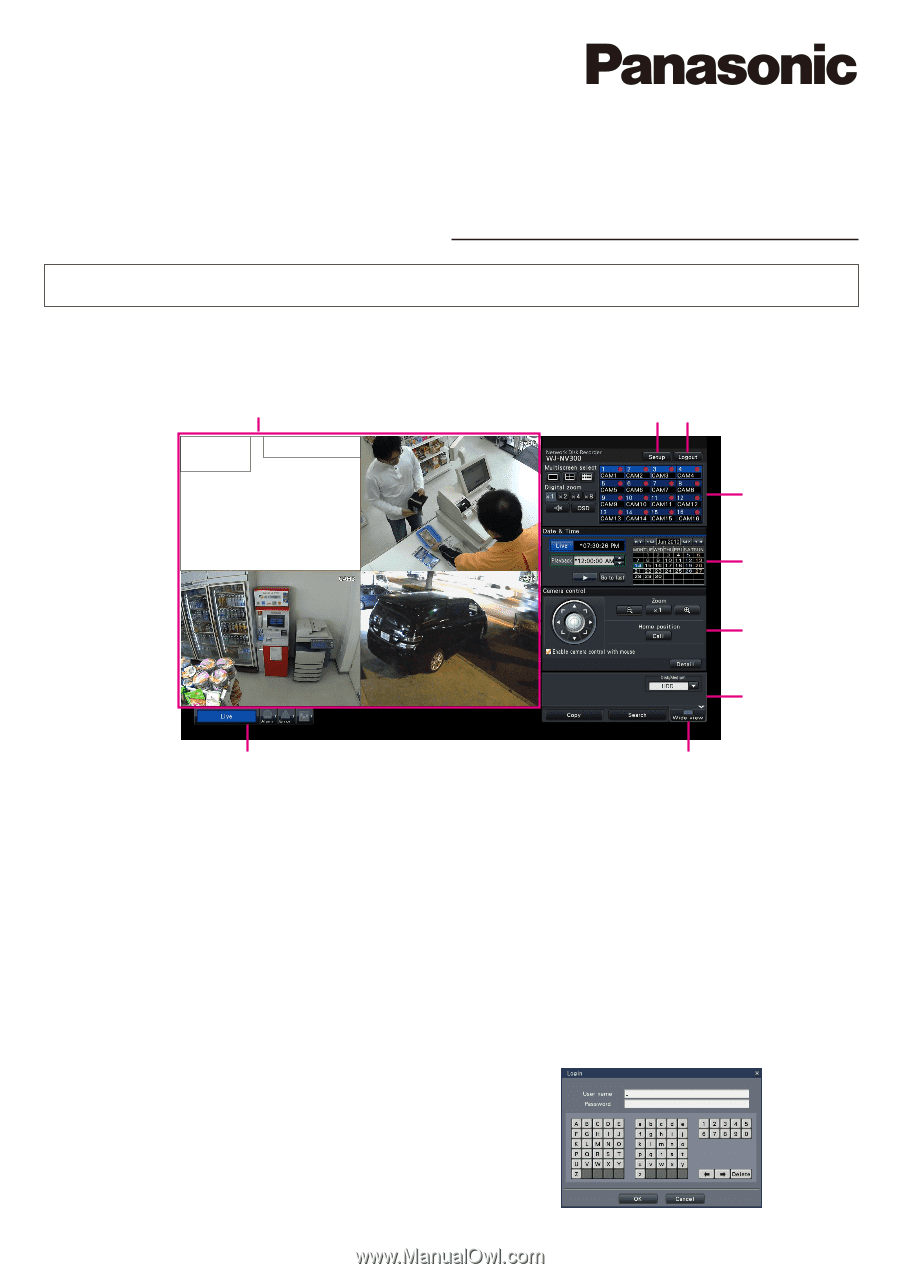
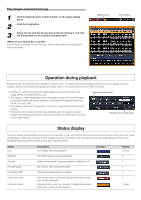
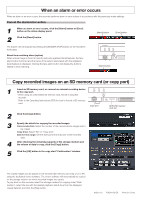
Network Disk Recorder Model No. WJ-NV300K, WJ-NV300K/G Quick Reference Guide Perform Basic Operations on the Screen The recorder is operated with the mouse (accessory) connected to the front of the recorder. To perform operations, either click buttons on the operation window displayed on the main monitor or turn the mouse wheel. Image display area Date & time display Camera title qw e r t y i u q [Setup] button Displays the setup menu. The login window will be displayed for users who are not authorized to perform the operation. w [Logout] button It is possible to log out from the recorder from this menu. To prevent operation by unauthorized persons, it is recommended to log out before leaving the recorder unattended. e Operation panel ☞ "Select a camera and switch images" r Date & time operation panel ☞ "Play image recorded at a designated date & time" t Camera control panel Contains the buttons for operating cameras with the panning/ tilting function. These allow panning/tilting and zooming of the camera, moving the camera to a preset position, and adjusting the focus and brightness. y Playback operation panel (While live images are being displayed) Selects the storage media from which to play back copied image data. This panel is also used to perform playback of images. (☞ "Operation during playback") u [Wide view] button Camera images will be displayed in wide view on a multiscreen (3-/6-/9-/16-screen). While images are being displayed on a full screen, u will be changed to the [Ctrl screen] button. For playback or camera operations, click the [Ctrl screen] button to return to this screen. i Status display panel ☞ "Status display" ☞ "When an alarm or error occurs" How to log in During logout, w becomes the [Login] button. When the login window is displayed, enter the user name and password.
-
 1
1 -
 2
2 -
 3
3 -
 4
4
 |
 |