Panasonic WJ-PR204 Operating Instructions - Page 36
Screw body diameter 2.6, mm {3/8 inches}: included, parts of camera side unit, BNC connector cover
 |
View all Panasonic WJ-PR204 manuals
Add to My Manuals
Save this manual to your list of manuals |
Page 36 highlights
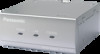
4 Connecting the Unit 3. Secure the BNC connector cover using the screw (included parts of camera side unit) to the camera side unit. (Recommended torque 0.6±0.2 N·m {6±2 kgf·cm}) Screw (body diameter 2.6×10 mm {3/8 inches}: included parts of camera side unit) BNC connector cover (Included parts of camera side unit) 4. First pass the coaxial cable through the included BNC connector cover (accessory), then connect the coaxial cable to the BNC connector of the receiver side unit. • When connecting 2 or more coaxial cables to the 4-channel receiver side unit, remove the BNC connector cover caps (accessory) and pass the coaxial cables through the BNC connector cover. • When passing the coaxial cables through the BNC connector cover as shown in the figure (next page) and connecting the cables to the BNC connector terminals of the receiver side unit, make sure that the coaxial cables are inserted straight into the BNC connector cover so that they do not become crossed inside the cover. Note • • The BNC connector cover cap (accessory) of the BNC connector cover (accessory) are shipped from the factory in such a way that the cables are connected to ch2, ch3, and ch4 terminals. When removing the BNC connector cover cap (accessory), rotate it slightly to the left. 36 Operating Instructions
-
 1
1 -
2
-
3
-
4
-
5
-
6
-
7
-
8
-
9
-
10
-
11
-
12
-
13
-
14
-
15
-
16
-
17
-
18
-
19
-
20
-
21
-
22
-
23
-
24
-
25
-
26
-
27
-
28
-
29
-
30
-
 31
31 -
 32
32 -
 33
33 -
 34
34 -
 35
35 -
 36
36 -
 37
37 -
 38
38 -
 39
39 -
 40
40 -
 41
41 -
42
-
43
-
44
-
45
-
46
-
47
-
48
-
49
-
50
-
51
-
52
-
53
-
54
-
55
-
56
-
57
-
58
-
59
-
60
 |
 |
