Panasonic fv08vsl1 Installation Instructions - Page 13
non-abrasive
 |
View all Panasonic fv08vsl1 manuals
Add to My Manuals
Save this manual to your list of manuals |
Page 13 highlights
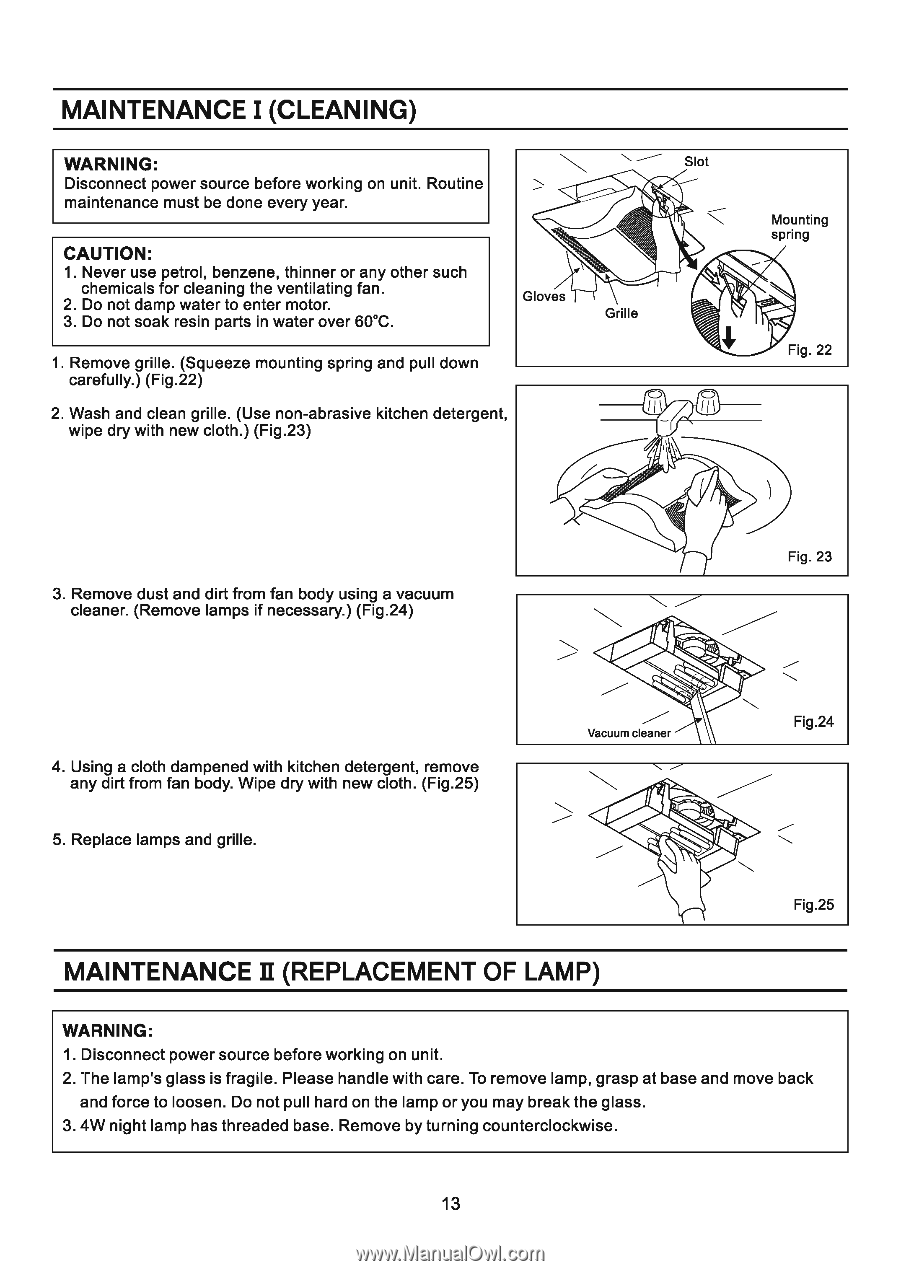
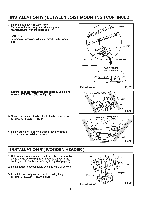
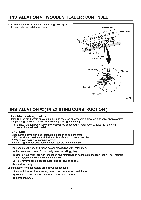
MAINTENANCE I (CLEANING) WARNING: Disconnect power source before working on unit. Routine maintenance must be done every year. ---- Slot CAUTION: 1. Never use petrol, benzene, thinner or any other such chemicals for cleaning the ventilating fan. 2. Do not damp water to enter motor. 3. Do not soak resin parts in water over 60°C. Gloves 1. Remove grille. (Squeeze mounting spring and pull down carefully.) (Fig.22) 2. Wash and clean grille. (Use non-abrasive kitchen detergent, wipe dry with new cloth.) (Fig.23) Grille Mounting spring Fig. 22 3. Remove dust and dirt from fan body using a vacuum cleaner. (Remove lamps if necessary.) (Fig.24) Fig. 23 4. Using a cloth dampened with kitchen detergent, remove any dirt from fan body. Wipe dry with new cloth. (Fig.25) 5. Replace lamps and grille. -/' Vacuum cleaner N .----- Fig.24 Fig.25 MAINTENANCE II (REPLACEMENT OF LAMP) WARNING: 1. Disconnect power source before working on unit. 2. The lamp's glass is fragile. Please handle with care. To remove lamp, grasp at base and move back and force to loosen. Do not pull hard on the lamp or you may break the glass. 3. 4W night lamp has threaded base. Remove by turning counterclockwise. 13
-
 1
1 -
2
-
3
-
4
-
5
-
6
-
7
-
 8
8 -
 9
9 -
 10
10 -
 11
11 -
 12
12 -
 13
13 -
 14
14
 |
 |