Panasonic ub5315 Assembly Instructions - Page 9
Assembling, Electronic, Board, izzrs
 |
View all Panasonic ub5315 manuals
Add to My Manuals
Save this manual to your list of manuals |
Page 9 highlights
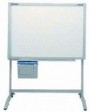
22 Attach the cover (lower). O Push the cover in the direction of the arrow until it clicks. O Fix the cover with the wing bolt. 0 Assembling the Electronic Board 24 Attach the rear cover. (only for use of the optional stand) Ck- Adhesive tape ® A (UB-5815 only) ©I 23 Attach the power cord. Securely fit the supplied power cord into the AC inlet on the printer unit. AC inlet cz:zizzrs, Power cord Rivets 940 • After peeling off the cover sheets of the adhesive tapes, attach the rear cover to the board attachments (upper/lower) while matching the top edges of them. Then install the rivets • The rear cover and rivets are supplied with the optional stand. 25 Wipe the screen film surface. Soak a soft cloth with water, wring well, and wipe the screen film surface. Installation Manual Caution • The power cord should be held in the cord holder. Cord holder Caution • Do not wipe the screen film surface with paint thinner, benzene, or cleaners that contain abrasives. Doing so may cause discoloration. • Do not wipe the screen film surface with a dry cloth. Doing so may create static electricity. 26 Check the operations. Refer to "Electronic Board Operations Check" on page 46. 45
-
 1
1 -
2
-
3
-
 4
4 -
 5
5 -
 6
6 -
 7
7 -
 8
8 -
 9
9 -
 10
10 -
 11
11 -
 12
12 -
 13
13 -
 14
14 -
15
-
16
-
17
-
18
-
19
-
20
 |
 |
