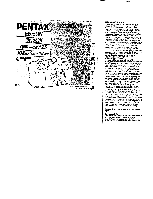
Pentax Espio 80V - EZY 80 Espio 80V - EZY 80 Manual - Page 5
Model, Viewfinder, Displays, Green, Indications
 |
View all Pentax Espio 80V - EZY 80 manuals
Add to My Manuals
Save this manual to your list of manuals |
Page 5 highlights
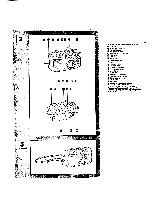
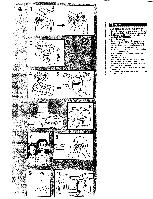
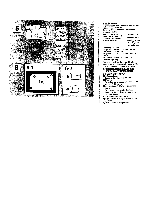
5 -err - 3 In. (LPG,/ a 6 6-1 6-2 0 0 0 0 Coj 5. DATE MODEL When the battery cover is opened, date and time initialize to '98 1 1 and 00:00. Use the protrusion parts of the strap clamp to depress the button. Selecting the Mode Press the DATE button 0 to change the date mode as shown in the list. Year Month Day 4. Day Hour Minute (Blank) No imprinting Month Day Year Day Month Year Correcting the Date 1 Depress the SELECT button 0 to select desired category of digits. 2 Depress the ADJUST button 0 to change digits. 3 Depress the SELECT button 0 until the blinking digits stop. Correcting the Time [Day Hour Minute] 1 Correction of the time can also be done in the same procedure as the one for the date. 6. VIEWFINDER DISPLAYS AND GREEN LAMP INDICATIONS 6-1. Viewfinder displays 0 Autofocus frame Focus on the subject with this frame. Picture area When taking a normal picture, compose the scene with this frame. 0 Close distance (0.8 to 1.0m) compensation frame. When the camera-to-subject distance is between 0.8m and 1.0m, compose the scene within this frame. 6-2. Green lamp indication 0 Lighting: Flash is charged. Shutter release possible. 0 Blinking: Flash is being charged.
-
 1
1 -
 2
2 -
 3
3 -
 4
4 -
 5
5 -
 6
6 -
 7
7
 |
 |
