Pentax P3 P3 Manual - Page 16
cartridge.
 |
View all Pentax P3 manuals
Add to My Manuals
Save this manual to your list of manuals |
Page 16 highlights
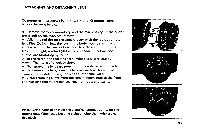
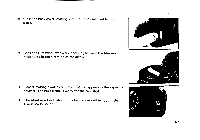
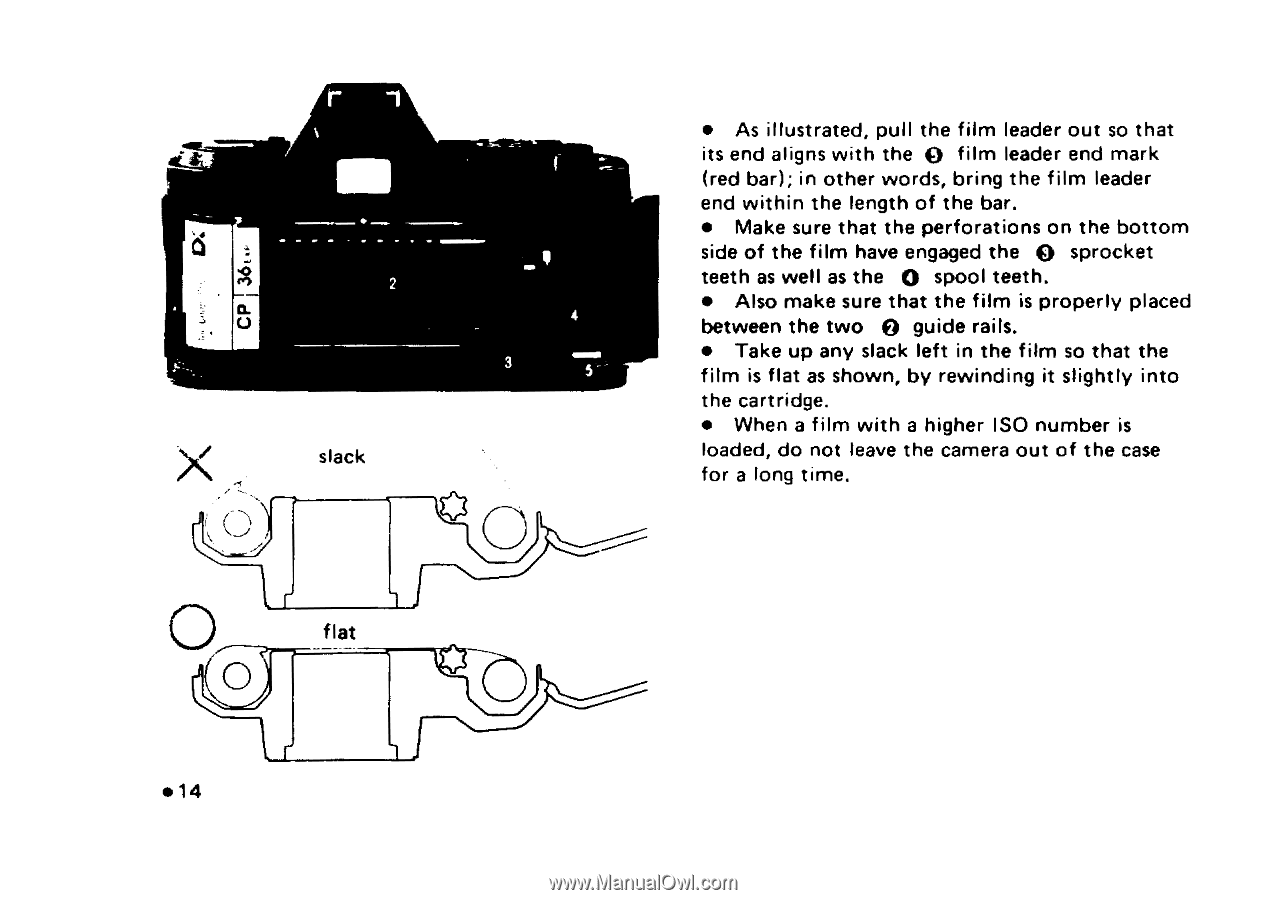
r • As illustrated, pull the film leader out so that 00 I its end aligns with the film leader end mark (red bar); in other words, bring the film leader end within the length of the bar. • Make sure that the perforations on the bottom side of the film have engaged the 0 sprocket 2 teeth as well as the 0 spool teeth. • Also make sure that the film is properly placed 4 between the two guide rails. 3 • Take up any slack left in the film so that the film is flat as shown, by rewinding it slightly into the cartridge. • When a film with a higher ISO number is x slack loaded, do not leave the camera out of the case for a long time. flat O • 14
-
 1
1 -
2
-
3
-
4
-
5
-
6
-
7
-
8
-
9
-
10
-
 11
11 -
 12
12 -
 13
13 -
 14
14 -
 15
15 -
 16
16 -
 17
17 -
 18
18 -
 19
19 -
 20
20 -
 21
21 -
22
-
23
-
24
-
25
-
26
-
27
-
28
-
29
-
30
-
31
-
32
-
33
-
34
-
35
-
36
-
37
-
38
-
39
-
40
-
41
-
42
-
43
-
44
-
45
-
46
-
47
-
48
-
49
-
50
-
51
-
52
 |
 |
r
x
O
•
14
2
slack
flat
3
I
4
•
As
illustrated,
pull
the
film
leader
out
so
that
its
end
aligns
with
the
film
leader
end
mark
(red
bar);
in
other
words,
bring
the
film
leader
end
within
the
length
of
the
bar.
•
Make
sure
that
the
perforations
on
the
bottom
side
of
the
film
have
engaged
the
0
sprocket
teeth
as
well
as
the
0
spool
teeth.
•
Also
make
sure
that
the
film
is
properly
placed
between
the
two
guide
rails.
•
Take
up
any
slack
left
in
the
film
so
that
the
film
is
flat
as
shown,
by
rewinding
it
slightly
into
the
cartridge.
•
When
a
film
with
a
higher
ISO
number
is
loaded,
do
not
leave
the
camera
out
of
the
case
for
a
long
time.