Pfaff creative 7510 Owner's Manual - Page 133
Pfaff creative 7510 Manual
 |
View all Pfaff creative 7510 manuals
Add to My Manuals
Save this manual to your list of manuals |
Page 133 highlights
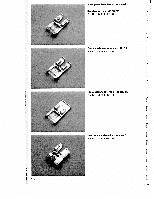
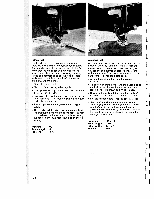
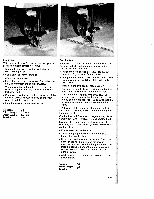
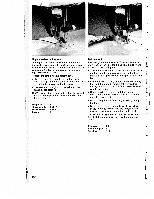
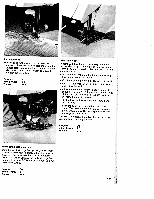
Fringe foot With this special foot for loop embroidery you can produce fantastic effects in no time. • Mark out your desired pattern with chalk or a disappearing ink pen. • Use a stabilizer for the material. Attach the fringe foot • Embroider the motif row by row. For circles you have to work from the outside inwards. • When using thicker threads you may have to select a longer stitch length; it is best to sew a test seam first • When you have finished, pull the work out of the machine carefully because if you pull too fast you will pull the loops tight • Knot the threads on the reverse side. Program: Stitch length: Stitch width: Tension: 02 0.35-1 1.5-2.5 2-3 Cording foot The classical sewing technique of pin tucking can be used perfectly well on many fabrics such as cottons and light woollens. • Attach the cording foot (5 grooves for thicker materials, 7 grooves for finer materials). • Change the needle to a twin needle (1.6 or 2 mm needle clearance) e.g. 1 30/705 H-ZWI needle thickness 80. • Thread up the two needles (see page 87). • Now set the needle thread tension quite tight (at about 5) to make the seam more prominent • Sew one row of tucking. When you sew the second row you can let the first row run parallel in one of the toot's grooves. This ensures that the spaces between the rows always remain the same. TIP: If you wish to emphasize the cording effect you can fit a cording blade on the front edge of the needle plate. Cording foot with 5 grooves - large cording blade Cording foot with 7 grooves - small cording blade Sewing with a gimp thread makes a similar effect However, with a gimp thread you work without a cording blade. • First remove the needle plate. • Thread the gimp thread upwards through the hole in the needle plate. • Return the needle plate to its position. The notch between the needle plate and the sewing machine provides space for the gimp thread. This thread must be fed under the detachable work support, so that it does not become tangled during sewing. • While sewing the cording, the material must be pulled lightly. Program: 00 Stitch length: 2.5 Tension: 5 II 129 L
-
 1
1 -
2
-
3
-
4
-
5
-
6
-
7
-
8
-
9
-
10
-
11
-
12
-
13
-
14
-
15
-
16
-
17
-
18
-
19
-
20
-
21
-
22
-
23
-
24
-
25
-
26
-
27
-
28
-
29
-
30
-
31
-
32
-
33
-
34
-
35
-
36
-
37
-
38
-
39
-
40
-
41
-
42
-
43
-
44
-
45
-
46
-
47
-
48
-
49
-
50
-
51
-
52
-
53
-
54
-
55
-
56
-
57
-
58
-
59
-
60
-
61
-
62
-
63
-
64
-
65
-
66
-
67
-
68
-
69
-
70
-
71
-
72
-
73
-
74
-
75
-
76
-
77
-
78
-
79
-
80
-
81
-
82
-
83
-
84
-
85
-
86
-
87
-
88
-
89
-
90
-
91
-
92
-
93
-
94
-
95
-
96
-
97
-
98
-
99
-
100
-
101
-
102
-
103
-
104
-
105
-
106
-
107
-
108
-
109
-
110
-
111
-
112
-
113
-
114
-
115
-
116
-
117
-
118
-
119
-
120
-
121
-
122
-
123
-
124
-
125
-
126
-
127
-
 128
128 -
 129
129 -
 130
130 -
 131
131 -
 132
132 -
 133
133 -
 134
134 -
 135
135 -
 136
136 -
 137
137 -
 138
138 -
139
-
140
-
141
-
142
 |
 |
