Pfaff expression 150 Owner's Manual - Page 25
Free-motion position, Buttonholes - free set up
 |
View all Pfaff expression 150 manuals
Add to My Manuals
Save this manual to your list of manuals |
Page 25 highlights
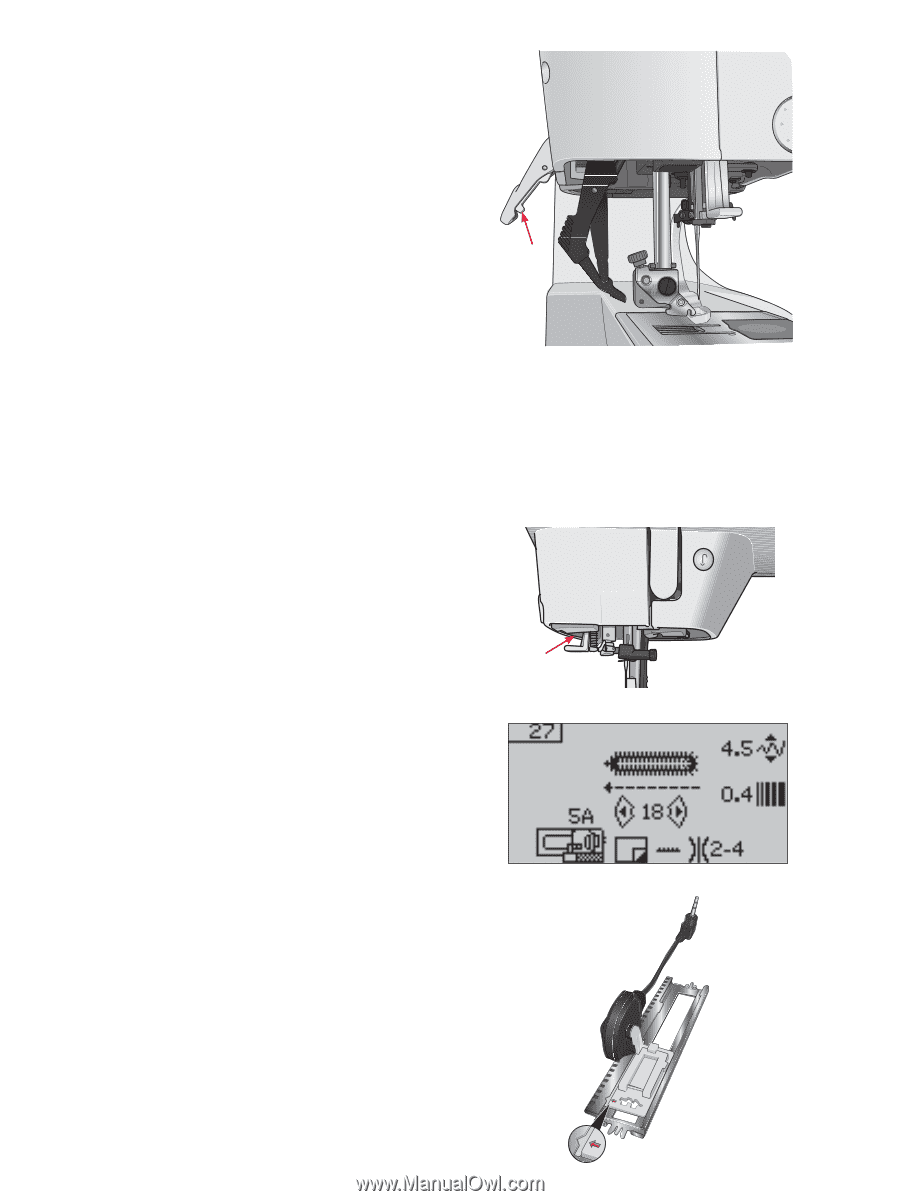
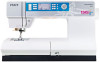
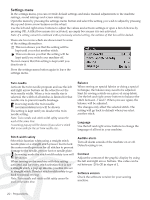
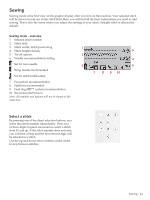
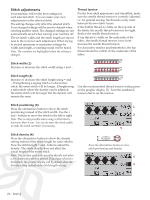
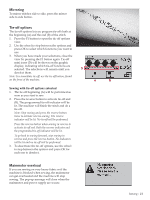
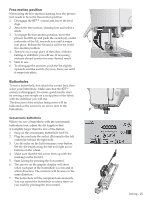
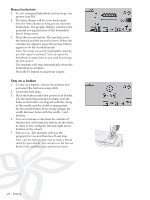
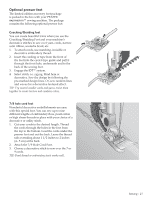
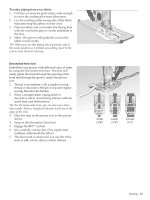
Free-motion position When using the free-motion/darning foot, the presser foot needs to be in the free-motion position. 1. Disengage the IDT™ system and lower the feed dogs. 2. Attach the free-motion/darning foot and select a stitch. 3. To engage the free-motion position, move the presser foot lift up and push the switch (A), on the underside of the lift, towards you until it snaps into place. Release the lift and it will be set in the free-motion position. 4. Test sew on a scrap piece of the fabric with the batting or stabilizer you will use. If necessary, increase thread tension for your desired result. 5. Start to sew. 6. To disengage the position, push the lift slightly upwards and the switch (A) away from you until it snaps into place. Buttonholes To sew a buttonhole, Àrst attach the correct foot, then select your buttonhole. Make sure that the IDT™ system is disengaged. To ensure good results, start by sewing a test sample on a scrap piece of the fabric with the stabilizer you will use. The direction of the stitches being sewn will be indicated on the screen by an arrow next to the buttonhole. Sensormatic buttonhole When you sew a buttonhole with the sensormatic buttonhole foot, adjust the slit length so that it is slightly larger than the size of the button. 1. Snap on the sensormatic buttonhole foot 5A. 2. Plug the cord into the socket (B) found to the left underside behind the light bulb. 3. Use the ruler on the lid to measure your button. Set the slit length using the left and right arrow buttons on the wheel. 4. Make sure that the red arrow lines up with the marking on the foot (C). 5. Start sewing by pressing the foot control. 6. The arrows on the graphic display will show when each part of the buttonhole is sewn and in which direction. The columns will be sewn in the same direction. 7. The buttonhole will be completed automatically. You can repeat the buttonhole as many times as you wish by pressing the foot control. A B C Sewing - 25
-
 1
1 -
2
-
3
-
4
-
5
-
6
-
7
-
8
-
9
-
10
-
11
-
12
-
13
-
14
-
15
-
16
-
17
-
18
-
19
-
 20
20 -
 21
21 -
 22
22 -
 23
23 -
 24
24 -
 25
25 -
 26
26 -
 27
27 -
 28
28 -
 29
29 -
 30
30 -
31
-
32
-
33
-
34
-
35
-
36
 |
 |