Pfaff expression 2048 Owner's Manual - Page 43
Pattern start function, Straight stitch - 1, Sewing in zippers - 1, Basting stitch - 10
 |
View all Pfaff expression 2048 manuals
Add to My Manuals
Save this manual to your list of manuals |
Page 43 highlights
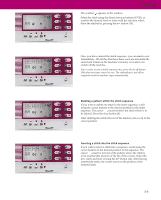
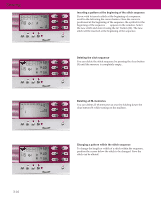
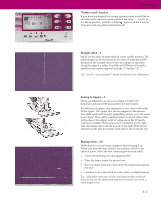
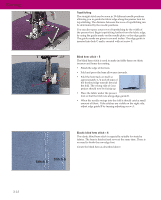
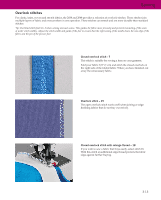
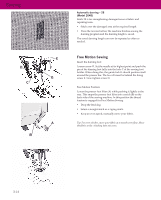
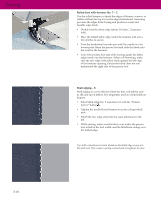
Sewing "Pattern start" function If you have interrupted the sewing operation and would like to start the stitch sequence again, position the cursor as far to the left as possible, until the symbol appears in the window. Then press the cl/pattern start button (9). Straight stitch - 1 Stitch 1 is the basic straight stitch in center needle position. The stitch length can be increased up to 6 mm. Change the needle position of the straight stitch to sew in a zipper or topstitch along the edge of a collar. The 2048 and 2038 have 19 needle positions that can be adjusted with the -/+ button "A". Tip: Use the "needle up/down" button to easily pivot at collar points. Sewing in zippers - 1 There are different ways to sew in zippers. Follow the directions included with your pattern for best results. For all types of zippers it is important to sew close to the teeth of the zipper. The zipper foot can be snapped to the presser foot ankle on the left or right, depending on how you will insert your zipper. Then set the needle position so that it enters close to the edge of the zipper teeth by using one of the 19 needle positions available. If the presser foot is attached on the right side, the needle must only be moved to the right. If the foot is attached on the left, the needle must only be moved to the left. Basting stitch - 10 With stitch 10 you can baste a garment before trying it on. When you press the foot control, the machine will sew one stitch at a time. Press the foot control again for each stitch. • Lower the feed dog and disengage the IDT. • Place the fabric under the presser foot. • Sew one stitch, then move the fabric the required amount to the rear. • Continue to sew one stitch at a time until you finish basting. Tip: Light fabrics are easier to baste with long straight stitches (6 mm). In this case the bottom feed need not be lowered. Use stitch 1, stitch length 6 mm. 3:11
-
 1
1 -
2
-
3
-
4
-
5
-
6
-
7
-
8
-
9
-
10
-
11
-
12
-
13
-
14
-
15
-
16
-
17
-
18
-
19
-
20
-
21
-
22
-
23
-
24
-
25
-
26
-
27
-
28
-
29
-
30
-
31
-
32
-
33
-
34
-
35
-
36
-
37
-
 38
38 -
 39
39 -
 40
40 -
 41
41 -
 42
42 -
 43
43 -
 44
44 -
 45
45 -
 46
46 -
 47
47 -
 48
48 -
49
-
50
-
51
-
52
-
53
-
54
-
55
-
56
-
57
-
58
-
59
-
60
-
61
-
62
-
63
-
64
-
65
-
66
-
67
-
68
 |
 |
