Pfaff hobbylock 2.5 Owner's Manual - Page 21
Start sewing
 |
View all Pfaff hobbylock 2.5 manuals
Add to My Manuals
Save this manual to your list of manuals |
Page 21 highlights
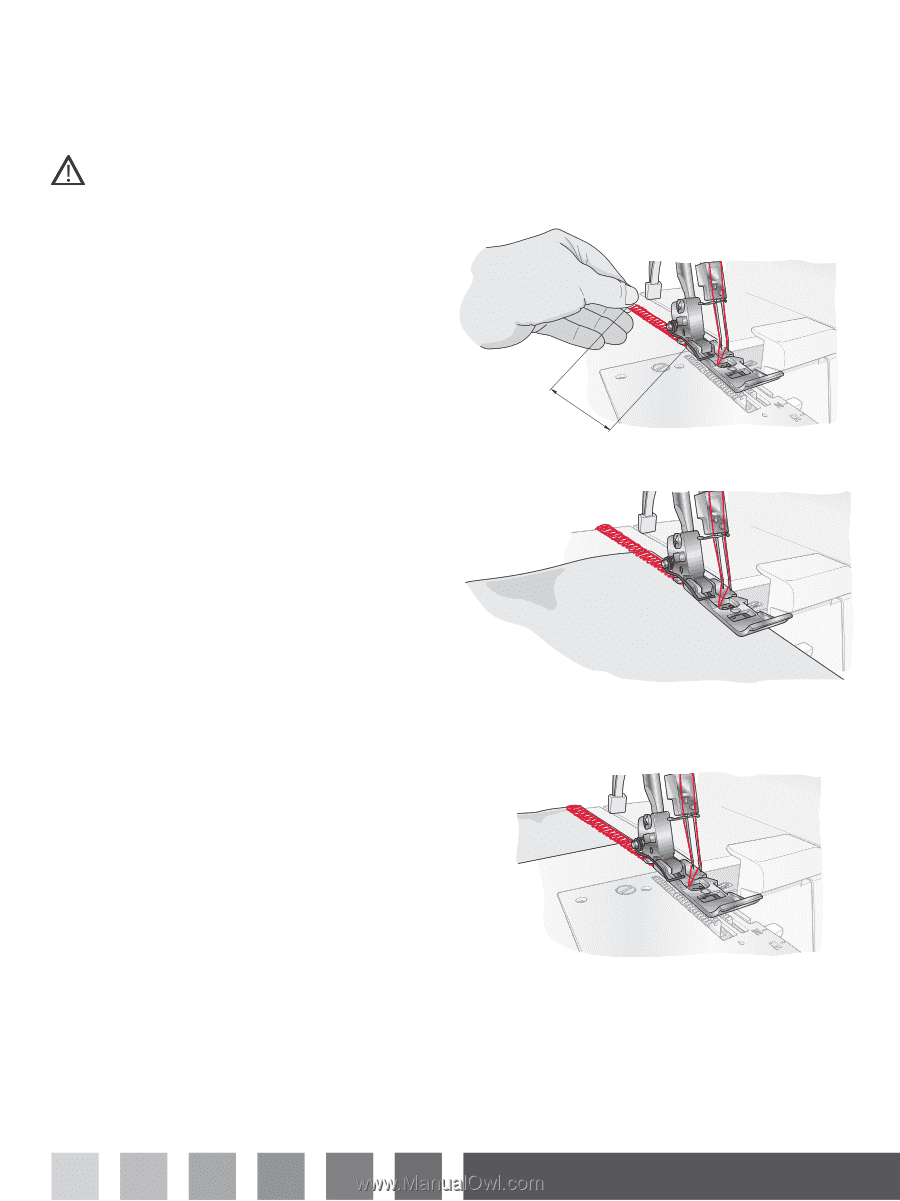
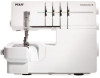
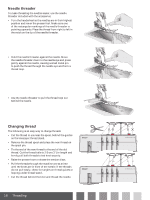
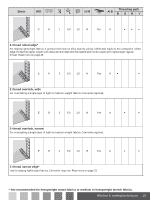
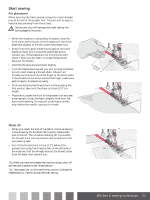
Start sewing Pin placement When securing the fabric pieces using pins, insert straight pins to the left of the presser foot. The pins will be easy to remove and are away from the cutters. Sewing over pins will damage and might destroy the cutting edge of the cutters. • When the machine is completely threaded, close the front cover and bring all of the threads over the stitch plate and slightly to the left under the presser foot. • Ensure that the upper blade moves against the lower blade correctly by turning the handwheel slowly toward you. If the blades are not moving correctly, check if there are any fabric or waste thread stuck between the blades. • Hold the threads and pull them slightly. • Turn the handwheel toward you two to three complete turns to start making a thread chain. Check if all threads wind around the stitch finger of the stitch plate. If the threads do not wind around the finger, make sure each thread is threaded correctly. • Continue holding the thread chain while pressing the foot control. Sew until the chain is 5-8 cm (2-3") in length. • Place fabric under the front of the presser foot and sew a test sample. Guide the fabric slightly with your left hand while sewing. Do not pull on the fabric as this may deflect the needle, causing it to break. (25--38")cm Chain off • When you reach the end of the fabric, continue sewing while drawing the finished fabric gently backwards and to the left. This is called chaining off. It prevents the threads from coming undone and prepares for the next sewing task. • Cut off the thread chain 2-5 cm (1-2") behind the presser foot using the thread cutter on the left side of the machine. Pull the threads around the thread cutter from the back, then toward you. Tip: When you have re-threaded the machine, always chain off and test sew a sample to test thread tension. Tip: The presser foot on this machine has marks to indicate the needle position. Use this as a guide when sewing. Stitches & sewing techniques 21
-
 1
1 -
2
-
3
-
4
-
5
-
6
-
7
-
8
-
9
-
10
-
11
-
12
-
13
-
14
-
15
-
 16
16 -
 17
17 -
 18
18 -
 19
19 -
 20
20 -
 21
21 -
 22
22 -
 23
23 -
 24
24 -
 25
25 -
 26
26 -
27
-
28
-
29
-
30
-
31
-
32
 |
 |