Pfaff hobbylock 2.5 Owner's Manual - Page 9
Needle information, Changing the needles, Movable upper cutter
 |
View all Pfaff hobbylock 2.5 manuals
Add to My Manuals
Save this manual to your list of manuals |
Page 9 highlights
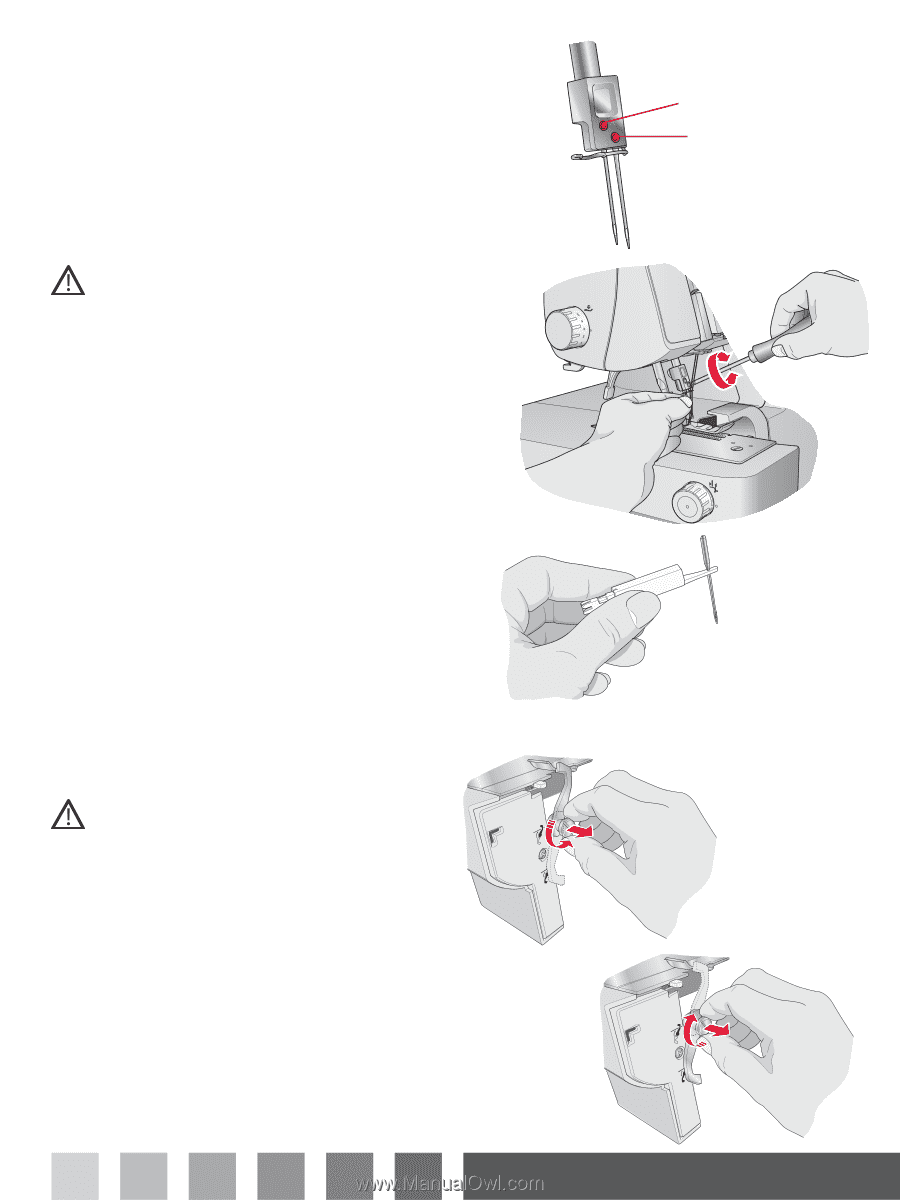
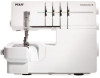
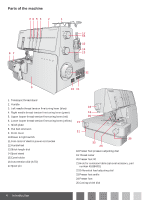
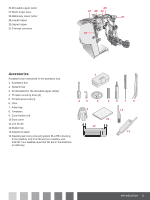
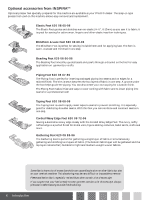
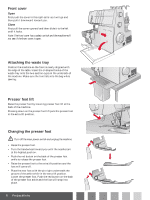
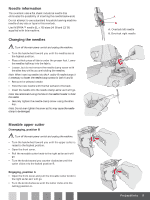
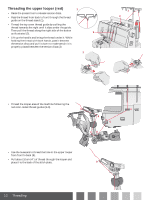
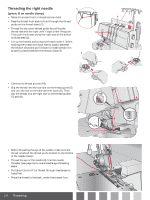
Needle information This overlock uses a flat shank industrial needle that eliminates the possibility of inserting the needle backwards. Do not attempt to use a standard household sewing machine needle of any size or type in this overlock. Use INSPIRA™ needle EL x 705 sizes 14/90 and 12/80, supplied with this machine. Changing the needles Turn off the main power switch and unplug the machine. • Turn the handwheel toward you until the needles are at the highest position. • Place a thick piece of fabric under the presser foot. Lower the needles halfway into the fabric. • Loosen, but do not remove the needle clamp screw with the allen key while you are holding the needles. Note: When inserting needles into the A and/or B needle clamps it is necessary to loosen the needle clamp screws for both A and B. • Remove the selected needle. • Hold the new needle with the flat surface to the back. • Insert the needle into the needle clamp as far as it will go. Note: We recommend using the hole in the needle threader to hold the needle. • Securely tighten the needle clamp screw using the allen key. Note: Do not over-tighten the screw as this may cause the needle clamp to be damaged. Movable upper cutter Disengaging, position B Turn off the main power switch and unplug the machine. A • Turn the handwheel toward you until the upper cutter is raised to the highest position. BB • Open the front cover. • Pull the movable cutter knob to the right as far as it will go. • Turn the knob toward you counter clockwise until the cutter clicks into the locked position B. Engaging, position A • Open the front cover and pull the movable cutter knob to the right as far as it will go. • Turn the knob clockwise until the cutter clicks into the cutting position A. A B A. Overlock left needle B. Overlock right needle A BB Preparations 9
-
 1
1 -
2
-
3
-
 4
4 -
 5
5 -
 6
6 -
 7
7 -
 8
8 -
 9
9 -
 10
10 -
 11
11 -
 12
12 -
 13
13 -
 14
14 -
15
-
16
-
17
-
18
-
19
-
20
-
21
-
22
-
23
-
24
-
25
-
26
-
27
-
28
-
29
-
30
-
31
-
32
 |
 |