Pfaff hobbylock 2.5 Owner's Manual - Page 8
Front cover, Attaching the waste tray, Presser foot lift, Changing the presser foot
 |
View all Pfaff hobbylock 2.5 manuals
Add to My Manuals
Save this manual to your list of manuals |
Page 8 highlights
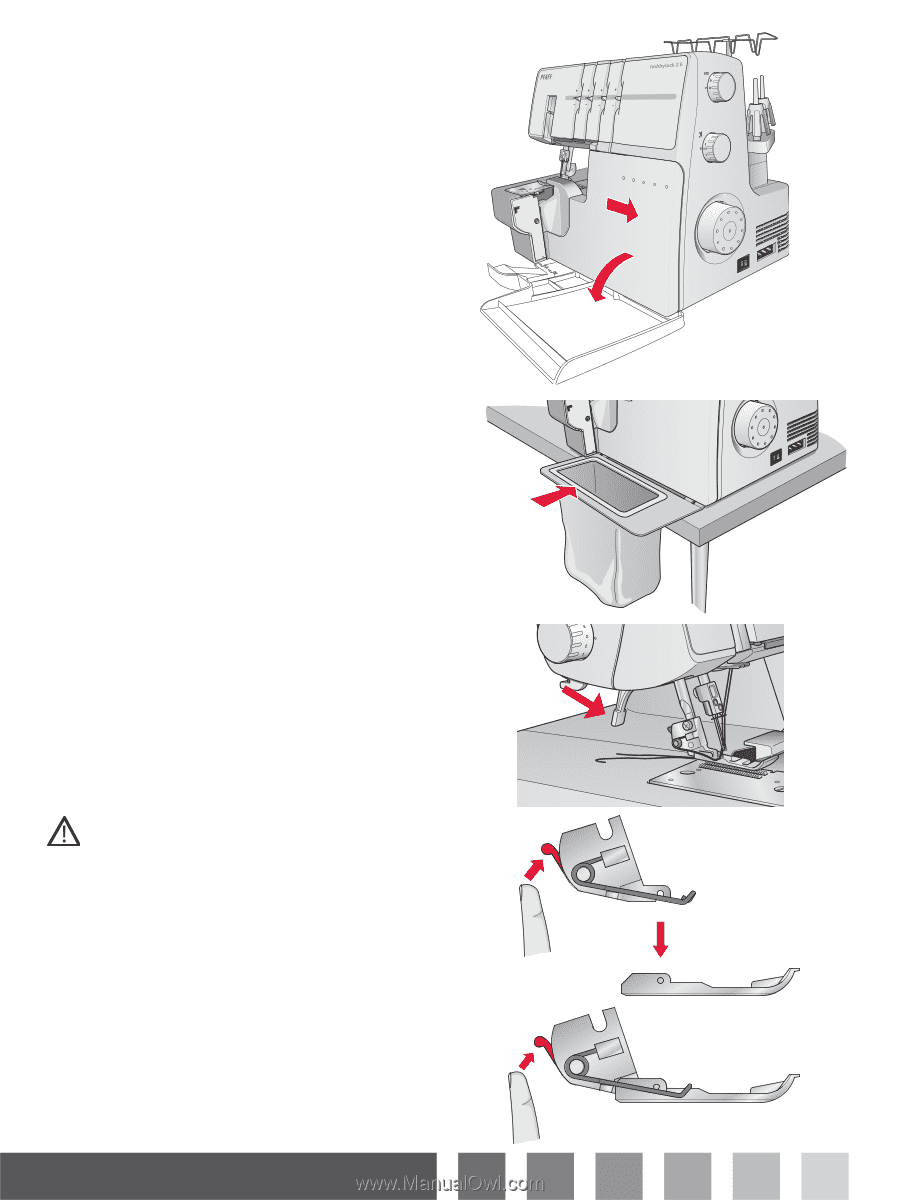
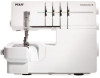
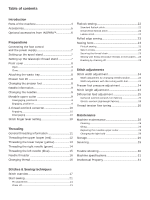
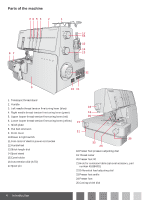
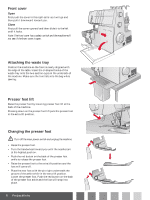
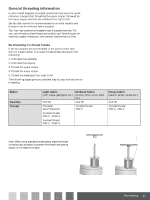
Front cover Open First push the cover to the right as far as it will go and then pull it downward toward you. Close First pull the cover upward and then slide it to the left until it locks. Note: The front cover has a safety switch and the machine will not sew if the front cover is open. Attaching the waste tray Position the machine so the front is nearly aligned with the edge of the table. Insert the U-shaped hooks of the waste tray onto the two suction cups on the underside of the machine. Make sure the trim falls into the bag while sewing. Presser foot lift Raise the presser foot by lowering presser foot lift at the back of the machine. Pressing down on the presser foot lift puts the presser foot in the extra lift position. Changing the presser foot Turn off the main power switch and unplug the machine. • Raise the presser foot. • Turn the handwheel toward you until the needles are at the highest position. • Push the red button on the back of the presser foot ankle to release the presser foot. • Raise the presser foot to the extra lift position and the foot will come off. • Place the new foot with the pin right underneath the groove of the ankle while in the extra lift position. Lower the presser foot. Push the red button on the back of the presser foot ankle and the foot will snap into place. 8 Preparations 1 2
-
 1
1 -
2
-
 3
3 -
 4
4 -
 5
5 -
 6
6 -
 7
7 -
 8
8 -
 9
9 -
 10
10 -
 11
11 -
 12
12 -
 13
13 -
14
-
15
-
16
-
17
-
18
-
19
-
20
-
21
-
22
-
23
-
24
-
25
-
26
-
27
-
28
-
29
-
30
-
31
-
32
 |
 |