Pfaff kayser 46 Owner's Manual - Page 22
Pfaff kayser 46 Manual
 |
View all Pfaff kayser 46 manuals
Add to My Manuals
Save this manual to your list of manuals |
Page 22 highlights
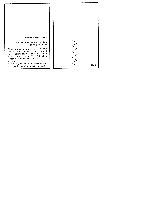
Sewing buttonholes on Cl. 46 zigzag and utility-stitch sewing machines with or without filler thread Attach clear-view buttonhole foot. Mark position and length of buttonhole on material, Set stitch length control R (Fig. 15) between "0" and "0.5", and turn stitch width control (6) to "5. Turn utility-stitch selector dial (5) until sym bol of left buttonhole seam is below dot mark. If a filler thread is used, place it under the sewing foot so that it is positioned below both markings. Sew first seam from A to B in the desired length. Raise needle out of material. nfl Turn utility-stitch seector dial until symbol of bartack is under the dot mark and sew about five barTacking stitches. Raise needle out of the material (C). Turn utility-stitch selector dial to right buttonhole seam symbol. and sew second seam the same length as the first. Stop sewing at 0 and raise needle out of material. Turn utilly-stitch selector dial back to the bartack symbol and sew about five bartacking stitches. Raise needle out of material (E). Turn stitch width control to "0" and sew 3 to 4 tying stitches. Cut the buttonhole open, making sure you do not damage the bartacking stitches.
-
 1
1 -
2
-
3
-
4
-
5
-
6
-
7
-
8
-
9
-
10
-
11
-
12
-
13
-
14
-
15
-
16
-
 17
17 -
 18
18 -
 19
19 -
 20
20 -
 21
21 -
 22
22 -
 23
23 -
 24
24 -
 25
25 -
 26
26 -
 27
27 -
28
-
29
-
30
-
31
-
32
-
33
-
34
-
35
-
36
-
37
-
38
 |
 |