Pfaff quilt expression 4.0 Owner's Manual - Page 24
expression™ - tension adjustment
 |
View all Pfaff quilt expression 4.0 manuals
Add to My Manuals
Save this manual to your list of manuals |
Page 24 highlights
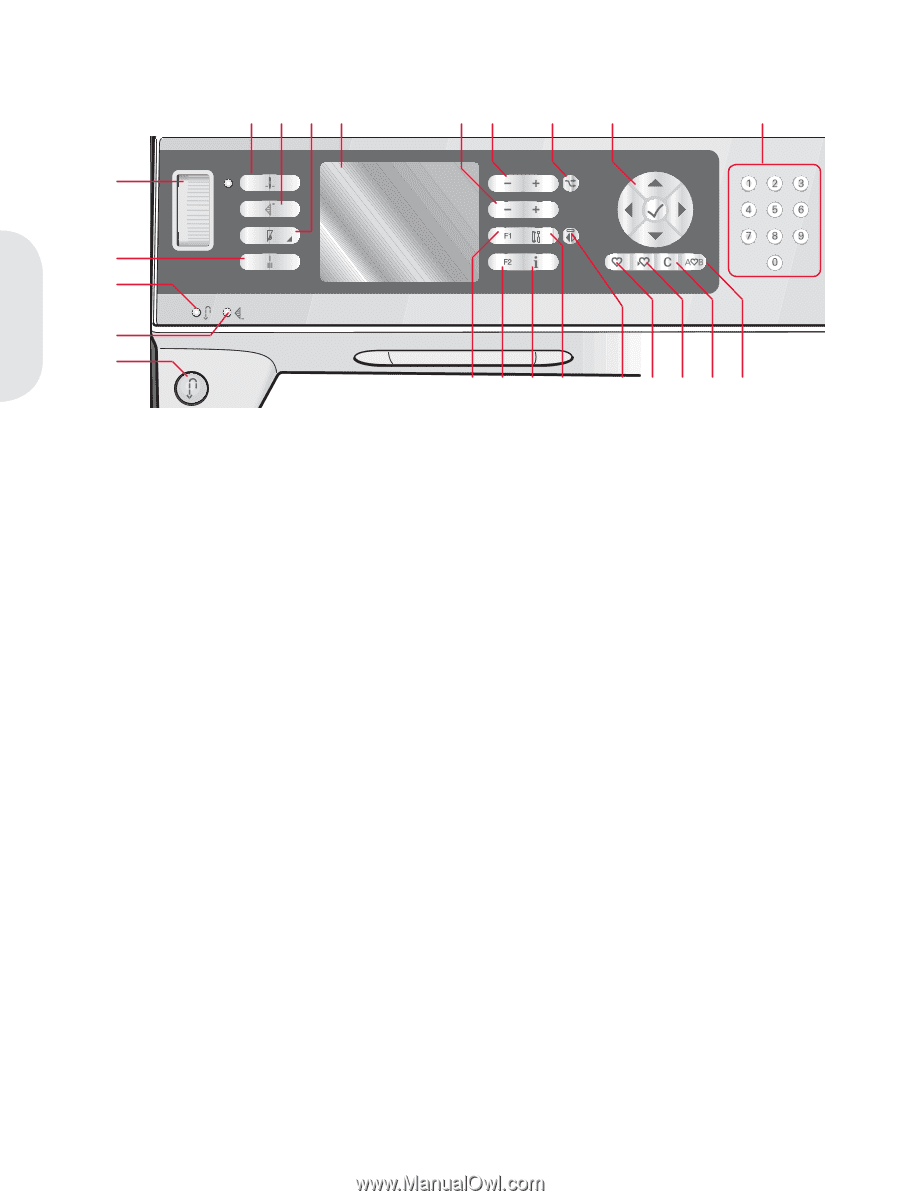
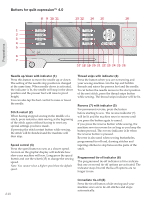
Preparations Buttons for expression™ 3.0 2349 11 10 12 13 14 1 4 3 2 1 8 5 6 7 15 16 17 18 19 20 21 22 23 Thread tension dial (1) If needed, adjust the top thread tension using the markings on the tension dial. Needle up/down with indicator (2) Press this button to move the needle up or down. The setting of the needle stop position is changed at the same time. When needle down is activated, the indicator is lit, the needle will stop in the down position. You can also tap the foot control to raise or lower the needle. Stitch restart (3) When having stopped sewing in the middle of a stitch, press restart to start sewing at the beginning of the stitch again without having to reset any special settings you have made. If pressing the stitch restart button while sewing, the stitch will be Ànished and the machine will then stop. Speed control (4) Press the speed button to sew at a slower speed. An icon on the graphic display will indicate how slow your machine will sew. Long press the speed button and use the wheel (13) to change the sewing speed. Note: You cannot select a higher speed than the default speed. Reverse (7) with indicator (5) For permanent reverse, press the button before starting to sew. The reverse indicator (5) will be lit and the machine sews in reverse until you press the button again to cancel. If you press the reverse button while sewing, the machine sews in reverse for as long as you keep the button pressed. The reverse indicator is lit when the reverse button is pressed. Reverse is also used when sewing buttonholes, programmed tie-off end, darning stitches and tapering stitches to step between the parts of the stitch. Programmed tie-off indicator (6) The programmed tie-off indicator is lit to indicate that one or several tie-off options are activated. The indicator stays lit until the tie-off options are no longer in use. Immediate tie-off (8) Press the tie-off button while sewing and your machine sews a few tie-off stitches and stops automatically. Graphic display (9) The graphic display lets you view all your selections and options. Stitches are shown in real size. 2:12
-
 1
1 -
2
-
3
-
4
-
5
-
6
-
7
-
8
-
9
-
10
-
11
-
12
-
13
-
14
-
15
-
16
-
17
-
18
-
 19
19 -
 20
20 -
 21
21 -
 22
22 -
 23
23 -
 24
24 -
 25
25 -
 26
26 -
 27
27 -
 28
28 -
 29
29 -
30
-
31
-
32
-
33
-
34
-
35
-
36
-
37
-
38
-
39
-
40
-
41
-
42
-
43
-
44
-
45
-
46
-
47
-
48
-
49
-
50
-
51
-
52
 |
 |