Philips 40PFL7705DV User manual - Page 31
Set your location to home, Network, Wireless network, Network selection, Connection test
 |
UPC - 609585195110
View all Philips 40PFL7705DV manuals
Add to My Manuals
Save this manual to your list of manuals |
Page 31 highlights
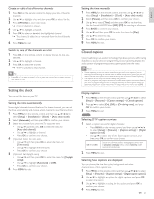
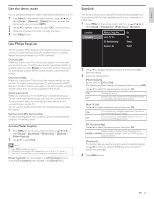
Set your location to home You can set the location of your TV to [Home] or [Retail store]. Choosing [Home] gives you full flexibility to change predefined settings for picture and sound. 1 Press MENU on the remote control and then use to select [Setup] > [Installation] > [Preferences] > [Location]. 2 Select [Home] and then press OK to confirm your choice. 3 Press MENU to exit. Note • You must set [Home]. Otherwise, personalized picture and sound settings will not be memorized after the unit goes to standby mode. Network Set up network connection settings in order to use Netflix, vTuner internet radio, VUDU,Twitter or network update function. Network selection Before you proceed to [Connection test] or other settings in [Network] section, set this selection to suit your preference. 1 Press MENU on the remote control and then use to select [Setup] > [Installation] > [Network] > [Network selection]. 2 Use Î / ï to select a setting and then press OK. Setting items Wired Wireless 3 Press MENU to exit. Description Select to use an Ethernet cable to connect to the internet by wired connection. Select to use a USB wireless LAN adapter to connect to the internet by wireless connection. Connection test Perform the following steps to test your internet connection after you have connected an Ethernet cable or entered network settings such as IP address, DNS settings, etc. manually. 1 Press MENU on the remote control and then use to select [Setup] > [Installation] > [Network] > [Connection test]. Connection test will start automatically and the test result will appear right after the connection test finishes. • [Testing...]:The test is in progress. • [Pass]: Connection test is successfully completed. • [Fail]: Connection test failed. Check the connection settings. Press OK to go to the list of network status confirmation screen. 2 Press MENU to exit. Note • If the connection test passes, you are ready to use Netflix, vTuner internet radio, VUDU, Twitter or network update function using the internet without making any additional settings. • If the connection test fails, check if the Ethernet cable is connected to this TV properly or if you have entered all the required details for the wireless LAN connection properly. Wireless network This menu is displayed only when you set [Wireless] in [Network selection]. In order to use a wireless network, you must set up a connection to the Wireless LAN Access Point (AP) (e.g. wireless router). Wireless network setting (Auto) Search for wireless networks automatically and select the wireless network name (SSID) from the list. 1 Press MENU on the remote control and then use to select [Setup] > [Installation] > [Network] > [Wireless network] > [Wireless network setting] > [Auto]. • This unit will start searching for wireless networks automatically. 2 The list of wireless networks will be displayed. Use Î / ï to select the appropriate wireless network name (SSID), then press OK. 3 Use Î / ï to select the authentication setting of the selected wireless network. • For a wireless network with authentication setting, select the authentication setting, according to the security type of the wireless network. • For a wireless network without authentication setting, select [None]. [None] Set the authentication setting to [None]. [WEP] Set the authentication setting to [WEP]. [WPA-PSK (TKIP)] Set the authentication setting to [WPA-PSK (TKIP)]. [WPA-PSK (AES)] Set the authentication setting to [WPA-PSK (AES)]. [WPA2-PSK (TKIP)] Set the authentication setting to [WPA2-PSK (TKIP)]. [WPA2-PSK (AES)] Set the authentication setting to [WPA2-PSK (AES)]. • If you select [WEP], [WPA-PSK (TKIP)], [WPA-PSK (AES)], [WPA2-PSK (TKIP)] or [WPA2-PSK (AES)],WEP /WPA Key entry screen will appear. Enter the WEP /WPA key of the selected wireless network using then press OK. [Clear] : Clear the entered number or word. [All clear] : Clear all the entered numbers or words. [a/A/@] : Switch between abc, ABC and @ ! ? [Cancel] : Shows the cancellation display. [OK] : Set the entered number or word. • Confirmation message will appear. Select [Yes] to complete the settings. 4 Press MENU to exit. Note • For a wireless network with authentication setting, key icon appears to the right hand of the wireless network name (SSID). • Signal icon shows the strength of the signal. • WEP /WPA key appears as asterisks on the confirmation screen. • The supplied USB wireless LAN adapter supports following specifications. - Wireless standards : IEEE 802.11 b/g/n - Frequency spectrum : 2.4GHz - Security protocol :WEP /WPA /WPA2 30 EN
-
 1
1 -
2
-
3
-
4
-
5
-
6
-
7
-
8
-
9
-
10
-
11
-
12
-
13
-
14
-
15
-
16
-
17
-
18
-
19
-
20
-
21
-
22
-
23
-
24
-
25
-
 26
26 -
 27
27 -
 28
28 -
 29
29 -
 30
30 -
 31
31 -
 32
32 -
 33
33 -
 34
34 -
 35
35 -
 36
36 -
37
-
38
-
39
-
40
-
41
-
42
-
43
-
44
-
45
-
46
-
47
-
48
 |
 |