Philips SE8881B User manual - Page 14
Get started
 |
View all Philips SE8881B manuals
Add to My Manuals
Save this manual to your list of manuals |
Page 14 highlights
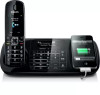
3 Get started Caution •• Make sure that you have read the safety instructions in the "Important" section before you connect and install your handset. Connect the base station and charger Warning •• Risk of product damage! Make sure that the power supply voltage corresponds to the voltage printed on the back or underside of the phone. •• Use only the supplied power adapter to charge the batteries. • the DC jack at the bottom of the extra handset charger. • the power socket on the wall. 4 For mobile phones with micro USB charging, connect the micro USB cable plug to the micro USB socket of the mobile phone. 5 For iPhone users, connect the plug of your USB charging cable (not supplied) to the USB socket at the bottom of SE888. Note •• If you subscribe to the digital subscriber line (DSL) high speed internet service through your telephone line, make sure that you install a DSL filter between the telephone line cord and the power socket.The filter prevents noise and caller ID problems caused by DSL interference. For further information about DSL filters, contact your DSL service provider. •• The type plate is located on the bottom of the base station. 1 Connect each end of the power adapter to: • the DC jack at the bottom of the base station; • the power socket on the wall. 2 Connect each end of the line cord to: • the telephone socket at the bottom of the base station; • the telephone socket on the wall. 3 Connect each end of the power adapter to (for multi-handset versions only): 14 EN Install the handset The batteries are pre-installed in the handset. Pull off the battery tape from the battery door before charging.
-
 1
1 -
2
-
3
-
4
-
5
-
6
-
7
-
8
-
 9
9 -
 10
10 -
 11
11 -
 12
12 -
 13
13 -
 14
14 -
 15
15 -
 16
16 -
 17
17 -
 18
18 -
 19
19 -
20
-
21
-
22
-
23
-
24
-
25
-
26
-
27
-
28
-
29
-
30
-
31
-
32
-
33
-
34
-
35
-
36
-
37
-
38
-
39
-
40
-
41
-
42
-
43
-
44
-
45
-
46
-
47
-
48
-
49
-
50
-
51
-
52
-
53
-
54
-
55
-
56
-
57
-
58
-
59
-
60
-
61
-
62
 |
 |
