Pioneer AVD-505 Service Manual - Page 28
Disassembly
 |
View all Pioneer AVD-505 manuals
Add to My Manuals
Save this manual to your list of manuals |
Page 28 highlights
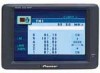
AVD-505 7.2 DISASSEMBLY - Removing the Case Section 1. Remove the four screws. 2. Remove the three stoppers indicated by the arrows, and lift the Case Section 3. Disconnect the connectors at the three locations and remove the Case Section. Note:When assembling, be careful not to catch the LCD Panel flexible connector between the Grille Assy and the Case Section.Remove the Case by either pushing on the left or right of center of the side of it. - Removing LCD Unit 1. Disconnect the two connectors. 2. Upright the tabs in four places indicated with arrows. 3. Remove the LCD Unit. Flexible Connector Case Section Grille Assy LCD Unit - Removing the Back Light Unit 1. Remove the six stoppers indicate the arrows, and then remove the Back Light Unit. Back Light Unit 28
-
 1
1 -
2
-
3
-
4
-
5
-
6
-
7
-
8
-
9
-
10
-
11
-
12
-
13
-
14
-
15
-
16
-
17
-
18
-
19
-
20
-
21
-
22
-
 23
23 -
 24
24 -
 25
25 -
 26
26 -
 27
27 -
 28
28 -
 29
29 -
 30
30 -
 31
31 -
 32
32
 |
 |
