Pioneer AVIC N2 Installation Manual - Page 14
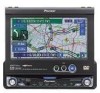
Built-in DVD drive - 7 ' wide touch screen
 |
UPC - 012562735191
View all Pioneer AVIC N2 manuals
Add to My Manuals
Save this manual to your list of manuals |
Page 14 highlights
How to Use Navigation Unit and Names of the Parts Chapter 1 (6) OPEN/CLOSE button Press to open or close the LCD panel. (7) NAVI/AV button Use to switch between Navigation map displays and audio operation displays. (8) POS button Press to view the map or return to guidance. Also, when the map is scrolling, pressing this button returns you to the display of the map of your surroundings. Use to switch the view mode of the navigation when the map of your surroundings is displayed. (9) NAVI MENU button Press to display a menu of Navigation. (10) RESET button Press to return to the factory settings (initial settings). Some information items are not erased. ➲ Resetting the microprocessor ➞ Page 9 (11) DETACH button Press to remove the front panel from the display unit. (12) Joystick Move to do manual seek tuning, fast forward, reverse and track search controls, etc. Push to display A.MENU. (13) EQ button Press to select various equalizer curves. (14) EJECT button Press to eject a disc from this unit. (15) BAND button Radio: Press to select among three FM and one AM bands. Built-in DVD drive: When playing back a disc containing an MP3 file and audio data (CD-DA), pressing this button switches playback between the MP3 file and CDDA. Touch and hold this button when a disc containing an MP3 file is inserted returns you to the root folder. (16) ANGLE (+/-) button Press to change the LCD panel angle. (17) WIDE button Press to select a desired mode for enlarging a 4:3 picture to a 16:9 one. Press and hold to enter the PICTURE ADJUST mode. 12 (18) REAR button Press to output to the REAR OUT terminal the sound and images of a disc inserted in the builtin DVD drive that is different the currently selected source. ➲ "Using the REAR button" ➞ Page 14 (19) ENT button Press to switch between the background displays. (20) Disc loading slot Insert a disc to play. ➲ "Loading a disc" ➞ Page 13 (21) SRC (SOURCE) button This unit is turned on by selecting a source. Press to cycle through all of the available sources. Press and hold to turn the source off. (22) VOLUME/ATT button Rotate to increase or decrease the volume. Press to quickly lower the volume level, by about 90%. Press once more to return to the original volume level. (23) LCD panel (24) LCD screen (25) Front panel
-
 1
1 -
2
-
3
-
4
-
5
-
6
-
7
-
8
-
 9
9 -
 10
10 -
 11
11 -
 12
12 -
 13
13 -
 14
14 -
 15
15 -
 16
16 -
 17
17 -
 18
18 -
 19
19 -
20
-
21
-
22
-
23
-
24
-
25
-
26
-
27
-
28
-
29
 |
 |
