Pioneer DEH-P9400MP Owner's Manual - Page 41
Extra functions Audio menu Using position selector
 |
View all Pioneer DEH-P9400MP manuals
Add to My Manuals
Save this manual to your list of manuals |
Page 41 highlights
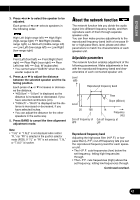
ENGLISH ESPAÑOL DEUTSCH Extra functions These functions are helpful in adjusting the sound to suit your system or your personal preferences. • Using octaver and BBE sound (EFFECT) • Using loudness (LOUD) • Using sound field control, octaver and BBE sound (SFC) • Using automatic sound levelizer (ASL) • Adjusting source levels (SLA) • Switching the digital attenuator (D.ATT) Audio menu The audio menu has the following functions: Using position selector One way to assure a more natural sound is to clearly position the stereo image, putting you right in the center of the sound field. The position selector function lets you automatically adjust the speakers' output levels and inserts a delay time to match the number and position of occupied seats. • You cannot select "ALL" when "NW" mode has been selected. 1. Press AUDIO and then press NEXT to display "POSI". Press NEXT until "POSI" appears. 2. Press POSI to select the position selector mode. 3. Press the corresponding button to select a listening position. Button FL FR FRONT ALL Position Front seat left Front seat right Front seats All seats Note: • If you do not operate the function within about 30 seconds, the display is automatically returned. (When you select the 13-band graphic equalizer mode (EQ2), the time alignment adjustment mode (T.AL, T.AL2) or the network adjustment mode (NW), the display is not returned automatically.) • "T.AL" or "T.AL2" is displayed only when you select "FL" or "FR" in the position selector mode (POSI). • "SW2" is displayed only when the subwoofer output is on in the subwoofer output mode (SW1). • "SLA" is not displayed when you select FM tuner as the source. • "A.EQ" is displayed after the auto-equalizer curve has been set. • Press the same button again to cancel the selected listening position. Note: • You can also use 5, ∞, 2 or 3 to select the listen- ing position. Button Position 2 Front seat left 3 Front seat right 5 Front seats ∞ All seats FRANÇAIS ITALIANO NEDERLANDS 40
-
 1
1 -
2
-
3
-
4
-
5
-
6
-
7
-
8
-
9
-
10
-
11
-
12
-
13
-
14
-
15
-
16
-
17
-
18
-
19
-
20
-
21
-
22
-
23
-
24
-
25
-
26
-
27
-
28
-
29
-
30
-
31
-
32
-
33
-
34
-
35
-
 36
36 -
 37
37 -
 38
38 -
 39
39 -
 40
40 -
 41
41 -
 42
42 -
 43
43 -
 44
44 -
 45
45 -
 46
46 -
47
-
48
-
49
-
50
-
51
-
52
-
53
-
54
-
55
-
56
-
57
-
58
-
59
-
60
-
61
-
62
-
63
-
64
-
65
-
66
-
67
-
68
-
69
-
70
-
71
-
72
-
73
-
74
-
75
-
76
-
77
-
78
-
79
-
80
-
81
-
82
-
83
-
84
-
85
-
86
-
87
-
88
-
89
-
90
-
91
-
92
-
93
-
94
-
95
-
96
-
97
-
98
-
99
-
100
-
101
-
102
-
103
-
104
-
105
-
106
-
107
-
108
-
109
-
110
-
111
-
112
-
113
-
114
-
115
-
116
-
117
-
118
-
119
-
120
-
121
-
122
-
123
-
124
-
125
-
126
-
127
-
128
 |
 |
