Pioneer DJM 5000 Owner's Manual - Page 15
Rotate [HI], [MID] or [LOW] for the [MIC1] or [MIC2] channel
 |
UPC - 012562961392
View all Pioneer DJM 5000 manuals
Add to My Manuals
Save this manual to your list of manuals |
Page 15 highlights
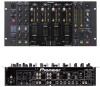
English Operating the MC section Using a microphone 1 Switch [OUTPUT] Select the output destination of the sound output from the [MIC1] or [MIC2] channel. 2 Rotate [LEVEL] for the microphone channel Adjusts the level of audio signals output from the microphone channel. ! Pay attention that rotating to the extreme right position outputs a very loud sound. 3 Press [MIC1 ON] for the [MIC1] channel or [MIC2 ON] for the [MIC2] channel. Turn on the microphone channel. The button lights up in green. 4 Input audio signals to the microphone Sound is output to the output destination selected in step 1. ! The peak level indicator lights in different colors corresponding to the level of audio being input. - Green: Permissible level - Orange: Appropriate level - Red: Excessive level (lower the level of audio by rotating [LEVEL] to the left) Using the talk-over feature 1 Rotate the talk-over level Set the attenuation level of sound besides the one in the microphone channel. 2 Switch between [NORMAL]/[ADVANCED] The attenuation mode for the talk-over function switches. ! Normal talk over: The sound output from channels other than the microphone channel is attenuated by the amount set for the talk over level. dB NORMAL ADVANCED Frequency ! Advanced talk over: Only the voice band of the sound output from channels other than the microphone channel is attenuated by the amount set for the talk over level. dB NORMAL ADVANCED Adjusting the sound quality Rotate [HI], [MID] or [LOW] for the [MIC1] or [MIC2] channel Refer to Specifications on page 19 for the range of sound that can be adjusted by each control. Using the microphone effect feature 1 Press [MIC EFFECT (REVERB, ECHO+VERB, OCTAVER or PITCH)] Turn on the microphone effect function. The button flashes in blue. ! The effect varies depending on the button. 2 Rotate [EFFECT] Adds an effect to the sound output from the microphone channel. ! The effect varies according to the rotation direction and position of [EFFECT]. Effect Name REVERB 1 ECHO+VERB 1 OCTAVER 1 Descriptions Adds a reverberation effect to the original sound. Adds reverberation and echo effects to the original sound. Adds sound with 1 octave up and down to the original sound. PITCH Changes the musical interval within the range of 1 octave up and down. Rotate it to the right and left to change the interval 1 octave up and down respectively. 1 The more you rotate it to the right, the louder the effect sound. ! When you turn off the microphone effect function, press the flashing [MIC EFFECT (REVERB, ECHO+VERB, OCTAVER, PITCH)] once again. The button lights up in blue. Frequency 3 Press [ON/OFF] for [TALK OVER] Turn on the talk-over function. The button lights up in red. ! When audio signals are input in the microphone channel, the sound, besides the one in the microphone channel, is attenuated according to the attenuation mode setting and the position of the control. En 15
-
 1
1 -
2
-
3
-
4
-
5
-
6
-
7
-
8
-
9
-
 10
10 -
 11
11 -
 12
12 -
 13
13 -
 14
14 -
 15
15 -
 16
16 -
 17
17 -
 18
18 -
 19
19 -
 20
20 -
21
-
22
-
23
-
24
-
25
-
26
-
27
-
28
-
29
-
30
-
31
-
32
-
33
-
34
-
35
-
36
-
37
 |
 |
