Pioneer DMH-W2770NEX Owners Manual - Page 48
Camera settings
 |
View all Pioneer DMH-W2770NEX manuals
Add to My Manuals
Save this manual to your list of manuals |
Page 48 highlights
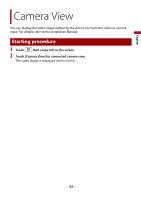
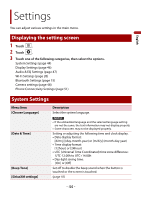
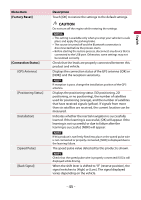
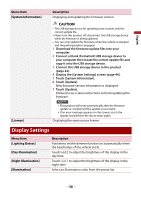
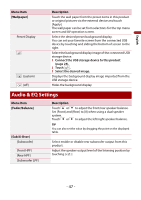
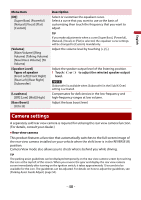
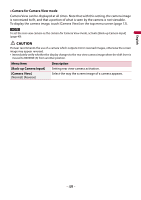
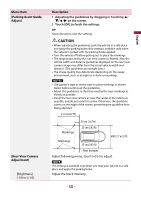
English Menu Item Description [EQ] [Super Bass] [Powerful] [Natural] [Vocal] [Flat] [Custom] Select or customize the equalizer curve. Select a curve that you want to use as the basis of customizing then touch the frequency that you want to adjust. [Volume] [Main Volume] [Ring Volume] [Talking Volume] [Navi/Voice Volume] [TA Volume] TIP If you make adjustments when a curve [Super Bass], [Powerful], [Natural], [Vocal], or [Flat] is selected, the equalizer curve settings will be changed to [Custom] mandatorily. Adjust the volume level by touching [+]/[-]. [Speaker Level] Types of speaker [Front Left] [Front Right] [Rear Left] [Rear Right] [Subwoofer] [Loudness] [Off] [Low] [Mid] [High] Adjust the speaker output level of the listening position. 1 Touch or to adjust the selected speaker output level. NOTE [Subwoofer] is available when [Subwoofer] in the [Sub/X-Over] setting is activated. Compensates for deficiencies in the low-frequency and high-frequency ranges at low volume. [Bass Boost] [0] to [6] Adjust the bass boost level. Camera settings A separately sold rear view camera is required for utilizing the rear view camera function. (For details, consult your dealer.) ▶Rear view camera This product features a function that automatically switches to the full-screen image of the rear view camera installed on your vehicle when the shift lever is in the REVERSE (R) position. Camera View mode also allows you to check what is behind you while driving. TIP The parking assist guidelines can be displayed temporarily on the rear view camera screen by touching the icon at the top left of the screen. When you reverse the gear and display the rear view camera screen immediately after turning on the ignition switch, it takes approximately 10 seconds to be available for the icon. The guidelines can be adjusted. For details on how to adjust the guidelines, see [Parking Assist Guide Adjust] (page 50). - 48 -
-
 1
1 -
2
-
3
-
4
-
5
-
6
-
7
-
8
-
9
-
10
-
11
-
12
-
13
-
14
-
15
-
16
-
17
-
18
-
19
-
20
-
21
-
22
-
23
-
24
-
25
-
26
-
27
-
28
-
29
-
30
-
31
-
32
-
33
-
34
-
35
-
36
-
37
-
38
-
39
-
40
-
41
-
42
-
 43
43 -
 44
44 -
 45
45 -
 46
46 -
 47
47 -
 48
48 -
 49
49 -
 50
50 -
 51
51 -
 52
52 -
 53
53 -
54
-
55
-
56
-
57
-
58
-
59
-
60
-
61
-
62
-
63
-
64
-
65
-
66
-
67
-
68
 |
 |
