Pioneer HTZ-77DV Owner's Manual
Pioneer HTZ-77DV Manual
 |
View all Pioneer HTZ-77DV manuals
Add to My Manuals
Save this manual to your list of manuals |
Pioneer HTZ-77DV manual content summary:
- Pioneer HTZ-77DV | Owner's Manual - Page 1
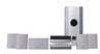
XV-DV77 POWERED SUBWOOFER S-DV77SW SATELLITE SPEAKER S-DV77ST - Pioneer HTZ-77DV | Owner's Manual - Page 2
)/bottom panel (European model), and on the powered subwoofer rear panel. CAUTION RISK OF ELECTRIC SHOCK DO NOT OPEN Thank you for buying this PIONEER product. Please read through these operating instructions so you will know how to operate your model properly. After you have finished reading the - Pioneer HTZ-77DV | Owner's Manual - Page 3
medium-sized (flat blade) screwdriver. Insert the tip of the screwdriver into the groove of the selector switch and turn it so that the power voltage marking of your area points to the arrow. 5 cm or damaged, ask your nearest PIONEER authorized service center or your dealer for a replacement. 3 En - Pioneer HTZ-77DV | Owner's Manual - Page 4
f CAUTION RISK OF ELECTRIC SHOCK DO NOT OPEN f d f d d f d f H017BChH f d f f f Зໄj CLASS 1 LASER PRODUCT CAUTION : VISIBLE AND INVISIBLE LASER RADIATION WHEN OPEN. AVOID EXPOSURE TO BEAM. VORSICHT : SICHTBARE NICHT DEM UND UNSICHTBARE LASERSTRAHLUNG, STRAHL - Pioneer HTZ-77DV | Owner's Manual - Page 5
English d f f d f d˸ еጐྡྷf 㕥᩶Ϸ˸ɪ 㕥᩶Ϸ˸ɪ 6 PLAY/PAUSE STANDBY/ON 1 R OPEN/CLOSE 0 STOP 7 㕥᩶Ϸ˸ɪ f d fν؈ d d u d f f ᎘f H038 ChH 110 V -120 V 220 V -230 V 240 V VOLTAGE SELECTOR f Νd f H038 ChH f f f d f f f - Pioneer HTZ-77DV | Owner's Manual - Page 6
9 Using this manual 9 Hints on installation 10 Avoiding problems with condensation 10 Moving the system 10 Discs compatible with this system 11 DVD Video regions 11 2 Controls and Displays Front panel 12 Display 12 Remote control 14 3 Setting Up Introduction 16 Switching on and setting - Pioneer HTZ-77DV | Owner's Manual - Page 7
a place in a disc 47 Memorizing disc settings 47 Displaying disc information 48 Displays when playing 49 Displays when stopped 51 DVD and CD system displays 51 Displays when playing 51 Displays when stopped 51 7 Playing MP3s Playing MP3s 52 Searching for folders and tracks 53 Using random - Pioneer HTZ-77DV | Owner's Manual - Page 8
Up For instructions on connecting up the speakers and the powered subwoofer, see the separate instruction sheet, Setting Up the System. Connecting Troubleshooting 90 Amplifier fault finding 90 Optional component fault finding 90 DVD fault finding 90 Troubleshooting tips 91 Resetting the system - Pioneer HTZ-77DV | Owner's Manual - Page 9
"DTS" and "DTS Digital Surround" are trademarks of Digital Theater Systems, Inc. Manufactured under license from Digital Theater Systems, Inc. ΅ଡ଼ϓj i i i i Using this manual This manual is for the XV-DV77 DVD Surround System. It is f d f divided into several sections: information for - Pioneer HTZ-77DV | Owner's Manual - Page 10
an amplifier, or other component in your stereo system that becomes hot in use. ✗ Use to support all four of the unit's feet. Avoiding problems with condensation Condensation may form inside the system if before switching on and using. Moving the system If you need to move the system, first switch it - Pioneer HTZ-77DV | Owner's Manual - Page 11
: • 12cm or 8cm discs • Linear PCM digital audio or MP3 (MPEG-1 Audio Layer 3) • CD, CD-R* and CD-RW* formats CDs are divided into tracks. * This system can play CD-R and CD-RW discs recorded with audio. However, depending on the condition of the player and the disc, you may find that - Pioneer HTZ-77DV | Owner's Manual - Page 12
with 96kHz audio 12 Active channel indicators 13 2PRO LOGIC Lights when playing a Dolby Pro Logic source 14 Indicates strength of broadcast signal 15 Auto stereo/mono mode - page 32 16 RPT, RPT-1 Repeat play mode - pages 46, 54 17 PGM Program play - pages 43,56 18 RDM Random play - pages - Pioneer HTZ-77DV | Owner's Manual - Page 13
English 2 STANDBY/ON 6 PLAY/PAUSE STANDBY/ON 7 STOP 1 R OPEN/CLOSE 0 STOP 7 12 56 7 9 10 11 COND.LAST 96KHz 14 15 3 RPT-1 16 PGM RDM 17 18 4 -DSP- 8 12 13 L CR 2PRO LOGIC Ls S Rs LFE 2DIGITAL 19 1 2 3 4 -DSP 5 6 7 8 9 COND 10 LAST - Pioneer HTZ-77DV | Owner's Manual - Page 14
2 Controls and Displays Remote control STANDBY /ON CD DVD TUNER FM/AM SYSTEM VOL + V1/V2/V3 VIDEO DIRECT PLAY 3 MD TAPE MEMORY CONDITION LAST 1 2 SEARCH 3 - TEST TONE CLR REPEAT A-B RANDOM 4 5 6 >10 DIMMER PROGRAM 7 8 9 10/0 TOP MENU MENU SYSTEM SETUP DVD 5 2 ENTER 3 - Pioneer HTZ-77DV | Owner's Manual - Page 15
37 38 39 40 41 42 43 44 45 46 47 48 49 50 1 STANDBY/ON 2 DVD/CD (DIRECT PLAY 3 3 TUNER FM/AM (DIRECT PLAY 3 4 SYSTEM VOL +/- 5 VIDEO V1/V2/V3 6 MD (DIRECT PLAY 3) 7 TAPE (DIRECT PLAY 3) 8 1 | CONDITION 9 2 | LAST 10 3 | SEARCH 11 CLR | TEST TONE 12 4 | REPEAT 13 5 | A-B 14 6 | RANDOM - Pioneer HTZ-77DV | Owner's Manual - Page 16
MENU CLOCK/ TIMER Introduction Before starting, make sure that your system is installed and set up according to the Setting up the system guide, and plugged into a power outlet. This chapter covers switching on and setting the clock, using the Setup Navigator to set some basic preferences, using - Pioneer HTZ-77DV | Owner's Manual - Page 17
to set the minute, then press ENTER. The display blinks for 2 seconds to indicate that the time has been set. Press SYSTEM DISP anytime to see the clock when the system is on or in standby. Changing the clock display format You can choose to display the clock and timer settings in - Pioneer HTZ-77DV | Owner's Manual - Page 18
the default settings. However, for really great surround sound, we recommend that you spend a few minutes making some settings that match this system to your listening room. These include setting the distances from your listening position to your speakers, and balancing the speaker volumes. Unless - Pioneer HTZ-77DV | Owner's Manual - Page 19
. • The setting mode is automatically exited if no operation is performed within 20 seconds. • There are several other settings that you can make from the System Setup menu to further enhance the surround sound. See chapter 10 for more on this. • The speaker distance settings have no effect when the - Pioneer HTZ-77DV | Owner's Manual - Page 20
further improve surround sound performance by balancing the levels from the subwoofer, center and surround speakers relative to the front left/right speakers. To help you judge the sound level of each speaker a test tone is played through each speaker in turn (make sure that there are no headphones - Pioneer HTZ-77DV | Owner's Manual - Page 21
in the display. 4 Press ENTER. 5 Use 5 or ∞ to select the video system. Switch between AUTO, PAL and NTSC. d f f 5 dܲ㕐TEST TONE f AUTOd d f d f NTSC ࣛd f 1 f 2 ܲ㕐SYSTEM MENUf 3 ˀూܲ㕐2 א㕐3d VIDEO SELECTf 4 ܲ㕐ENTERf 5 ͜㕐5 f ί㕐AUTO , PAL ձ㕐NTSC ʘග፯f 6 ܲ㕐ENTERf 6 Press ENTER - Pioneer HTZ-77DV | Owner's Manual - Page 22
∞ 7 Using the setup navigator Before playing any discs, we strongly recommend using the Setup Navigator. This makes some basic DVD system settings for you. d f f 1 Press STANDBY/ON to switch on. Also turn on your TV and make sure that it is set to the correct video input. • If a disc - Pioneer HTZ-77DV | Owner's Manual - Page 23
Navigator Exit Setup Navigator Changes are saved Save Changes Delete Changes Start Again Move ENTER Select SETUP Exit Congratulations, you've set up your system! If you want to use the Setup Navigator again at any time, it is available from the General menu. Also, each individual setting can - Pioneer HTZ-77DV | Owner's Manual - Page 24
TV, hold down the CLR button, then enter the three digit code for your TV. The remote transmits an on/off signal to the TV. If you've entered the correct code, your TV should switch off. If your TV doesn't turn off, repeat the procedure using the next code in the - Pioneer HTZ-77DV | Owner's Manual - Page 25
remote for Europe. Button POWER What it does Press to switch your TV on or into standby CH +/- Press to change the TV channel VOL +/- Press to turn up the TV volume INPUT Press to switch NORDMENDE OCEANIC ONWA ORION PANASONIC PHILIPS PHONOLA PIONEER PRISM QUASAR RADIOLA SABA SALORA SAMSUNG SANYO - Pioneer HTZ-77DV | Owner's Manual - Page 26
107 105 178 115 105 104 116 129 168 117 104 105 Manufacturer Ⴁிਠ MITSUBISHI MTC NATIONAL NEC ORION PANASONIC PHILCO PHILIPS PIONEER PORTLAND PRISM PROSCAN QUASAR RADIOSHACK RCA SAMSUNG SANYO SCOTT SEARS SHARP SIGNATURE SONY SYLVANIA SYMPHONIC TECHNICS TOSHIBA VIDTECH WARDS ZENITH Code(s) ᇜᇁ 117 - Pioneer HTZ-77DV | Owner's Manual - Page 27
d͂ක͉ӻ୕f (remote or front panel) to turn on the system. 2 Press DVD/CD. 2 ܲ㕐DVD/CDf 3 ᙃ㕐OPEN/CLOSE 0 d͂කဿ˪ 3 Touch the OPEN/CLOSE 0 ϖᆵf sensor (front panel only) to open the disc tray. 4 ༀɝဿ˪f dл͜ 4 Load a disc. Load a disc with the label side facing up, using the disc tray guide - Pioneer HTZ-77DV | Owner's Manual - Page 28
4 Getting Started කԴ͜ Basic playback controls Button 6 What it does Starts playback or pauses a disc that's playing (press again to restart playback). DVD and Video CD only: Resumes playback of a stopped disc. 7 Stops playback. DVD and Video CD only: Display shows RESUME (press 6 to start - Pioneer HTZ-77DV | Owner's Manual - Page 29
e (SHIFT 1) 1. Press to start slow-motion reverse scanning. Press again to switch between SLOW 1 and SLOW 2 scanning speed. 2. When playing, press once to displayed on-screen. means that the operation is not allowed by the system. means that the operation is not allowed by the disc. Navigating DVD - Pioneer HTZ-77DV | Owner's Manual - Page 30
4 Getting Started කԴ͜ Navigating Video CD PBC menus Some Video CDs have menus from which you can choose what you want to watch. These are called PBC (Playback control) menus. You can play a PBC Video CD without having to navigate the PBC menu by starting playback using a number button to select a - Pioneer HTZ-77DV | Owner's Manual - Page 31
AM radio broadcasts using the automatic, manual and ᇞཥᄿᅧf dઆ high-speed tuning Press TUNER FM/AM to select the tuner. Press repeatedly to switch between FM and AM bands. FM 87.5OMHz 1 ܲ㕐TUNER FM for about a second. The system will start searching for the next station, stopping when it - Pioneer HTZ-77DV | Owner's Manual - Page 32
stereo sound If you're listening to a stereo FM broadcast, but find that there is a lot of noise because of a weak signal, try switching to mono. 1 Press SYSTEM listen to that station. This saves the effort of manually tuning in each time. This system can save up to 30 station presets. When saving - Pioneer HTZ-77DV | Owner's Manual - Page 33
of button presses. d f 1 ܲ㕐TUNER FM/AMd f 1 Press TUNER FM/AM to switch to the tuner. 2 Use the 4 / ¢ or the 2 / 3 buttons to select numbers over 10). 2 ͜㕐4 2㕐㕟㕐3 f 10 f d d f • If the system is left disconnected from the AC power outlet for a lengthy period, the station presets - Pioneer HTZ-77DV | Owner's Manual - Page 34
4 Press DISP/CHARACTER to change the character set. You can switch between alphabet (upper case), alphabet (lower case), numbers and number buttons to select characters. See the diagram on page 31 for which buttons correspond to which characters. 6 f 7 SYSTEM MENU ৗ̈f 6 Enter the rest of the - Pioneer HTZ-77DV | Owner's Manual - Page 35
the analog or digital auxiliary inputs. 1 ܲ㕐VIDEO V1/V2/V3 f 1 Press VIDEO V1/V2/V3 to select an auxiliary input. 2 For inputs V1 only: Press SYSTEM MENU and select VIDEO1 INPUT. • Change menu options using the 2 and 3 buttons. Press ENTER to select the currently displayed option. 3 Use the 5 or - Pioneer HTZ-77DV | Owner's Manual - Page 36
SYSTEM MENU • For detailed instructions on using the optional MD or tape deck, see the included operating instructions. • For more on controlling your TV using this remote turning on the video input attenuator. 1 Switch the system into standby. 2 Press SYSTEM MENU and select VIDEO ATT. • Change - Pioneer HTZ-77DV | Owner's Manual - Page 37
. • TREBLE O Adjusts the amount of treble. • EFFECT 7O Adjusts the amount of Advanced Theater or DSP effect (not available on all effects). • P.BASS ON Switches extra bass boost on or off. • MIDNIGHT ON Switches the low-level listening mode on or off. 3 Use the 5 and ∞ buttons to adjust - Pioneer HTZ-77DV | Owner's Manual - Page 38
This system offers several ways to enjoy surround sound and stereo sources. When playing Dolby Digital, Dolby Surround, Dolby Pro-Logic or DTS sources, we recommend using the surround mode to ensure proper surround sound. From the surround mode you can choose one of the Advanced Theater effects - Pioneer HTZ-77DV | Owner's Manual - Page 39
surround-sound effects. • MUSICAL Concert hall sound. • DRAMA Classic, mid-size movie theater sound. • ACTION Large, modern movie theater sound. • VIRTUAL SURR.1 Virtual surround sound from just the main front stereo speakers and the subwoofer. Use this mode if you can't use the surround - Pioneer HTZ-77DV | Owner's Manual - Page 40
or in combination with a surround mode. • When playing stereo sources with DSP effects switched off, there is no sound from the surround and THEATER1 Classic, mid-size movie theater sound. • THEATER2 Large, modern movie theater sound. • SIMUL.STEREO Virtual stereo for mono sources. f d - Pioneer HTZ-77DV | Owner's Manual - Page 41
English Playing Discs 6 Introduction • Most of the functions covered in this chapter apply to DVD discs, Video CDs and CDs, although the exact operation of some varies slightly with the kind of disc loaded. • When playing DVD discs, if the or icon appears on-screen when you try and use a - Pioneer HTZ-77DV | Owner's Manual - Page 42
more angles-check the disc box for details: it should be j marked with a icon if it contains multi-angle ౻d f scenes. dሗܲ㕐ANGLEf • To switch the camera angle, press ANGLE. d If the disc was paused, playback starts again with the ׳f new angle. • To hide the TV angle indicator - Pioneer HTZ-77DV | Owner's Manual - Page 43
right channel only. • To change the playback channel, press AUDIO. Press repeatedly to switch between: • L CH - Left channel only • R CH - Right channel only • STEREO d e f dሗܲ㕐AUDIOf j ÷ L CH R CH STEREO Making a program list Making a program list means telling the player which titles - Pioneer HTZ-77DV | Owner's Manual - Page 44
6 Playing Discs 4 Enter the title/chapter numbers for your program list. For titles/chapters 1-10, use the corresponding number buttons. For 11 and over, use the >10 button (>10, 2, 4 for 24, etc.) • A program list can contain up to 24 steps. 5 If you want to save the program list, move the - Pioneer HTZ-77DV | Owner's Manual - Page 45
English Playing Discs 6 3 Press ENTER or 6 to start playback immediately, or PROGRAM to exit if you want to start playback later. • You can't start playback later with a PBC Video CD; press ENTER or 6 to start. Using random play Use the random play function to play titles/chapters (on a DVD) - Pioneer HTZ-77DV | Owner's Manual - Page 46
how to make a program list). d e f f d f 1 Press REPEAT ( SHIFT and 4 ) during playback to select a repeat mode. Each press switches the repeat mode: 1 REPEAT ( SHIFT ʿ㕐4 )d f d j • Repeat Chapter • Repeat Title • Repeat Off ÷ Repeat Chapter Repeat Title Repeat Off • Repeat - Pioneer HTZ-77DV | Owner's Manual - Page 47
d of picking up later where you left off, you can bookmark d d the place then resume playback at a later date without d f having to manually search for the right place. You can use this feature for up to five discs (after that ਗ਼мৰd f the oldest bookmark is deleted to make space - Pioneer HTZ-77DV | Owner's Manual - Page 48
displays on DVD DISP f the following pages (depending on the disc, you may not see all the screens shown). d fΎܲɓϣ㕐DVD DISP • To show/switch the information ࠦf displayed, press DVD DISP. • When a disc is playing, the information appears at the top of the screen. Keep pressing DVD DISP - Pioneer HTZ-77DV | Owner's Manual - Page 49
English Playing Discs 6 Displays when playing current title/chapter number elapsed time of current title Play Title 3-29 49.58 -51.06 / 101.04 remaining time of current title remaining total time of current title « current title/chapter number elapsed time of current title Play 3-32 54 - Pioneer HTZ-77DV | Owner's Manual - Page 50
6 Playing Discs current track number/ total number of tracks Video CD's total elapsed time Play All 3/12 10.53 -59.26 / 70.19 Video CD's remaining time Video CD's total time « current track number Video CD's total elapsed time Play Track 3 3.56/ 10.53 5.23 elapsed time of current track - Pioneer HTZ-77DV | Owner's Manual - Page 51
1/1 CD/Video CD DISPLAY Exit Information: Compact Disc Total Time 6.30 Track Time 01 3.32 02 2.58 1/1 CD/Video CD DISPLAY Exit DVD and CD system displays • Press SYSTEM DISP to change the information shown in the display. Displays when playing CD 1 O:24 Elapsed track time 4:12 am Time - Pioneer HTZ-77DV | Owner's Manual - Page 52
disc into the player. • It may take upwards of 20 seconds for the system to read the contents of the disc. 2 Press 6 to start playing the forward. • Press 7 to stop playback. Except in program or random play, the system remembers the current folder as long as the disc remains in the player. Press 6 - Pioneer HTZ-77DV | Owner's Manual - Page 53
dܲ>10d f dܲՇϣ>10d f Էνd dܲ>10d4d6f dܲ>10d>10d1d2d10/0f f 3 ܲ6 f 3 Press 6 to start playback of the selected track. Using random play • Files can be mono or stereo. Use the random play feature to play tracks on a disc in a random order. Playback stops when all the tracks have played. 1 Press - Pioneer HTZ-77DV | Owner's Manual - Page 54
003 004 005 1/2 MP3 Track 1 ~ 9 1 ~ 11 1 ~ 3 1 ~ 22 1 ~ 15 Folder 001 002 003 004 005 Track 1 ~ 10 1 ~ 13 1 ~ 5 1 ~ 4 1 ~ 8 DISPLAY Exit ᜑͪMP3༟ৃ SYSTEM DISPd MP3༟ৃf j PLAY 16/2O O:O5 Track ONLY_YOU PLAY 2/1O O:O5 Folder ELVIS ග PLAY 2-16 O:O5 Track -2:25/ 2:3O PLAY - Pioneer HTZ-77DV | Owner's Manual - Page 55
English Playing MP3s ᅧ׳MP3 7 Using the MP3 Navigator Use the MP3 Navigator to make searching for the track (s) you want to play easier. You can also use it to add or clear tracks from the program list. 1 Load a CD-ROM containing MP3 tracks. 2 Press MENU to enter the MP3 Navigator screen. - Pioneer HTZ-77DV | Owner's Manual - Page 56
7 Playing MP3s ᅧ׳MP3 Making a program list of MP3 tracks 1 Load a CD-ROM containing MP3 files. 2 Press PROGRAM to enter the Program MP3 screen. ႡЪMP3 1 ༀɝўMP3ᏦࣩٙCD-ROMf 2 ܲPROGRAMආɝProgram MP3ࠦf MP3 Program Folder:001~025 Move ENTER Play PROGRAM Exit From this - Pioneer HTZ-77DV | Owner's Manual - Page 57
MP3s ᅧ׳MP3 7 MP3 compatibility information • Mono or stereo MPEG-1 Audio Layer 3 format compatible. • The CD-ROM must be ISO 9660 compatible. • MP3 tracks on mixed CD audio/MP3 discs can't be played. Only the audio section is playable. • This system is not compatible with multi-session discs - Pioneer HTZ-77DV | Owner's Manual - Page 58
the source function to that. Once the timer is active, it will switch the system on everyday at the set time. Unlike an ordinary alarm clock, you need to set a system switch off time as well as a switch on time. d f d f d f d d f ࠠࠅ f You can only use the timer features if the clock - Pioneer HTZ-77DV | Owner's Manual - Page 59
time. OFF 1O:3O am Set in the same way as the switch on time, pressing ENTER to finish. 7 Check the settings you just made. The am OFF 1O:3O am DVD/CD VOLUME 12 CHECK END 8 Switch the system into standby. The timer will not work if the system is left on! The standby light on the front panel lights - Pioneer HTZ-77DV | Owner's Manual - Page 60
1O:3O am DVD/CD VOLUME 12 CHECK END Using the sleep timer The sleep timer switches the system into standby after a specified amount of time so that you can fall asleep without worrying about the stereo being left on all night. If you've also set the wake up timer this is - Pioneer HTZ-77DV | Owner's Manual - Page 61
to the 90 minute setting. • To cancel the sleep timer, switch the system into standby, or select SLEEP OFF (as described above). • If you switch to a different source when SLEEP AUTO is set, the system will automatically go into standby a minute later. 2 ͜5 f ÷㕐 SLEEP AUTO SLEEP 9O SLEEP - Pioneer HTZ-77DV | Owner's Manual - Page 62
them exciting, but it also means that when you turn the volume down you can easily lose quiet dialog. Switch on Dynamic Range Control to even out the soundtrack volume. 1 Press SYSTEM SETUP. • Access this function together with the SHIFT button. 2 Press the 2 or 3 button until you see D. R.C. in the - Pioneer HTZ-77DV | Owner's Manual - Page 63
dual-mono setting to play just the guitar part on its own; just the backing, or everything together (through separate speakers, or mixed). 1 Press SYSTEM SETUP. • Access this function together with the SHIFT button. 2 Press the 2 or 3 button until you see one of the displays shown below. 3 Use - Pioneer HTZ-77DV | Owner's Manual - Page 64
sound. You can do this in any mode, including the surround, DSP, and stereo modes. d f dDSP f ءจ ÷㕐၇DSP f • Each DSP effect has its The channel levels you set for the surround mode apply to all Advanced Theater effects. f • The headphone level is not affected by the channel level - Pioneer HTZ-77DV | Owner's Manual - Page 65
English Using the DVD Setup menu The DVD Setup menu gives you access to all the system's DVD settings. Press DVD SETUP to display/leave the menu and the cursor (25∞3) and ENTER buttons on the remote to navigate and select options. In some screens you can press RETURN to leave the - Pioneer HTZ-77DV | Owner's Manual - Page 66
96kHz PCM Out - 96kHz 3 48kHz 96kHz Changes 96kHz output mode Move SETUP Exit You only need to make this setting if you connected this system to another component (MD recorder, etc.) using the digital out. If your AV amplifier (or other connected component) is 96kHz audio compatible, set to - Pioneer HTZ-77DV | Owner's Manual - Page 67
screen area. When playing software recorded in conventional (4:3) format, the settings on your TV will determine how the material is presented-see the manual that came with your TV for details on what options are available. If you have a conventional TV, choose either 4:3 (Letter Box) or 4:3 (Pan - Pioneer HTZ-77DV | Owner's Manual - Page 68
, it can "burn in" leaving a ghost image on the screen. Switch On the screen saver to make sure that a constant image is not displayed for a stopped. Video Adjust Audio V1 Video2 Language General Background - Pioneer Logo Video Adjust Start Picture Quality Controls Move SETUP Exit There - Pioneer HTZ-77DV | Owner's Manual - Page 69
- High contrast picture • Animation - Picture with rich color • Memory 1, 2, 3 - User presets (see below for more on these) 3 f ÷ Standard d f ÷ Cinema f Fine Focus Move On Off ENTER Select DISPLAY Check • Fine Focus - Switch on to reveal greater detail (higher resolution) in the picture. • - Pioneer HTZ-77DV | Owner's Manual - Page 70
min max green red Off 1 2 3 • The parameters you can adjust are the same as above. • To save your changes in one of the user presets, highlight Memory 1, 2 or 3 and press ENTER. 3 ܲ DVD DISPf 4 ͜5 d 2ձ 3 f Fine Focus Contrast Sharpness Chroma Level Hue Memory On Off min max soft fine - Pioneer HTZ-77DV | Owner's Manual - Page 71
a still frame from a DVD disc. The default Auto setting lets the system decide which to use. Field - produces a stable, generally shake-free image : Position - Normal Audio V1 Video2 Language General Background Color - Pioneer Logo Video Adjust Still Picture - Auto On Screen Display - -Position - Pioneer HTZ-77DV | Owner's Manual - Page 72
Auto Language - Italian Spanish Other Setup audio language Move SETUP Exit Angle Indicator j On Audio V1 Video2 Language General Background Color - Pioneer Logo Video Adjust Still Picture - Auto On Screen Display - Position - Normal Angle Indicator - On Off Move SETUP Exit d dሗਗ਼Angle - Pioneer HTZ-77DV | Owner's Manual - Page 73
If the language you specify here is recorded on a disc, the system automatically plays the disc in that language (although this depends on the also want to refer to the Language code list on page 89. You can switch between the languages recorded on a DVD disc any time during playback using the - Pioneer HTZ-77DV | Owner's Manual - Page 74
to refer to the Language code list on page 89. You can change or switch off the subtitles on a DVD disc any time during playback using the SUBTITLE button will be shown with subtitles. Set to Off to have the system play discs strictly according to your Audio Language and Subtitle Language settings - Pioneer HTZ-77DV | Owner's Manual - Page 75
DVD Setup Menu DVDணໄ፯ఊ 10 English You can still switch audio and subtitle languages on playback using the AUDIO and SUBTITLE buttons. DVD Language • Default Setting: w/Subtitle Language Audio Video1 V2 Language General OSD Language - - Pioneer HTZ-77DV | Owner's Manual - Page 76
Move SETUP Exit Set to On, the player displays subtitles according to the Subtitle Language and Auto Language settings above. Set to Off to switch subtitles off altogether (although see Subtitle Off on this page for special cases). Set to Assist Subtitle to have the player display the extra - Pioneer HTZ-77DV | Owner's Manual - Page 77
to enter a password before the disc will play. This gives you some control about what your children watch on your DVD player. Some discs also support the Country Code feature. The player does not play certain scenes on these discs, depending on the country code you set. ɓছணໄ Setup Menu Mode - Pioneer HTZ-77DV | Owner's Manual - Page 78
to change the cursor position). 3 Press ENTER to register the password. If you forget your password, you can reset the system then register a new one. See page 93 for how to reset the player. һҷParental Lock Country Code f 1 ፯ " Password "f 2 f d f 3 ܲENTER೮ᇁf d d f f Changing - Pioneer HTZ-77DV | Owner's Manual - Page 79
DVD Setup Menu DVDணໄ፯ఊ 10 English Setting/changing the Parental Lock level 1 Select 'Level'. 2 Use number buttons to enter your password, then press ENTER. 3 Select a new level. Move leftward to lock more levels (more discs will require the password); rightward to unlock levels. You can't lock - Pioneer HTZ-77DV | Owner's Manual - Page 80
10 DVD Setup Menu DVDணໄ፯ఊ Country code list Country Input code ARGENTINA AUSTRALIA AUSTRIA BELGIUM BRAZIL CANADA CHILE CHINA DENMARK FINLAND FRANCE GERMANY HONG KONG INDIA INDONESIA ITALY JAPAN KOREA, REPUBLIC OF MALAYSIA MEXICO NETHERLANDS NEW ZEALAND NORWAY PAKISTAN PHILIPPINES PORTUGAL - Pioneer HTZ-77DV | Owner's Manual - Page 81
all the components are switched off and unplugged from the power supply. ࠠࠅ d d f Connecting other components 1 Use a stereo audio cable to connect digital output of an external component the OPTICAL IN jack of this system. This will allow you to play a digital audio component fitted with - Pioneer HTZ-77DV | Owner's Manual - Page 82
OUT jack of this system to the optical digital input of an external component. This will allow you to record from this system to an external digital MD and DAT players and satellite receivers. Check the instructions that came with your other component for more details. ءจ OPTICAL IN d i d d - Pioneer HTZ-77DV | Owner's Manual - Page 83
Connecting Up ஹટ 11 Connecting external antennas External AM antenna Use 5-6 meters (15-18 ft.) of vinyl-insulated wire and set up either indoors (B) or outdoors (A). Leave the supplied AM loop antenna connected. External FM antenna Use 75Ω coaxial cable to hook up an - Pioneer HTZ-77DV | Owner's Manual - Page 84
12 Additional Information Child lock When set to on, the remote control functions normally, but all front panel controls are inoperative. Յഁᕁ֛ d d f 1 Switch the system into standby. 2 Press SYSTEM MENU and select CHILD LOCK. • Change menu options using the 2 and 3 buttons. Press ENTER to - Pioneer HTZ-77DV | Owner's Manual - Page 85
are 5 levels of brightness. • ܲDIMMER f f Taking care of your system To clean this unit, wipe with a soft, dry cloth. For stubborn dirt malfunction due to dirt or dust, consult your nearest Pioneer authorized service center. Although lens cleaners for CD players are commercially available - Pioneer HTZ-77DV | Owner's Manual - Page 86
't risk using it-you could end up damaging the system. d f d f d ᐀d f d d f f dຟd d f This system is designed for use with conventional, fully circular discs only. Use of shaped discs is not recommended. Pioneer disclaims all liability arising in connection with the use of - Pioneer HTZ-77DV | Owner's Manual - Page 87
of digital audio (front left and right, surround left and right, center and lowfrequency channels). See also DTS. DTS A surround sound system developed by Digital Theater Systems as an alternative to Dolby Digital. DTS discs contain up to eight channels of digital audio. See also Dolby Digital. MPEG - Pioneer HTZ-77DV | Owner's Manual - Page 88
12 Additional Information Language code list Language Code/ᇜᇁ Japanese ( ja ) 1001 English ( en ) 0514 French ( fr) 0618 German ( de ) 0405 Italian ( it ) 0920 Spanish ( es ) 0519 Dutch ( nl ) 1412 Russian ( ru ) 1821 Chinese ( zh ) 2608 Korean ( ko ) 1115 Greek ( el - Pioneer HTZ-77DV | Owner's Manual - Page 89
bars at the either side of the screen. ૢ७f 16:9 (Wide) The program appears stretched. Your TV will determine how the picture is presented-check the manual that came with the TV for details. f f 89 En/ChH - Pioneer HTZ-77DV | Owner's Manual - Page 90
Troubleshooting Incorrect operation is often mistaken for trouble or malfunction. If you think that there is something wrong with this component, check the points below. Sometimes the trouble trouble cannot be rectified after checking the items below, ask your nearest Pioneer authorized service - Pioneer HTZ-77DV | Owner's Manual - Page 91
Troubleshooting tips Problem that the disc is seated properly in the disc guide. • Check that the disc has a compatible region . • Switch the power off once, then on again using the front panel standby/on switch. • system through a VCR or an AV selector may prevent recording or cause picture problems - Pioneer HTZ-77DV | Owner's Manual - Page 92
re using the remote within its operating range and that there are no obstacles between the remote and the sensor Switch the system into standby using the the unit for proper operation. If this does not correct the front panel standby/on switch. problem, please consult your nearest Pioneer service - Pioneer HTZ-77DV | Owner's Manual - Page 93
12 English ਪᕚ CDeDVDձVCD f f ણ݄ f f f f f f f f f f f ࣛdᜑͪ f d f f d f d STANDBY/ON f f d f f d f f f f f d f d f f f f d d d f f d d f d f f f f f 93 ChH - Pioneer HTZ-77DV | Owner's Manual - Page 94
12 ણ݄ f f d d f f d f e f d f f f f MP3 f f d f d f f dᜑͪ UNPLAYABLE MP3 FORMATৃࢹf f f f f f d f f d f f d f d f f d f d f f f d f ءจ f d d f d Pioneer f ӻ୕ూЗ d e f 1 STANDBY/ON f 2 7ܲඐd f f 94 ChH - Pioneer HTZ-77DV | Owner's Manual - Page 95
Additional Information 12 Specifications Powered subwoofer (S-DV77SW) Amplifier Section Surround Front, Center, Rear 30 W, per channel (1 kHz, 1% T.H.D., 8 Ω) Subwoofer 50W (100Hz, 1% T.H.D., 4Ω) Continuous power output (RMS) Front, Center, Rear 40W, per channel (1kHz, 10% T.H.D., 8Ω) - Pioneer HTZ-77DV | Owner's Manual - Page 96
12 Additional Information Satellite speakers Satellite speaker system (S-DV77ST) Type Sealed, antimagnetic (EIAJ) Speaker 8.7cm (cone type) Nominal impedance 8 Ω Frequency range 100 to 20,000 Hz Max. input 40 W (EIAJ) Front, Rear speakers - Pioneer HTZ-77DV | Owner's Manual - Page 97
unit 1 Remote control unit instructions (Basic 1 Note: • Specifications and design subject to possible modification without notice, due improvements. Չ˼ j ڝ 1 1 2 1 1 1 1 3 2 19 4 1 1 1 1 1 ءจj d f Published by Pioneer Corporation. Copyright © 2001 Pioneer - Pioneer HTZ-77DV | Owner's Manual - Page 98
12 Additional Information 98 En/ChH - Pioneer HTZ-77DV | Owner's Manual - Page 99
Additional Information 12 99 En/ChH - Pioneer HTZ-77DV | Owner's Manual - Page 100
more than five minutes in the DVD/CD function. 1 Switch the system into standby. 2 Press SYSTEM MENU and select DEMO MODE. • Change menu options using the .11 PIONEER ELECTRONICS AUSTRALIA PTY. LTD. 178-184 Boundary Road, Braeside, Victoria 3195, Australia, TEL: [03] 9586-6300 PIONEER ELECTRONICS
-
 1
1 -
 2
2 -
 3
3 -
 4
4 -
 5
5 -
 6
6 -
 7
7 -
8
-
9
-
10
-
11
-
12
-
13
-
14
-
15
-
16
-
17
-
18
-
19
-
20
-
21
-
22
-
23
-
24
-
25
-
26
-
27
-
28
-
29
-
30
-
31
-
32
-
33
-
34
-
35
-
36
-
37
-
38
-
39
-
40
-
41
-
42
-
43
-
44
-
45
-
46
-
47
-
48
-
49
-
50
-
51
-
52
-
53
-
54
-
55
-
56
-
57
-
58
-
59
-
60
-
61
-
62
-
63
-
64
-
65
-
66
-
67
-
68
-
69
-
70
-
71
-
72
-
73
-
74
-
75
-
76
-
77
-
78
-
79
-
80
-
81
-
82
-
83
-
84
-
85
-
86
-
87
-
88
-
89
-
90
-
91
-
92
-
93
-
94
-
95
-
96
-
97
-
98
-
99
-
100
 |
 |

XV-DV77
S-DV77SW
POWERED SUBWOOFER
S-DV77ST
SATELLITE SPEAKER