Pioneer S-DJ08 Owner's Manual - Page 6
Introduction, Installation - s dj05
 |
UPC - 884938122696
View all Pioneer S-DJ08 manuals
Add to My Manuals
Save this manual to your list of manuals |
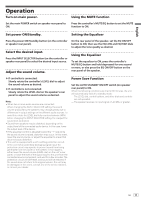
Page 6 highlights
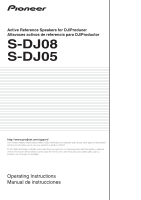
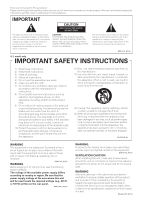
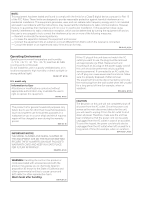
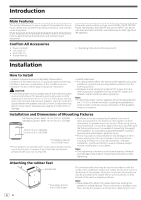
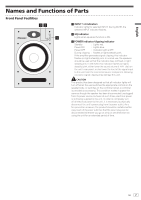
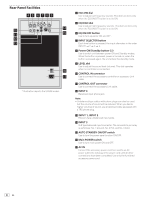
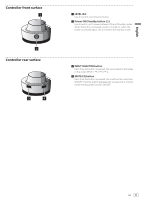
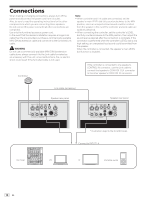
Introduction Main Features This product allows you to use a single set of speakers for all your music needs, from DJ performances to production, and ordinary music enjoyment. Audio response can be adjusted to perfectly match all situations, from DJ performances to production and ordinary music enjoyment. Frequently used controls such as sound LEVEL, MUTE ON/OFF, Power ON/Standby, EQ ON/OFF and source INPUT can be set with the hand-held controller simultaneously for both right and left speakers. Confirm All Accessories ! Power cords (2) ! Link cable (1) ! Controller (1) ! Rubber feet (8) ! Operating Instructions (this document) Installation How to Install A speaker's playback sound is delicately influenced by conditions in the listening room. To produce optimum listening conditions, take due consideration of the conditions of your installation location before beginning actual installation. CAUTION ! To promote proper cooling, please assure that sufficient space is preserved between the speakers and nearby walls or other components (minimum 30 cm (11.9 in.) or more above, behind, and to right and left sides of each speaker). Leaving insufficient space between the speaker and walls or other components may lead to rising interior temperatures, leading to malfunction or damage. ! Install at ear level. ! For natural stereo effect, the right and left speakers should be installed in symmetrical and equidistant positions from the listening position. ! Speakers should ideally be located at 30° angles from the listening position (together forming a total 60° angle), and rotated inward to face the listening position. Note: ! To promote proper cooling, speakers should be separated 30 cm (11.9 in.) or more from walls. Locating the speakers too close to walls could also cause a disruption of the speakers' frequency response. Installation and Dimensions of Mounting Fixtures M5 tapping screw, depth 13 mm (0.5 in.) (S-DJ05) M8 tapping screw, depth 13 mm (0.5 in.) (S-DJ08) 60 mm (2.4 in.) (S-DJ05) 150 mm (5.9 in.) (S-DJ08) * Illustration depicts the S-DJ08 model. ! These speakers are provided with no accessory speaker stands, mounting fixtures, or screws. If such facilities are desired, please provide your own as required. ! As shown in the accompanying illustration, two screw holes are provided on the bottom of each speaker to allow attachment to speaker mounting fixtures. When using such a mounting fixture, consult the usage instructions provided with the fixture and be sure it is capable of supporting the weight of the speaker. An improperly supported speaker could fall, causing serious damage or personal injury. ! Pioneer accepts no responsibility for any damages or other issues arising from the use of speaker mounting fixtures, including mistaken or insufficient assembly, improper installation, insufficient ability to support speaker weight, misuse, modification, or accidents. Note: ! Over tightening of screws could cause stripping of threads and damage to the product. Take proper precautions when tightening. Attaching the rubber feet Rubber feet * Illustration depicts the S-DJ08 model. The provided rubber feet may be used in accordance with the needs of the installation. Attach one rubber foot to each corner of the bottom of the speaker. Note that insufficient slip-resistance may be provided by the rubber feet in some locations, so they should not be used on slippery surfaces. Note: ! Never attempt to attach the rubber feet while holding the speaker in a tilted attitude. Place a soft cloth or blanket on the floor, and lay the speaker on its side when attaching the feet. 6 En
-
 1
1 -
 2
2 -
 3
3 -
 4
4 -
 5
5 -
 6
6 -
 7
7 -
 8
8 -
 9
9 -
 10
10 -
 11
11 -
 12
12 -
13
-
14
-
15
-
16
-
17
-
18
-
19
-
20
-
21
-
22
-
23
-
24
-
25
-
26
-
27
-
28
 |
 |