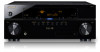
Pioneer VSX-33 Owner's Manual
Pioneer VSX-33 Manual
 |
UPC - 884938109048
View all Pioneer VSX-33 manuals
Add to My Manuals
Save this manual to your list of manuals |
Pioneer VSX-33 manual content summary:
- Pioneer VSX-33 | Owner's Manual - Page 1
Operating Instructions audio/video multi-channel receiver 33 VSX32 VSX- - Pioneer VSX-33 | Owner's Manual - Page 2
servicing) instructions in the literature accompanying the appliance. D3-4-2-1-1_A1_En 1) Read these instructions. 2) Keep these instructions. 3) Heed all warnings. 4) Follow all instructions Cable should be used for connection with speaker, and should be routed away from hazards to avoid damage to - Pioneer VSX-33 | Owner's Manual - Page 3
Name: AUDIO/VIDEO MULTI-CHANNEL RECEIVER Model Number: VSX-33 / VSX-32 Responsible Party Name: PIONEER ELECTRONICS (USA) INC. SERVICE SUPPORT DIVISION Address radio frequency energy and, if not installed and used in accordance with the instructions, may cause harmful interference to radio - Pioneer VSX-33 | Owner's Manual - Page 4
This product is for general household purposes. Any failure due to use for other than household purposes (such as long-term use for business purposes in a restaurant or use in a car or ship) and which requires repair will be charged for even during the warranty period. K041_A1_En WARNING: Handling - Pioneer VSX-33 | Owner's Manual - Page 5
to the front panel input 32 Connecting an XM Radio tuner (VSX-33 only 33 Connecting a SiriusConnect™ tuner 33 Connecting an iPod 33 Connecting a USB device 34 Connecting a USB device for Advanced MCACC output 34 Connecting an IR receiver 35 Operating other Pioneer components with this unit - Pioneer VSX-33 | Owner's Manual - Page 6
multi-operation 69 Resetting the remote control settings 70 Default preset codes 70 Controlling components 70 10 The Advanced MCACC menu Making receiver settings from the Advanced MCACC menu 73 Automatic MCACC (Expert 73 Manual MCACC setup 75 Fine Channel Level 76 Fine Speaker Distance 76 - Pioneer VSX-33 | Owner's Manual - Page 7
Additional information Speaker Setting Guide 88 Positional relationship between speakers and monitor 89 Troubleshooting 89 Power 89 No sound 90 Other audio problems 91 ADAPTER PORT 92 Video 92 Settings 93 Professional Calibration EQ graphical output . . . . . 93 Display 94 Remote control - Pioneer VSX-33 | Owner's Manual - Page 8
59) • Setting the Video options (page 61) 13 Other optional adjustments and settings • Control with HDMI function (page 56) • The Advanced MCACC menu (page 73) • The System Setup and Other Setup menus (page 82) 14 Making maximum use of the remote control • Operating multiple receivers (page 66 - Pioneer VSX-33 | Owner's Manual - Page 9
: • Setup microphone (cable: 5 m (16.4 ft.)) • Remote control unit • AAA size IEC R03 dry cell batteries (to confirm system operation) x2 • AM loop antenna • FM wire antenna • iPod cable • Power cord • Warranty card • These operating instructions Note 1 XM Radio is only supported on the VSX-33 - Pioneer VSX-33 | Owner's Manual - Page 10
turned off) and could cause burns. Operating range of remote control unit The remote control may not work properly if: • There are obstacles between the remote control and the receiver's remote with governmental regulations or environmental public instruction's rules that apply in your country - Pioneer VSX-33 | Owner's Manual - Page 11
the remote control for the receiver. RECEIVER MULTI OPERATION SOURCE 1 R.SETUP 2 BD DVD DVR/BDR HDMI 10 TV CD NET RADIO ADAPTER 3 iPod USB TUNER SIRIUS XM INPUT SELECT TV CTRL RECEIVER 4 11 MASTER INPUT VOLUME TV CONTROL 5 12 CH VOL MUTE 13 AUDIO PARAMETER VIDEO PARAMETER - Pioneer VSX-33 | Owner's Manual - Page 12
HDMI iPod iPhone PRESET ENTER TUNER EDIT AUTO SURR/ALC/ STREAM DIRECT STEREO ADVANCED SURROUND STANDARD SURROUND HOME THX SPEAKERS MULTI-ZONE CONTROL ON / OFF MASTER VOLUME PHONES MCACC SETUP MIC iPod iPhone USB VIDEO CAMERA HDMI 5 9 10 11 1 INPUT SELECTOR dial Use to select - Pioneer VSX-33 | Owner's Manual - Page 13
sensor Receives the signals from the remote control (see Operating range of remote control unit on page 10). 8 MASTER VOLUME dial 9 PHONES jack Use to connect headphones. When the headphones are connected, there is no sound output from the speakers. 10 Listening mode buttons AUTO SURR/ALC/STREAM - Pioneer VSX-33 | Owner's Manual - Page 14
during DSD (Direct Stream Digital) to PCM one of the Home THX modes is VSX-33.) 14 Scroll indicators Light when there are more selectable items when making the various settings. 15 Speaker indicators Lights to indicate the current speaker system, A and/or B (page 62). 16 SLEEP Lights when the receiver - Pioneer VSX-33 | Owner's Manual - Page 15
your equipment This receiver provides you with many connection possibilities, but it doesn't have to be difficult. This chapter explains the kinds of components you can connect to make up your home theater system. Important • Illustration shows the VSX-33, however connections for the VSX-32 are the - Pioneer VSX-33 | Owner's Manual - Page 16
RS-232C and EXTENSION terminals. Using the CU-RF100 lets you display the receiver's display information on the remote control display in your hands and operate it without worrying about obstacles or the direction in which the remote control is pointing. AM LOO RS-232C ANTENNA (OUTPUT 5 V 150 mA MAX - Pioneer VSX-33 | Owner's Manual - Page 17
SBL A 9.1 ch surround system connects the left and right front speakers (L/R), the center speaker (C), the left and right front height speakers (FHL/FHR), the left and right surround speakers (SL/SR), the left and right surround back speakers (SBL/SBR), and the subwoofer (SW). This surround system - Pioneer VSX-33 | Owner's Manual - Page 18
and right front height speakers at least one meter (3.3 ft.) directly above the left and right front speakers. THX speaker system setup If you are using you the best sound experience when using the Home THX modes (page 53). Some tips for improving sound quality Where you put your speakers in the - Pioneer VSX-33 | Owner's Manual - Page 19
listener than for home theater playback. • Try not to place the surround speakers farther away from the listening position than the front and center speakers. Doing so can weaken the surround sound effect. Connecting the speakers Each speaker connection on the receiver comprises a positive (+) and - Pioneer VSX-33 | Owner's Manual - Page 20
) OUT VIDEO DVR/BDR OUT IN CD IN AUDIO CD-R/TAPE OUT IN FRONT CENTER SURROUND SURR BACK FH/FW (Single) PRE OUT L Y PB PR MONITOR OUT R SUBWOOFER AM LOOP RS-232C ANTENNA FM UNBAL 75 SPEAKERS A R FRONT L CENTER R SURROUND L B R SURROUND BACK L(Single) FRONT HEIGHT / FRONT - Pioneer VSX-33 | Owner's Manual - Page 21
so may damage your speakers. Bi-wiring your speakers Your speakers can also be bi-wired if they support biamping. • With these connections, the Speaker System setting makes no difference. • To bi-wire a speaker, connect two speaker cords to the speaker terminal on the receiver. Using a banana plug - Pioneer VSX-33 | Owner's Manual - Page 22
the Speaker System menu. See Speaker system setting on page 83 to do this. Front wide setup 1 Connect a pair of speakers to the front height speaker terminals. receiver's HDMI video outputs when connecting this video source.1 Note 1 • If the video signal does not appear on your TV, try adjusting - Pioneer VSX-33 | Owner's Manual - Page 23
a component that is not compatible with HDCP, an HDCP ERROR message is displayed on the front panel display. Some components that are compatible with HDCP still cause this message to be displayed, but so long as there is no problem with displaying video this is not a malfunction. • Depending on - Pioneer VSX-33 | Owner's Manual - Page 24
Connecting using HDMI If you have an HDMI or DVI (with HDCP) equipped component (Blu-ray disc player (BD), etc.), you can connect it to this receiver using a commercially available HDMI cable. If the TV and playback components support the Control with HDMI feature, the convenient Control with HDMI - Pioneer VSX-33 | Owner's Manual - Page 25
an optical digital audio cable, you'll need to tell the receiver which digital input you connected the player to (see The Input Setup menu on page 39). Note 1 When the TV and receiver are connected by HDMI connections, if the TV supports the HDMI Audio Return Channel function, the sound of the TV - Pioneer VSX-33 | Owner's Manual - Page 26
to listen to HD audio on the receiver. Do not use an HDMI cable to input video signals. Depending on the video component, it may not be possible instructions supplied with your component for more information. • If you want to listen to the sound of the TV over the receiver, connect the receiver - Pioneer VSX-33 | Owner's Manual - Page 27
and BD recorders. When you set up the receiver you'll need to tell the receiver which input you connected the recorder to (see also The Input Setup menu on page 39). HDD/DVD recorder, BD recorder, etc. AUDIO IN R ANALOG L VIDEO IN VIDEO VIDEO OUT VIDEO Select one DIGITAL OUT AUDIO OUT COAXIAL - Pioneer VSX-33 | Owner's Manual - Page 28
receiver you'll need to tell the receiver which input you connected the component to (see also The Input Setup menu on page 39). CD-R, MD, DAT, etc. VIDEO OUT VIDEO IN 3 (VIDEO DVR/BDR OUT IN CD IN AUDIO CD-R/TAPE OUT IN FRONT CENTER SURROUND SURR B SUBWOOFER FM UNBAL 75 SPEAKERS A R - Pioneer VSX-33 | Owner's Manual - Page 29
Connecting additional amplifiers This receiver has more than enough power for any home use, but it's speakers. ANALOG INPUT L R Front channel amplifier N (10/100) XM IN ADAPTER PORT (OUTPUT 5 V 100 mA MAX) IAL OPTICAL ABLE ASSIGNABLE IN 2 IN 1 IN 2 IN 3 (CD) (TV/SAT) (DVR/BDR) (VIDEO - Pioneer VSX-33 | Owner's Manual - Page 30
release the best results, extend the FM antenna fully and fix to a wall or door frame. Don't drape loosely or leave coiled up. AM LOOP ANTENNA FM UNBAL 75 Indoor antenna (vinyl-coated wire) 5 m to 6 m (16 ft. to 20 ft.) MULTI-ZONE setup This receiver can power up to three (VSX-33)/two (VSX-32 - Pioneer VSX-33 | Owner's Manual - Page 31
TV/SAT, DVR/BDR, VIDEO, INTERNET RADIO, iPod/USB, XMa, CD, CD-R/TAPE, TUNER, ADAPTER PORT, SIRIUS (Outputs analog audio and composite video.) DVD, TV/SAT, DVR/BDR, VIDEO, CD, CD-R/TAPE, TUNER, ADAPTER PORT (Outputs analog audio.) a.VSX-33 only. Basic MULTI-ZONE setup (ZONE 2) • Connect a separate - Pioneer VSX-33 | Owner's Manual - Page 32
VOLUME LAN terminal Ethernet jack 10BASE-T/100BASE-TX MCACC SETUP MIC iPod iPhone USB VIDEO CAMERA HDMI 5 Video camera, etc. Note 1 To listen to Internet radio stations, you must sign a contract with an ISP (Internet Service Provider) beforehand. 2 The Bluetooth ADAPTER (AS-BT100) is sold - Pioneer VSX-33 | Owner's Manual - Page 33
RADiO SATELLiTE RADiO XM Mini-Tuner and Home Dock with antenna • For instructions on playing the XM Radio, see Listening to XM Radio (VSX-33 only) on page 47. CONTROL ON / OFF MCACC SETUP MIC iPod iPhone USB VIDEO CAMERA HDMI 5 MASTER VOLUME Connecting a SiriusConnect™ tuner To receive - Pioneer VSX-33 | Owner's Manual - Page 34
input name in the Input Setup menu (page 39). • Add names to radio station presets (page 45). • Enter Internet radio station URLs (page 46). • Switch the receiver into standby then connect your USB device to the USB terminal on the front panel of this receiver.1 • For instructions on playing the USB - Pioneer VSX-33 | Owner's Manual - Page 35
remote sensor on the front panel of this receiver.1 1 Connect the IR receiver sensor to the IR IN jack on the rear of this receiver. Closet or shelving unit Pioneer component Non-Pioneer SPEAKERS A Class 2 Wiring 12 V TRIGGER (OUTPUT 12 V 1 TOTAL 150 mA MAX) IN 1 IN 2 OUT 2 IR IR receiver - Pioneer VSX-33 | Owner's Manual - Page 36
ZONE2 ZONE3 OUT OUT DVD TV/SAT VIDEO IN IN IN DVR/BDR OUT Y PB Setup on page 56. Plugging in the receiver Only plug in after you have connected all your components to this receiver, including the speakers , ask your nearest Pioneer authorized independent service company for a replacement - Pioneer VSX-33 | Owner's Manual - Page 37
VIDEO input is now selected). 2 Press RECEIVER on the remote control, then press HOME MENU. A Graphical User Interface (GUI) screen appears on your TV. Use and ENTER to navigate through the screens and select menu items. Press RETURN to exit the current menu. 3 Select 'System Setup' from the Home - Pioneer VSX-33 | Owner's Manual - Page 38
using the Auto MCACC Setup on page 39) and verifying the mic connection. If there doesn't seem to be a problem, you can simply select GO NEXT and continue. 1a.Full Auto MCACC A/V RECEIVER Now Analyzing... 2/9 Environment Check Ambient Noise : OK Microphone : Speaker YES/NO : Exit Cancel - Pioneer VSX-33 | Owner's Manual - Page 39
Setup' from the Home Menu. 3 Select 'Input Setup' from the System Setup menu. 4.System Setup A/V RECEIVER a.Manual SP Setup b. Input Setup c. OSD Language d. Network Setup e. Other Setup 4b.Input Setup A/V RECEIVER as DVD or VIDEO) which, in turn, correspond with the names on the remote control. 5 - Pioneer VSX-33 | Owner's Manual - Page 40
36), select MAIN, ZONE 2, ZONE 3 (VSX-33 only) or OFF for the corresponding Setup menu on page 39 to tell the receiver how you've connected up. The dots () indicate possible assignments. Input function DVD BD TV/SAT DVR/BDR VIDEO HDMI 1 HDMI 2 HDMI 3 HDMI 4 HDMI 5 (front panel) INTERNET RADIO - Pioneer VSX-33 | Owner's Manual - Page 41
basic instructions for playing a source (such as a DVD disc) with your home theater system. 1 Switch on your system components and receiver. Make sure that the TV's video input is set to this receiver. 2 Select the input function you want to play. You can use the input function buttons on the remote - Pioneer VSX-33 | Owner's Manual - Page 42
This receiver's remote control buttons can be used for basic playback of files stored on an iPod.2 • Press iPod USB to switch the remote control to the iPod/USB operation mode. AUDIO PARAMETER LIST VIDEO PARAMETER TUNE TOOLS TOP MENU BAND T.EDIT GUIDE PRESET ENTER PRESET CATEGORY HOME MENU - Pioneer VSX-33 | Owner's Manual - Page 43
receiver's remote control buttons can be used for basic playback of files stored on USB memory devices. • Press iPod USB to switch the remote control to the iPod/USB operation mode. AUDIO PARAMETER LIST VIDEO PARAMETER TUNE TOOLS TOP MENU BAND T.EDIT GUIDE PRESET ENTER PRESET CATEGORY HOME - Pioneer VSX-33 | Owner's Manual - Page 44
receiver supports the following file formats. Note that some file formats are not available for playback although they are listed as playable file formats. Music files Category Extension Stream 48 kHz 16 bit 2 ch 8 kbps to 320 kbps Supported/Supported 32 kHz, 44.1 kHz, 48 kHz 8 bit, 16 bit 2 ch, - Pioneer VSX-33 | Owner's Manual - Page 45
Manual tuning - To change the frequency one step at a time, press TUNE /. High speed tuning - Press and hold TUNE / for high speed tuning. Release enter the frequency of the radio station. For example, manually tuning in each time. This receiver remote control to recall the station preset. 45 En - Pioneer VSX-33 | Owner's Manual - Page 46
stations you wish to listen to onto this unit. See Programming the Internet radio stations below for how to program. Though the Internet radio stations are programmed in this receiver before it leaves the factory, the link may have expired. In that case, preset the stations again yourself. 1 Press - Pioneer VSX-33 | Owner's Manual - Page 47
this receiver is set to the Internet radio function. • When entering the title and URL of Internet radio station, do not press 'Update' while you are connected to other stations (i.e., labelled as "Connecting..."). Listening to Satellite Radio Important • XM Radio is only supported on the VSX-33 - Pioneer VSX-33 | Owner's Manual - Page 48
Radio, see About SIRIUS and XM on page 102. • Press SIRIUS to switch to the SIRIUS input. For best reception, you may need to move the SiriusConnect™ tuner antenna near a window (refer to the manual for the SiriusConnect™ Home tuner for antenna placement recommendations).3 Note 1 You can reset - Pioneer VSX-33 | Owner's Manual - Page 49
receiver to select channels and navigate categories using the GUI screen display.2 Selecting channels and browsing by genre From the SIRIUS Channel Guide, you can browse SIRIUS Radio can reset the Channel presets and memory in Resetting the system on page 64. 4 You can reset the Channel Skip/Add - Pioneer VSX-33 | Owner's Manual - Page 50
Device not equipped with Bluetooth wireless technology: Digital music player + Bluetooth audio transmitter (sold commercially) Music data This receiver Bluetooth® ADAPTER Remote control operation Wireless music play When the Bluetooth ADAPTER (Pioneer Model No. ASBT100)1 is connected to this unit - Pioneer VSX-33 | Owner's Manual - Page 51
Start playback of music contents stored on the Bluetooth wireless technology device. This receiver's remote control buttons can be trademarks owned by Bluetooth SIG, Inc. and any use of such marks by Pioneer Corporation is under license. Other trademarks and trade names are those of their respective - Pioneer VSX-33 | Owner's Manual - Page 52
source, press RECEIVER , then press AUTO/ALC/DIRECT (AUTO SURR/ALC/STREAM DIRECT) for for more on this). • VSX-33 only: When listening to XM Radio, the XM HD Surround Speaker System is set to Normal(SB/FW). 5 When listening to 2-channel sources in Neo:6 Cinema or Neo:6 Music mode, you can also adjust - Pioneer VSX-33 | Owner's Manual - Page 53
- See above3 • WIDE SURROUND MUSIC - See above3 • Straight Decode - Plays back without the effects above. Using the Home THX modes THX and Home THX are technical standards created by THX Ltd. for cinema and home theater sound. Home THX is designed to make home theater audio sound more like what you - Pioneer VSX-33 | Owner's Manual - Page 54
signal and whether or not surround back speakers are connected. For details, see Auto Surround, ALC and Stream Direct with different input signal formats on page 103. • While listening to a source, press RECEIVER , then press AUTO/ALC/DIRECT (AUTO SURR/ALC/STREAM DIRECT) to select the mode you want - Pioneer VSX-33 | Owner's Manual - Page 55
a video game close to the TV). • While listening to a source, press RECEIVER , Dolby Digital, DTS, WMA9 Pro, PCM (32 kHz to 192 kHz), Dolby TrueHD, For more details, refer to the instruction manual supplied with your DVD player. 3 a higher value. • If the speaker distance is not properly set, you - Pioneer VSX-33 | Owner's Manual - Page 56
terminal. HDMI Setup You must adjust the settings of this receiver as well as the connected Control with HDMI-compatible components in order to make use of the Control with HDMI function. For more information see the operating instructions for each component. 1 Press RECEIVER , then press HOME MENU - Pioneer VSX-33 | Owner's Manual - Page 57
used. When this unit's power is turned off, audio and video of sources connected via HDMI are not adjust the receiver's volume or mute the sound using the TV's remote control. • When in the synchronized amp mode, the synchronized amp mode is canceled when the receiver's power is turned off. To turn - Pioneer VSX-33 | Owner's Manual - Page 58
) can cause operational errors. • When Control is set to ON, HDMI Input in The Input Setup menu on page 39 is automatically set to OFF. • When the receiver's Control is turned ON, even if the receiver's power is in the standby mode, it is possible to output the audio and video signals from a player - Pioneer VSX-33 | Owner's Manual - Page 59
video. MIDNIGHT Allows you to hear effective surround sound of movies at low volumes. MIDNIGHT/ LOUDNESS OFF MIDNIGHT ON LOUDNESS Used to get good bass and treble from music channels. Both channels heard from front speakers DRC (Dynamic Range Control) Adjusts the level of dynamic range for - Pioneer VSX-33 | Owner's Manual - Page 60
, selecting this ON mode allows you to hear a virtual front height channel through your front speakers.k a.The adjustment can be made only when TONE is set to ON. b.With the iPod/USB, INTERNET RADIO or ADAPTER PORT input function, by default S.RTRV is set to ON. c.UP1 to UP4 can be selected - Pioneer VSX-33 | Owner's Manual - Page 61
other than V. CONV can only be selected when V. CONV is set to ON. 1 Press RECEIVER , then press VIDEO PARAMETER. 2 Use / to select the setting you want to adjust. Depending on the current status/mode of the receiver, certain options may not be able to be selected. Check the table below for notes - Pioneer VSX-33 | Owner's Manual - Page 62
speaker setup on page 82. However, if SPB is selected above, no sound is heard from the subwoofer (the LFE channel is not downmixed). • All speaker systems (except Speaker B connections) are switched off when headphones are connected. 2 This can only be selected on the VSX-33. 3 If the receiver - Pioneer VSX-33 | Owner's Manual - Page 63
been muted (adjusting the volume also restores the sound).a a.You can only use this button when Speaker System is set to ZONE 2. Making an audio or a video recording You can make an audio or a video recording from the built-in tuner, or from an audio or video source connected to the receiver (such - Pioneer VSX-33 | Owner's Manual - Page 64
input, ZONE 3 input2 and HDMI OUT. 2 When you're finished, press STATUS again to switch off the display. Resetting the system Use this procedure to reset all the receiver's settings to the factory default. Use the front panel controls to do this. Set MULTI-ZONE to OFF. • Disconnect the iPod and USB - Pioneer VSX-33 | Owner's Manual - Page 65
Video Conversion SPEAKERS Speaker System Speaker HDMI HDMI Audio Amp HDMI output (VSX-33 only) HDMI OUT ALL Control ON Sound Retriever iPod/USB, INTERNET ON RADIO, ADAPTER PORT function Music Center Width 3 Options Dimension 0 Panorama OFF Neo:6 Options Center Image Neo:6 MUSIC - Pioneer VSX-33 | Owner's Manual - Page 66
be operated is switched by inputting the preset code to set the remote control setting. • Set the remote modes on the receivers before using this function (see Remote Control Mode Setup on page 87). 1 Press and hold R.SETUP, then press "4" for three seconds. The LED flashes continuously. • To cancel - Pioneer VSX-33 | Owner's Manual - Page 67
SOURCE R.SETUP BD DVD DVR/BDR HDMI TV CD NET RADIO ADAPTER iPod USB TUNER SIRIUS XM INPUT SELECT TV CTRL RECEIVER INPUT MASTER VOLUME TV CONTROL CH VOL MUTE AUDIO PARAMETER LIST VIDEO PARAMETER TUNE TOOLS TOP MENU BAND T.EDIT GUIDE PRESET ENTER PRESET CATEGORY RETURN HOME MENU - Pioneer VSX-33 | Owner's Manual - Page 68
the factory default. This function is handy for erasing all data programmed for devices no longer being used. 1 Press and hold R.SETUP, then receiver and the remote control. When you turn direct function off, you can operate the remote control without affecting the receiver. 1 Press and hold R.SETUP - Pioneer VSX-33 | Owner's Manual - Page 69
will run, then all Pioneer components will switch off4, followed by this receiver (switch of all the zones becomes off). Erasing the settings for the multi-operation This erases all the settings programmed in the remote control for the multi-operation. 1 Press and hold R.SETUP, then press "8" for - Pioneer VSX-33 | Owner's Manual - Page 70
SOURCE R.SETUP BD DVD DVR/BDR HDMI TV CD NET RADIO ADAPTER iPod USB TUNER SIRIUS XM INPUT SELECT TV CTRL RECEIVER INPUT MASTER VOLUME TV CONTROL CH VOL MUTE AUDIO PARAMETER LIST VIDEO PARAMETER TUNE TOOLS TOP MENU BAND T.EDIT GUIDE PRESET ENTER PRESET CATEGORY RETURN HOME MENU - Pioneer VSX-33 | Owner's Manual - Page 71
ENTER HDD (Red) DVD (Green) (Yellow) (Blue AUDIO DISP CH +/- TOOLS/GUIDE/ EPG ENTER HOME MENU RETURN Red Green Yellow Blue ANT AUDIO DISPLAY CH+/- USER MENU ENTER HOME MENU RETURN Red Green Yellow Blue AUTO SETUP FREEZE AV SELECTION SCREEN SIZE AUDIO DISPLAY CH+/- a. Controls for BD. TOOLS - Pioneer VSX-33 | Owner's Manual - Page 72
5 USER2 6 USER3 7 COLOR+ 8 SHARP+ 9 GAMMA 0 COLOR- • (dot) SHARP- ENTER (CLASS) COLOR TEMP EXIT INFO ENTER AUDIO DISP CH +/- ENTER TEST HIDE MENU HDMI1 HDMI2 COMP. VIDEO S-VIDEO BRIGHTBRIGHT+ POWER OFF ASPECT CONTRAST+/- 72 En - Pioneer VSX-33 | Owner's Manual - Page 73
) below for a more detailed MCACC setup. • Manual MCACC - Fine-tunes your speaker settings and customizes the Acoustic Calibration EQ (see Manual MCACC setup on page 75). • Demo - No settings are saved and no errors occur. When the speakers are connected to this receiver, the test tone is output - Pioneer VSX-33 | Owner's Manual - Page 74
the instructions on-screen. 6 Wait for the Auto MCACC Setup to finish outputting test tones. A progress report is displayed on-screen while the receiver outputs test tones to determine the speakers present in your setup. Try to be as quiet as possible while it's doing this.4 • With error messages - Pioneer VSX-33 | Owner's Manual - Page 75
receiver. • See Problems when using the Auto MCACC Setup on page 39 for notes regarding high background noise levels and other possible interference. • If you're using a subwoofer, switch it on and turn up the volume to the middle position. 1 Select 'Manual manually using the Manual speaker setup - Pioneer VSX-33 | Owner's Manual - Page 76
using the Manual speaker setup on page 82. 1 Select 'Fine SP Distance' from the Manual MCACC setup menu. 2 Adjust the distance of the left channel from the listening position. 3 Select each channel in turn and adjust the distance as necessary. Use / to adjust the delay of the speaker you selected - Pioneer VSX-33 | Owner's Manual - Page 77
, then use / to raise or lower the channel level for the current speaker. 3 When you're finished, press RETURN. You will return to the Manual MCACC setup menu. Acoustic Calibration EQ Professional This setup minimizes the unwanted effects of room reverberation by allowing you to calibrate your - Pioneer VSX-33 | Owner's Manual - Page 78
receiver (after calibration).2 Note that the EQ response may not appear entirely flat due to adjustments If 'Advanced EQ Setup' is selected, best to use the measurement results as a reference for your time setting. For an optimal system calibration based on the direct sound coming from the speakers - Pioneer VSX-33 | Owner's Manual - Page 79
setup on page 75, you can check your calibrated settings using the GUI screen. The data can be transferred to a computer using a USB device to check it on the computer's screen as well. 1 Press RECEIVER , then press HOME MCACC presets. See Acoustic Calibration EQ Adjust on page 77 for more on this - Pioneer VSX-33 | Owner's Manual - Page 80
listening positions (or frequency adjustments for the same listening from a sofa, or playing a video game close to the TV). From this you don't need. 1 Press RECEIVER , then press HOME MENU. A Graphical User Interface 'Memory Rename' from the Data Management setup menu. 2 Select the MCACC preset - Pioneer VSX-33 | Owner's Manual - Page 81
data If you want to manually adjust the Acoustic Calibration EQ (see Manual MCACC setup on page 75), we recommend setup menu. 2 Select the setting you want to copy. • All Data - Copies all the settings of the selected MCACC preset memory. • Level & Distance - Copies only the channel level and speaker - Pioneer VSX-33 | Owner's Manual - Page 82
how to change the speaker-related settings manually and make various other settings (input selection, OSD language selection, etc.). 1 Switch on the receiver and your TV. Make sure that the TV's video input is set to this receiver. 2 Press RECEIVER , then press HOME MENU. A Graphical User Interface - Pioneer VSX-33 | Owner's Manual - Page 83
with this receiver. In addition to a normal home theater setup where they are used for the front height speakers or front wide speakers, they can be used for bi-amping the front speakers or as an independent speaker system in another room. 1 Select 'Speaker System' from the Manual SP Setup menu. See - Pioneer VSX-33 | Owner's Manual - Page 84
, an important factor when setting up a home theater system. 1 Select 'Channel Level' from the Manual SP Setup menu. 2 Select a setup option. • MANUAL - Move the test tone manually from speaker to speaker and adjust individual channel levels. • AUTO - Adjust channel levels as the test tone moves - Pioneer VSX-33 | Owner's Manual - Page 85
. 7 When you're finished, press RETURN. You will return to the Manual SP Setup menu. Network Setup menu Setting up the network to listen to Internet radio on this receiver. 1 Press RECEIVER on the remote control, then press HOME MENU. A Graphical User Interface (GUI) screen appears on your TV. Use - Pioneer VSX-33 | Owner's Manual - Page 86
the Home Menu. 3 Select 'Other Setup', then press ENTER. 4 Select the setting you want to adjust. If you are doing this for the first time, you may want to adjust these settings in order: Note 1 The IP address determined by the Auto IP function is 169.254.X.X. You cannot listen to an Internet radio - Pioneer VSX-33 | Owner's Manual - Page 87
this receiver with your Pioneer component supporting Control with HDMI (page 56). • Volume Setup - Sets up the volume-related operations of this receiver (see below). • Remote Control Mode Setup - Sets this receiver's remote control mode (see below). • Flicker Reduction - Adjusts the way - Pioneer VSX-33 | Owner's Manual - Page 88
most homes, however, it is not possible to achieve this environment. For the distance, on this receiver it is possible to automatically correct the speaker distance electrically to a precision of 1/2 inch using the Auto MCACC Setup function (page 37). Step 1: Speaker layout and distance adjustment - Pioneer VSX-33 | Owner's Manual - Page 89
blinks. • The receiver may have a serious problem. Disconnect from the power and call a Pioneer authorized independent service company. During loud playback the power suddenly switches off. • Turn down the volume. • Lower the 63 Hz and 125 Hz equalizer levels in the Manual MCACC setup on page 75 - Pioneer VSX-33 | Owner's Manual - Page 90
Symptom Remedy AMP ERR blinks in the display, • The receiver may have a serious problem. Do not try switching the receiver on. Unplug the receiver then the power automatically from the wall and call a Pioneer authorized independent service company. switches off. The ADVANCED MCACC blinks and the - Pioneer VSX-33 | Owner's Manual - Page 91
is muted until exiting the Home Menu. Other audio problems Symptom Remedy Broadcast stations cannot be selected automatically, or there is considerable noise in radio broadcasts. For FM broadcasts • Fully extend the FM wire antenna, adjust the position for best reception and secure to a wall - Pioneer VSX-33 | Owner's Manual - Page 92
video or HDMI cables (see The Input Setup menu on page 39). • Check the video output settings of the source component. • Check that the video input you selected on your TV is correct. • Some components (such as video game units) have resolutions that may not be converted. If adjusting this receiver - Pioneer VSX-33 | Owner's Manual - Page 93
the room as low as possible (see also Problems when using the Auto MCACC Setup on page 39). If the noise level cannot be kept low enough, you will have to set up the surround sound manually (page 82). • When using only one surround back speaker, connect it to the SURROUND BACK L (Single) terminals - Pioneer VSX-33 | Owner's Manual - Page 94
but due to your speakers' low frequency limitations, PCM. malfunction. The power turns off • See the Power section receivers on page 66). • Check whether the receiver's remote control mode is properly set (see Remote Control Mode Setup on page 87). • Try replacing the batteries in the remote - Pioneer VSX-33 | Owner's Manual - Page 95
(even if it is HDCP-compatible). In this case, connect using the component or composite video jacks between source and receiver. • If the problem still persists when connecting your HDMI component directly to your monitor, please consult the component or monitor manual or contact the manufacturer - Pioneer VSX-33 | Owner's Manual - Page 96
). • Select ALL for the Control Mode with HDMI setting (see HDMI Setup on page 56). • Turn the TV's power on before turning on this receiver's power. • Set the TV side Control with HDMI setting to ON (see TV's operating instructions). • VSX-33 only: Connect the TV to the HDMI OUT 1 terminal and set - Pioneer VSX-33 | Owner's Manual - Page 97
station had closed or moved. Enter new internet radio station on the Internet Radio Setup. Cannot listen to Internet radio Broadcast is in a format not compatible with this This receiver cannot play audio in formats other stations. ("File Format Error" receiver. than MP3 or WMA. Also, even if - Pioneer VSX-33 | Owner's Manual - Page 98
Internet radio settings This receiver's IP address has not been entered screen cannot be displayed on into the browser correctly. the computer Internet browser. JavaScript is disabled on the Internet . position. See instructions supplied with the XM Mini-Tuner and Home Dock for antenna - Pioneer VSX-33 | Owner's Manual - Page 99
firmware is being updated. Wait for updating to finish. If the problem is not solved after the troubleshooting above, if the screen freezes unexpectedly or if the buttons on the remote control or front panel stop working completely, do the following: • Press STANDBY/ON on the front panel to turn - Pioneer VSX-33 | Owner's Manual - Page 100
video other U.S. and worldwide patents issued & pending. DTS and home, correcting the tonal and spatial errors home because film soundtracks were designed to be played back in large movie theaters speakers so that the surround information is all around you. In a home theatre, you use only two speakers - Pioneer VSX-33 | Owner's Manual - Page 101
released into the home home theater audiences can now experience the rich details in a surround mix at any volume level. A consequence of turning Music and THX Ultra2 Games. • THX Select2 Cinema THX Select2 Cinema mode plays 5.1 movies using all 8 speakers giving you the best can manually select - Pioneer VSX-33 | Owner's Manual - Page 102
Radio is only supported on the VSX-33. The VSX- 32 only supports SIRIUS Radio. SIRIUS, XM and all related marks and logos are trademarks of Sirius XM Radio tuners and home docks or SIRIUS tuners (each sold separately) are required to receive the SIRIUS or XM satellite radio service. All programming - Pioneer VSX-33 | Owner's Manual - Page 103
you will hear with different input signal formats, depending on the Stream Direct mode (see Using Stream Direct on page 54) you have selected. Stereo (2 channel) signal formats Input signal format Surround Back speaker(s): Connected Dolby Digital Surround DTS Surround Other stereo sources Analog - Pioneer VSX-33 | Owner's Manual - Page 104
problem remote individual commands from another remote control (see Programming signals from other remote controls on page 67). example: TV Pioneer 0004 Category Preset code Manufacturer 104 En TV Pioneer 0099 Quasar 0003, 0010, 0105 Radio Shack 0100, 0104 Radio Shack/Realistic 0000, 0004, 0006, - Pioneer VSX-33 | Owner's Manual - Page 105
conduct operations with the preset codes for the BD, DVR (BDR, HDR). Pioneer 2014, 2158 Accurian 2092 Advent 2072 Aiwa 2012 Akai 2066 Alco 2070 Allegro 2091 Fisher 2083 Funai 2091 GE 2016, 2077, 2080 GFM 2043 Go Video 2087 Gradiente 2068 Greenhill 2080 Haier 2094 Harman/Kardon 2030, 2084 Hitachi - Pioneer VSX-33 | Owner's Manual - Page 106
1018 Quarter 1001 Quartz 1001 Quasar 1004 Radio Shack 1003 Radio Shack/Realistic 1001, 1002, 1003, 1004 UltimateTV 1031 Unitech 1002 Vector Research 1000 Video Concepts 1000 Videosonic 1002 Viewsonic 1017 Voodoo , 1018 ZT Group 1017 Satellite Set Top Box Pioneer 0126, 6097, 6098, 6145 ADB 6035, 6001 - Pioneer VSX-33 | Owner's Manual - Page 107
Pace 6029 Panasonic 6083 Rogers 6029 Scientific Atlanta 6029 Shaw 6074 Suddenlink 6074, 6029 Supercable 6072 Time Warner 6074, 6029, 6058 Tivo 6076 CD Pioneer 5065, 5066 AKAI 5043 Asuka 5045 Denon 5019 Fisher 5048 Goldstar 5040 Hitachi 5042 Kenwood 5020, 5021, 5031 Luxman 5049 Marantz 5033 Onkyo - Pioneer VSX-33 | Owner's Manual - Page 108
Guaranteed speaker impedance Video VSX-32 13.1 kg (29 lb) Number of Furnished Parts MCACC Setup microphone (APM7009 1 Remote control unit (AXD7591 1 AAA size IEC R03 dry cell batteries 2 iPod cable 1 AM loop antenna 1 FM wire antenna 1 Power cord 1 Warranty card 1 These operating instructions - Pioneer VSX-33 | Owner's Manual - Page 109
the surface. Our philosophy Pioneer is dedicated to making your home theater listening experience as close as ve just purchased is only the start of your musical enjoyment. Now it's time to consider how you drill 120 Rock band concert in front of speakers, thunderclap 140 Gunshot blast, jet plane 180 - Pioneer VSX-33 | Owner's Manual - Page 110
12 Additional information 110 En - Pioneer VSX-33 | Owner's Manual - Page 111
Additional information 12 111 En - Pioneer VSX-33 | Owner's Manual - Page 112
service location, to purchase replacement parts, operating instructions, or accessories, please go to one of following URLs : Pour enregistrer votre produit, trouver le service 479-4411 PIONEER EUROPE NV Haven 1087, Keetberglaan 1, B-9120 Melsele, Belgium TEL: 03/570.05.11 PIONEER ELECTRONICS
-
 1
1 -
 2
2 -
 3
3 -
 4
4 -
 5
5 -
 6
6 -
 7
7 -
8
-
9
-
10
-
11
-
12
-
13
-
14
-
15
-
16
-
17
-
18
-
19
-
20
-
21
-
22
-
23
-
24
-
25
-
26
-
27
-
28
-
29
-
30
-
31
-
32
-
33
-
34
-
35
-
36
-
37
-
38
-
39
-
40
-
41
-
42
-
43
-
44
-
45
-
46
-
47
-
48
-
49
-
50
-
51
-
52
-
53
-
54
-
55
-
56
-
57
-
58
-
59
-
60
-
61
-
62
-
63
-
64
-
65
-
66
-
67
-
68
-
69
-
70
-
71
-
72
-
73
-
74
-
75
-
76
-
77
-
78
-
79
-
80
-
81
-
82
-
83
-
84
-
85
-
86
-
87
-
88
-
89
-
90
-
91
-
92
-
93
-
94
-
95
-
96
-
97
-
98
-
99
-
100
-
101
-
102
-
103
-
104
-
105
-
106
-
107
-
108
-
109
-
110
-
111
-
112
 |
 |

Operating Instructions
audio/video multi-channel receiver
VSX-
33
VSX-
32