Pioneer VSX-831 Basic Manual - Page 18
Front Panel
 |
View all Pioneer VSX-831 manuals
Add to My Manuals
Save this manual to your list of manuals |
Page 18 highlights
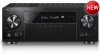
> Before start > Hookup > Setup > Playback > Part Names Front Panel 1 2 34 5 6 7 8 9 10 11 12 13 14 15 16 17 1. INPUT SELECTOR dial: Switch the input to be played. 2. MCACC indicator: This lights when you have enabled the speaker calibration made with MCACC. 3. FL OFF indicator: This lights when you have pressed DIMMER repeatedly to turn the display off. 4. DIMMER button: Switches the brightness of the display. 5. TUNING MODE button: Switches the tuning mode. 6. +FAVORITE button: Registers a radio station. 7. HOME MENU button: Displays the Home. 8. Display ( P20) 9. Cursor buttons ( TUNE / PRESET button) and ENTER button: Select the item with the cursors and press ENTER to confirm your selection. When using the TUNER, select the frequency with TUNE , or select preset stations with PRESET . 18 18 19 20 10.NETWORK indicator: When the power of the unit is on, this lights when "NET" is selected with the input selector and the unit is connected to the network. If the unit is in standby mode, this lights when functions such as HDMI CEC and network standby are enabled. 11. WIRELESS indicator: Lights when the unit is connected to the wireless network. 12.Remote control sensor 13.RETURN button: Returns the display to the previous state. 14.MASTER VOLUME: Allows you to adjust the volume. 15.Í STANDBY/ON button: Turns the unit on or into standby mode. 16.PHONES jack: Stereo headphones with a standard plug (1/4 inch or ø6.3 mm) are connected. 21 22 17. MCACC SETUP MIC jack: The supplied speaker setup microphone is connected. 18. Listening mode button: Select the listening mode. 19. SOUND RETRIEVER button: Turns on/off the Sound Retriever function that provides better sound quality for compressed audio. 20. PURE DIRECT button: Swithes to the Pure Direct mode. 21. USB port: A USB storage device is connected so that music files stored in it can be played. You can also supply power (5V/1A) to USB devices with a USB cable. 22. AUX INPUT jack: You can play the audio from an external player by connecting using a stereo mini plug cable.
-
 1
1 -
2
-
3
-
4
-
5
-
6
-
7
-
8
-
9
-
10
-
11
-
12
-
 13
13 -
 14
14 -
 15
15 -
 16
16 -
 17
17 -
 18
18 -
 19
19 -
 20
20 -
 21
21 -
 22
22 -
 23
23 -
24
 |
 |
