Pioneer VSX91TXH Owner's Manual - Page 55
& SOURCE jacks and a TV monitor to the MULTI - vsx 7 1 channel a v receiver
 |
View all Pioneer VSX91TXH manuals
Add to My Manuals
Save this manual to your list of manuals |
Page 55 highlights
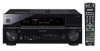
Other connections 08 • Before making or changing the connections, switch off the power and disconnect the power cord from the AC outlet. AM LOOP L OUT PRE OUT CENTER L L (Single) IN 3 R R SUB R SUR- SURROUND BACK FRONT WOOFER ROUND 12V TRIGGER SIRIUS IN OUT IN MONITOR (DC OUT 12V/ 50mA MAX) MULTI-ZONE OUT MONITOR ZONE 2 & SOURCE OUT R L OUT IN L CENTER L L DVR/VCR2 R R R FRONT SUB SUR- SURROUND WOOFER ROUND BACK MULTI CH IN VSX-91TXH ANALOG INPUT L R ANALOG INPUT ANALOG INPUT L R ANALOG INPUT L R ANALOG INPUT Front channel amplifier Center channel amplifier (mono) Surround channel amplifier Surround back channel amplifier Powered subwoofer • You can use the additional amplifier on the surround back channel pre-outs for a single speaker as well. In this case plug the amplifier into the left (L (Single)) terminal only. • The sound from the surround back terminals will depend on how you have configured the Surround back speaker setting on page 36. • To hear sound only from the pre-outs, switch the speaker system to OFF, or simply disconnect any speakers that are connected directly to the receiver. • If you're not using a subwoofer, change the front speaker setting (see Speaker Setting on page 43) to LARGE. MULTI-ZONE listening This receiver can power two independent systems in separate rooms after you have made the proper MULTIZONE connections.1 Different sources can be playing in both zones at the same time or, depending on your needs, the same source can also be used. The main and sub zones have independent power (the main zone power can be off while the sub zone is on) and the sub zone can be controlled by the front panel controls. However, you may need to specify the volume setting in Multi Zone Setup on page 61. Making MULTI-ZONE connections It is possible to make these connections if you have a separate TV and speakers for your sub zone. You will also need a separate amplifier if you are not using the SurrBack System setup (see below). There are two MULTI-ZONE setups possible with this system: Basic MULTI-ZONE setup • Connect a separate amplifier to the MULTI-ZONE & SOURCE jacks and a TV monitor to the MULTIZONE & SOURCE MONITOR OUT jacks, both on the rear of this receiver. You should have a pair of speakers attached to the sub zone amplifier as shown in the illustration below. IN MONITOR OUT (DC OUT 12V/ 50mA MAX) MULTI-ZONE MONITOR ZONE 2 & SOURCE OUT R L SPEAKERS A R FRON L CENTER L L Sub zone Main zone OPTICAL MULTI-ZONE & SOURCE ZONE 2 ANTENNA IN 1 DIGITAL OUT OUT IR IN IN 2 OUT HDMI XM IN IN 1 (DVR/ VCR1) IN 2 (TV/SAT) IN 3 (CD) ASSIGNABLE 13 CONTROL OUT IN COMPONENT VIDEO Y PB PR IN 1 Y PB PR IN 2 Y PB PR Y PB PR ASSIGNABLE 1 3 RS-232C S-VIDEO iPod IN IN IN OUT IN VIDEO AUDIO IN L IN 1 (DVD/LD) R IN 2 (DVR/VCR2) CD COAXIAL ASSIGNABLE 12 OUT IN IN IN OUT IN CD-R/TAPE/MD DVD/LD TV/SAT DVR/VCR1 AM LOOP L OUT PRE OUT CENTER L L (Single) IN 3 R R SUB R SUR- SURROUND BACK FRONT WOOFER ROUND 12V TRIGGER SIRIUS IN OUT IN MONITOR (DC OUT 12V/ 50mA MAX) MULTI-ZONE OUT MONITOR ZONE 2 & SOURCE OUT R L OUT IN L CENTER L L DVR/VCR2 R R R FRONT SUB SUR- SURROUND WOOFER ROUND BACK MULTI CH IN Surround Back System MULTI-ZONE setup You must select ZONE2 in Surround back speaker setting on page 36 to use this setup. Note that the sound in the sub zone will be temporarily interrupted when controlling the main zone (for example, changing the input source or starting playback). • Connect a TV monitor to the MULTI-ZONE & SOURCE MONITOR OUT jacks on the rear of this receiver. You should have a pair of speakers attached to the surround back speaker terminals as shown below. Note 1 Note that you will only be able to play analog sources (such as composite video) in the sub zone. 55 En
-
 1
1 -
2
-
3
-
4
-
5
-
6
-
7
-
8
-
9
-
10
-
11
-
12
-
13
-
14
-
15
-
16
-
17
-
18
-
19
-
20
-
21
-
22
-
23
-
24
-
25
-
26
-
27
-
28
-
29
-
30
-
31
-
32
-
33
-
34
-
35
-
36
-
37
-
38
-
39
-
40
-
41
-
42
-
43
-
44
-
45
-
46
-
47
-
48
-
49
-
 50
50 -
 51
51 -
 52
52 -
 53
53 -
 54
54 -
 55
55 -
 56
56 -
 57
57 -
 58
58 -
 59
59 -
 60
60 -
61
-
62
-
63
-
64
-
65
-
66
-
67
-
68
-
69
-
70
-
71
-
72
-
73
-
74
-
75
-
76
-
77
-
78
-
79
-
80
-
81
-
82
-
83
-
84
-
85
-
86
-
87
-
88
 |
 |
