Plantronics P240 User Manual - Page 7
Using the Speakerphone, Placing a call on hold to make a second call, Switching between calls - calisto software
 |
View all Plantronics P240 manuals
Add to My Manuals
Save this manual to your list of manuals |
Page 7 highlights
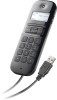
Using the Speakerphone 1 Press the speakerphone key (8). The audio functions will be transferred to the built in speakerphone in the handset. 2 Press the speakerphone key again and the audio functions will be transferred back to standard handset mode. Pressing the end key will end the call and return the handset to handset mode for the next call. To adjust the speakerphone volume when not in an active call select menu (5) and use the scroll key (6) to highlight handsfree volume then press select (5). Once selected press the scroll key up or down to adjust and then select OK to save. Pressing back before OK will result in the handset defaulting back to its original setting. Press back after OK will take you back to the menu, pressing back again will take you back to the main screen Use caution not to activate the speakerphone when the handset is against your ear. In the event that you do remove the handset from your head. switch back to handset mode before replacing the handset to your ear. The call alert signal is quite loud, do not hold the handset to your ear while the phone is ringing (second call alert will be much quieter and the handset can be used normally with this beeping). Placing a call on hold to make a second call 1 Press the send/answer button (2), select Options (3) and use the scroll keys (6) to select Hold. Then call the 2nd number as usual. 2 To end the 2nd call simply press the call end key (4). The handset will automatically switch back to the first call. Switching between calls on hold 1 Select Options (3) and use the scroll keys (6) to select Flash. Then use the scroll key (6) to highlight the call you wish to take and select Resume (7). Changing Language Settings 1 The P240 supports 11 basic languages to change from the default English select Menu (3) and use the scroll keys (6) to highlight Language. Select Language (3) then use the scroll key (6) to highlight the language you want and press Select (3) to choose that language. Press Back (5) to return through the menu to the main display. Plantronics Calisto P240 USB Handset Software Installation It is highly recommended that you use the CD to install the Plantronics software. Though your Calisto P240 USB Handset audio will operate without the software, it will severely limit the handset's full capabilities. If you do not have the CD that came with the Calisto P240 handset the software is available for download at plantronics.com/software. After installation, Start > Programs > Plantronics > Plantronics Control Panel to access the software. Software Features NOTE Some parameters that do not apply to a Plantronics device may appear grayed out. Media Player Media Player is located under the Preferences Tab. Media Player controls the behavior of iTunes, Winamp, and Windows Media Player when a softphone call is received. The default setting is Pause/Play with Mute/Unmute. Multi-Softphone Status (MSS) Multi-Softphone Status is supported for both Microsoft Office Communicator and for Skype. When engaged in a call using any alternative softphone supported by Plantronics Software your availability status within Microsoft Office Communicator will automatically change to "On a Call" indicating which application you are currently using for the call. Fellow Microsoft Office Communicator users will see your status change outwardly, as well. When using an alternative softphone to Skype, your status will simply change within Skype to the "Do Not Disturb" icon, which will be displayed outwardly as well. Voice Comments Voice Comments is supported on all of Plantronics devices once the software is installed. Voice Comments adds four buttons to the PowerPoint "Review" tab to allow you to insert, delete and navigate audio voice comments embedded in a PowerPoint document. "Insert Voice Comment" lets you record and embed a voice comment in a PowerPoint document. It pulls up an online screen recorder where you can, through the Plantronics device, record audible feedback which then becomes part of the PowerPoint document. You can also click a previously recorded voice comment which is represented by an icon in the document and click "Delete Voice Comment" to remove the recorded message. The recipient of the document can navigate between the recorded comments using "Next Voice Comment" and "Previous Voice Comment". Using these navigation buttons, the audio automatically plays. Alternatively, double-clicking the icon plays the voice comment. 7
-
 1
1 -
 2
2 -
 3
3 -
 4
4 -
 5
5 -
 6
6 -
 7
7 -
 8
8 -
 9
9
 |
 |
